Ads can be scheduled with start and end dates for limited or seasonal promotions. You can schedule these availability periods on a per-ad basis.
To schedule start and end dates for new ads, use the Available Dates section of the form when first creating a new ad.
From the left navigation menu, select Content → Ads.
Find the ad you want to schedule from the list, then, select Update Ad.
Next to Available Dates, select
![[Edit]](https://paligoapp-cdn-eu1.s3.eu-west-1.amazonaws.com/impact/attachments/f01cdffa431a4d75ff09c130b66974d4-99be015393b21b58ed4d995cb77b53ab.svg) [Edit].
[Edit].Select
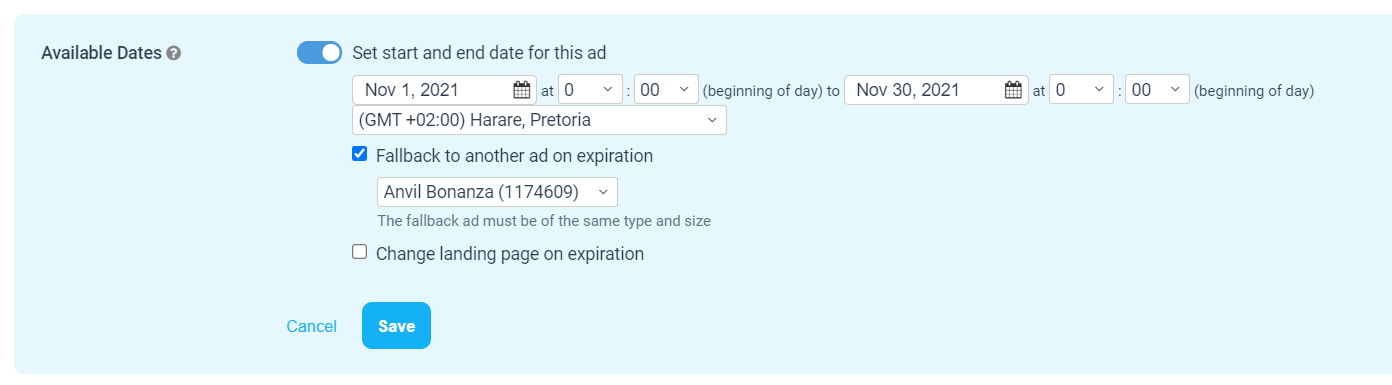
![[Toggle on]](https://paligoapp-cdn-eu1.s3.eu-west-1.amazonaws.com/impact/attachments/f01cdffa431a4d75ff09c130b66974d4-84d1224fd3bb6ba94b899febe2021eaa.svg) [toggle on] Set start and end date for this ad.
[toggle on] Set start and end date for this ad.Use the fields to set a start date, start time, expiration date, and expiration time for the ad, along with time zones for each.
If you want to display another ad when this one expires, select
![[Checked box]](https://paligoapp-cdn-eu1.s3.eu-west-1.amazonaws.com/impact/attachments/f01cdffa431a4d75ff09c130b66974d4-aee23966cd91ec2a9f9985361c43ab1a.svg) [Checked box] Fallback to another ad on expiration and select your chosen fallback ad.
[Checked box] Fallback to another ad on expiration and select your chosen fallback ad.If you want to change the landing page of the ad after it expires, select
[Checked box] Change landing page on expiration. From here, you can enter a URL that the user will be sent to, and, optionally, you can elect to use an interstitial page.Select Save to complete the process.
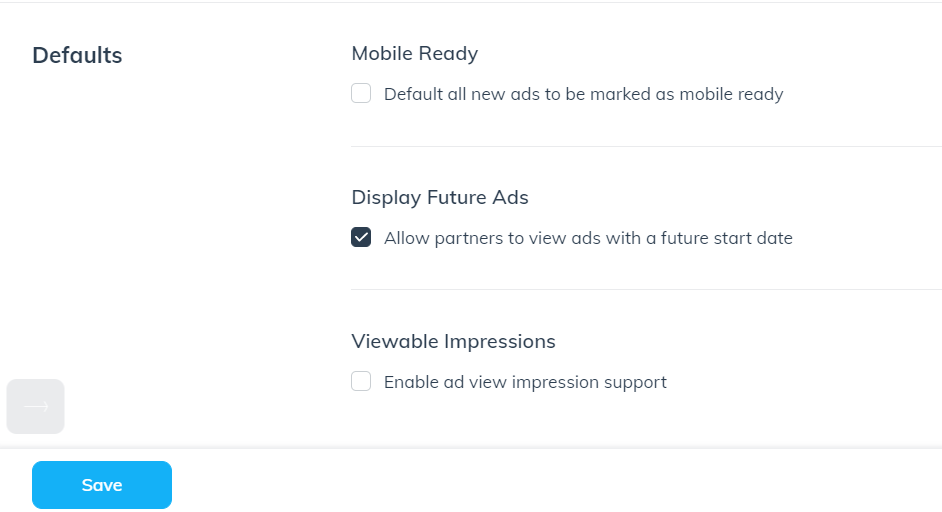
Future-dated ads will not activate until the start date you set during ad creation. If you want your future-dated ads to be visible to your partners, you must enable the Display Future Ads setting.
From the left navigation menu, select
![[Menu]](https://paligoapp-cdn-eu1.s3.eu-west-1.amazonaws.com/impact/attachments/f01cdffa431a4d75ff09c130b66974d4-d3b5cc4952c19da1607fade39f63066b.svg) [Menu] → Settings.
[Menu] → Settings.In the Program column, under General, select Ad Settings.
Next to Defaults, check the Allow partners to view ads with a future start date option.
Select Save.