Blocks, a type of Routing Rule, will prevent traffic from being redirected to another web page. When traffic that meets certain criteria (known as conditions), for example, clicks on an ad that one of your partners is hosting, they will instead be blocked from visiting the ad's destination URL.
Traffic sourced from certain partners, specific countries, and even traffic that comes from a set URL (i.e., a referring URL) can be blocked from reaching a destination URL.
From the top navigation bar, select
[User profile] → Settings.
On the right, under Technical, select Blocking & Redirect.
In the top-right corner, select Configure rule.
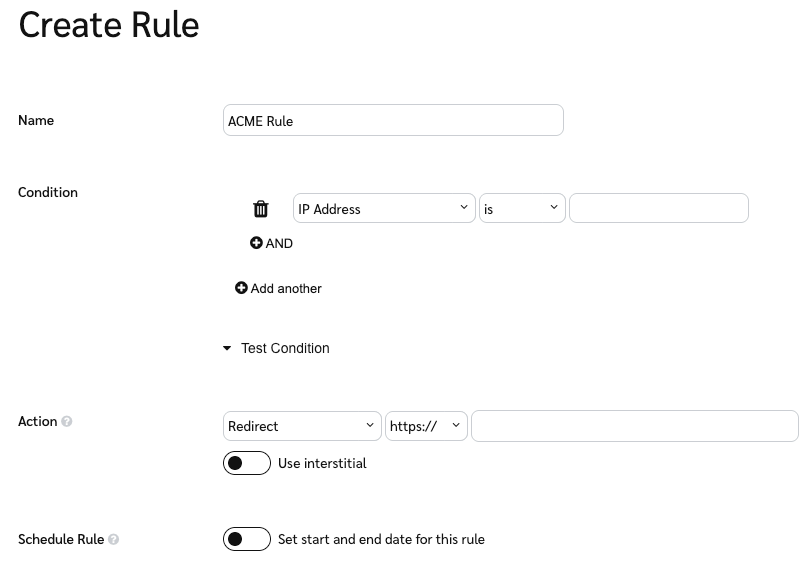
Add a Name for your rule.
In the Condition section, use the drop-down menus to configure your block rule.
View the Conditions reference below to learn more about the different condition attributes.
In the Action section, ensure you set the drop-down menu to Block.
If you want to have an interstitial web page, toggle on and configure
[Toggle on] Use interstitial. Ensure you set the Template drop-down menu to Custom.
Optionally, Schedule when this block rule will be active.
Rank the block rule.
If multiple block rules share some of the same conditions and the same Rank, the one with the lower ID will take priority.
If you don't want the block to begin immediately and you did not Schedule the rule, you can Pause the rule.
You will need to manually unpause this rule for it to become active.
Save your block rule.

Refer to the table below for more information about each of the options available for setting up a block interstitial.
Interstitial Setting | Description |
Header Text | A short phrase displayed on the interstitial in large type. |
Body Text | Information that traffic will see on the interstitial. |
Preview | Opens a new browser tab to preview the interstitial page. |
Condition setup works in an AND/OR system: Selecting ![[Add]](https://paligoapp-cdn-eu1.s3.eu-west-1.amazonaws.com/impact/attachments/f01cdffa431a4d75ff09c130b66974d4-568fc079a417d45c3469dad1ade0b41f.svg)
![[Add]](https://paligoapp-cdn-eu1.s3.eu-west-1.amazonaws.com/impact/attachments/f01cdffa431a4d75ff09c130b66974d4-568fc079a417d45c3469dad1ade0b41f.svg)
Below are the different attributes that can fill a condition:
Condition Attribute | Description |
IP Address | The IP Address registered to a device. |
Shared Id | A partner-controlled query string parameter that is used in reporting. |
Country | The country from where traffic is sourced. |
Region | The geographical region from where traffic is sourced. |
Ad Status | The associated ad's state of use. |
Sub Id1 | A partner-controlled query string parameter that is used in reporting. |
Sub Id2 | A partner-controlled query string parameter that is used in reporting. |
Sub Id3 | A partner-controlled query string parameter that is used in reporting. |
MP Id | impact.com's unique Id for a partner. |
Device Type | What type of device the customer was using when the block rule is prompted to activate. |
Ref URL | URL of the website that is referring traffic to the original destination URL. |
Landing Page | The original destination URL. |
Product SKU | An Id for the subject of the ad, which is usually designated in a product catalog. |
Ad Id | impact.com's unique Id for an ad. |
Probability | The block rule will randomly grab a percentage of traffic to be rerouted. This is primarily used for A/B testing. |
Mobile Fallback | If an ad has mobile fallback configured, the associated routing rule can request to reroute traffic to their respective app store to download an app. You will never need to set up a block routing rule with a mobile fallback condition since traffic will not be redirected. Learn more about mobile fallback and app interstitials. |
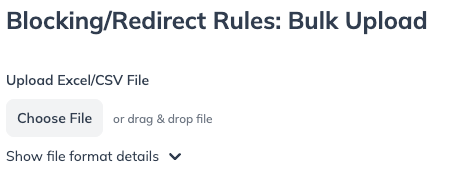
Block rules can also be uploaded and configured in bulk with a .XLSX or .CSV file. Not all file columns may be available for use—Refer to the impact.com Routing Rule Bulk upload Data Fields spreadsheet to learn more about each column.
From the top navigation bar, select
[User profile] → Settings.
On the right, under Technical, select Blocking & Redirect.
In the top-right corner, select Bulk Upload.
Select Choose File, then select your file.
Refer to the impact.com Routing Rule Bulk upload Data Fields spreadsheet to see how your file should be formatted.
Select Next.
If validation errors exist, select Back to upload a new file. Otherwise, select Accept & Create Rules.
Any block rules with validation errors will not be created.
Redirect rules uploaded in a bulk file can take up to a day to process.

Archiving routing rules works in the same way as deactivating them: traffic will no longer be blocked according to the condition(s) set in that block rule. No type of routing rule can be entirely deleted.
From the top navigation bar, select
[User profile] → Settings.
On the right, under Technical, select Blocking & Redirect.
Find the rule you want to archive, then select
[More] → Archive.
Select I understand, continue.
You can reactivate archived block rules at any time by selecting ![[More] vNext](https://paligoapp-cdn-eu1.s3.eu-west-1.amazonaws.com/impact/attachments/f01cdffa431a4d75ff09c130b66974d4-73f43076a692f2dcc8960037fabdca9c.svg)