Labels are a tool to help you organize your assets into categories such as size, promotions, offer dates, keywords, or any other category that may be relevant to you or your partners. Multiple labels can be created and added to assets.
From the left navigation menu, select
![[Engage] v2](https://paligoapp-cdn-eu1.s3.eu-west-1.amazonaws.com/impact/attachments/f01cdffa431a4d75ff09c130b66974d4-aa671735ec2b65af79961eaf59ab60af.svg) [Engage] → Content → Ads.
[Engage] → Content → Ads.Hover your cursor over the asset for which you want to add a label and select the
![[Unchecked box]](https://paligoapp-cdn-eu1.s3.eu-west-1.amazonaws.com/impact/attachments/f01cdffa431a4d75ff09c130b66974d4-ff8b288b06d10266c33d33f5c103fb83.svg) [Unchecked box].
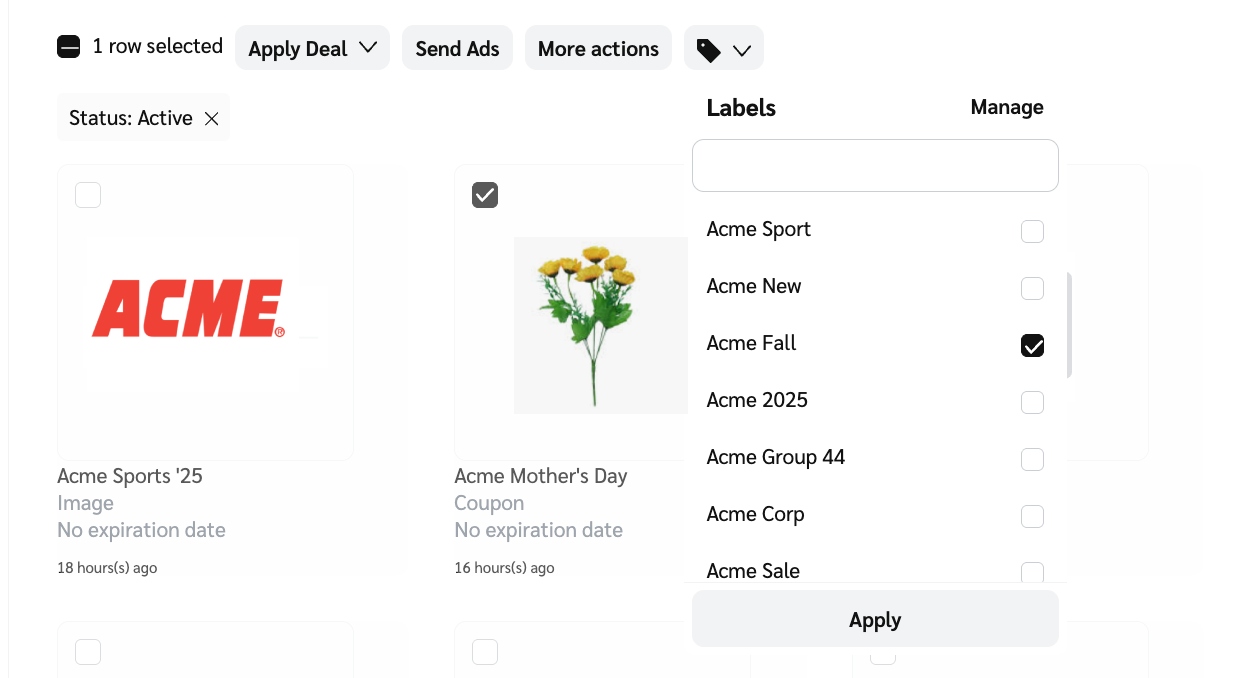
[Unchecked box].Select the
![[Tag]](https://paligoapp-cdn-eu1.s3.eu-west-1.amazonaws.com/impact/attachments/f01cdffa431a4d75ff09c130b66974d4-d7cb813f7e62df4d6d512e5dc6698b34.svg) [Label] you want to apply from the
[Label] you want to apply from the ![[Drop-down menu]](https://paligoapp-cdn-eu1.s3.eu-west-1.amazonaws.com/impact/attachments/f01cdffa431a4d75ff09c130b66974d4-d6b35853a9aa1f1fe6bd66da29bd09fa.svg) [Drop-down menu] and then select Apply.
[Drop-down menu] and then select Apply.Use the search bar to find labels quickly.
You can select more than one asset when making changes to asset labels.
From the left navigation menu, select
[Engage] → Content → Ads.Hover your cursor over the asset for which you want to manage labels and select the
[Unchecked box].Select
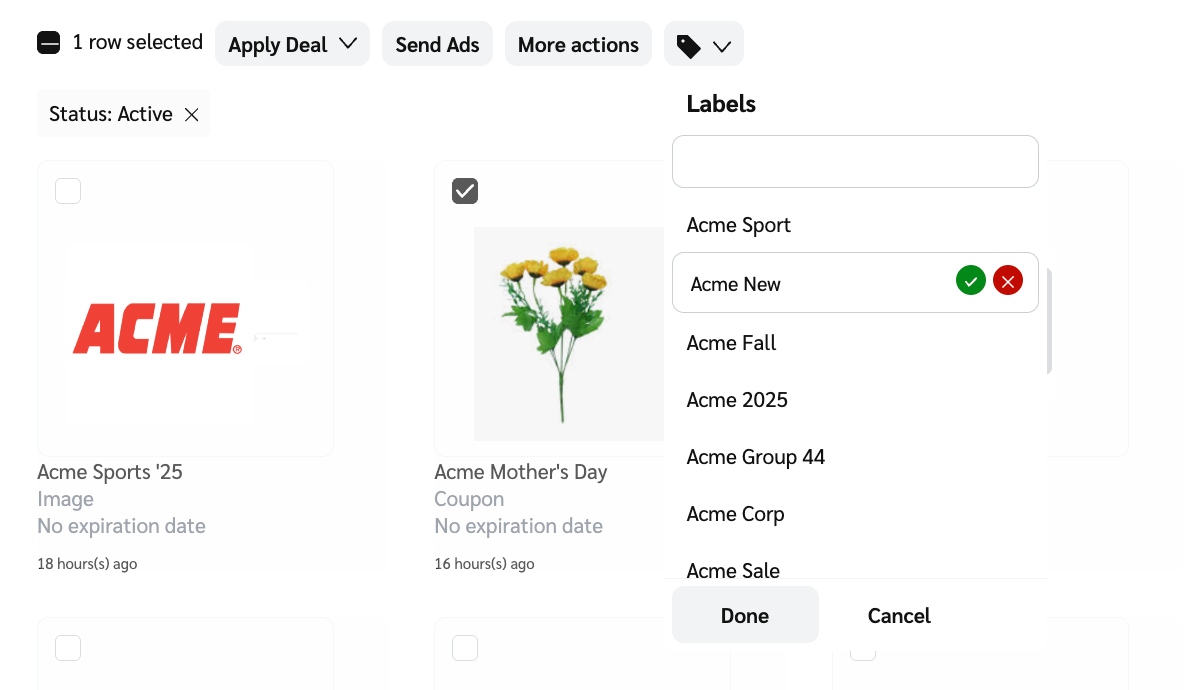
[Label] →Manage.Hover your cursor over the asset whose labels you want to edit and select
![[Edit]](https://paligoapp-cdn-eu1.s3.eu-west-1.amazonaws.com/impact/attachments/f01cdffa431a4d75ff09c130b66974d4-e61063d693316495c46ce944a80f6e34.svg) [Edit].
[Edit].Change or update the name of the label and select
![[Checked circle]](https://paligoapp-cdn-eu1.s3.eu-west-1.amazonaws.com/impact/attachments/f01cdffa431a4d75ff09c130b66974d4-c0035f0a3225b3662a3351a8783f01d5.svg) [Check] to confirm the update.
[Check] to confirm the update.Once you've updated all the necessary labels, select Done.