
Connectors are a system for all batch data file transfers between impact.com and brands, partners, or other parties. Each connection (an individual connector) has certain attributes, such as the data type (clicks, conversions, product catalogs, etc.), direction (inbound or outbound), method (email, SFTP, FTP), and more.
The Connector wizard allows you to set up connections to other platforms so that impact.com can automatically batch process the data for you. Either receiving data to enhance reporting in the impact.com platform or to deliver enriched data to your systems.
Example: Suppose you are collecting conversion data (i.e., Actions) on the server-side or through a cookie. In that case, you can submit your data to impact.com so you can visualize your program's performance, attribute credit to partners, and modify or reverse any actions before they lock.
From the top navigation bar, select
![[User]](https://paligoapp-cdn-eu1.s3.eu-west-1.amazonaws.com/impact/attachments/f01cdffa431a4d75ff09c130b66974d4-ec4c7b9aa5792fe725406b280fb272b1.svg) [User profile] → Settings.
[User profile] → Settings. In the left column, under Technical, select Connections.
Select Create Connection in the top right to access the Connector wizard.
You can't delete a connection once it's been created.
Connector terminologyTerm
Description
Name
Provide a name that describes the connection. E.g., Upload Aggregate Performance Data.
Direction
The direction of the data that this connection supports: Inbound is data coming into impact.com, Outbound is data going out of impact.com to another platform.
Data Type
The type of data this connection processes (E.g., conversion data, action modifications, etc.).
Method
The transfer method this connection uses, E.g., FTP, SFTP, or Email.
Methodology
The transfer methodology. Inbound connections support “Push to Impact” and “Pull from 3rd Party”. Outbound connections support “Pull from Impact”.
Connection Details
The connection details that will be required is dependant on a combination of the chosen Direction, Method and Methodology. In some cases the you will need to provide details and in other cases impact.com will provide the details.
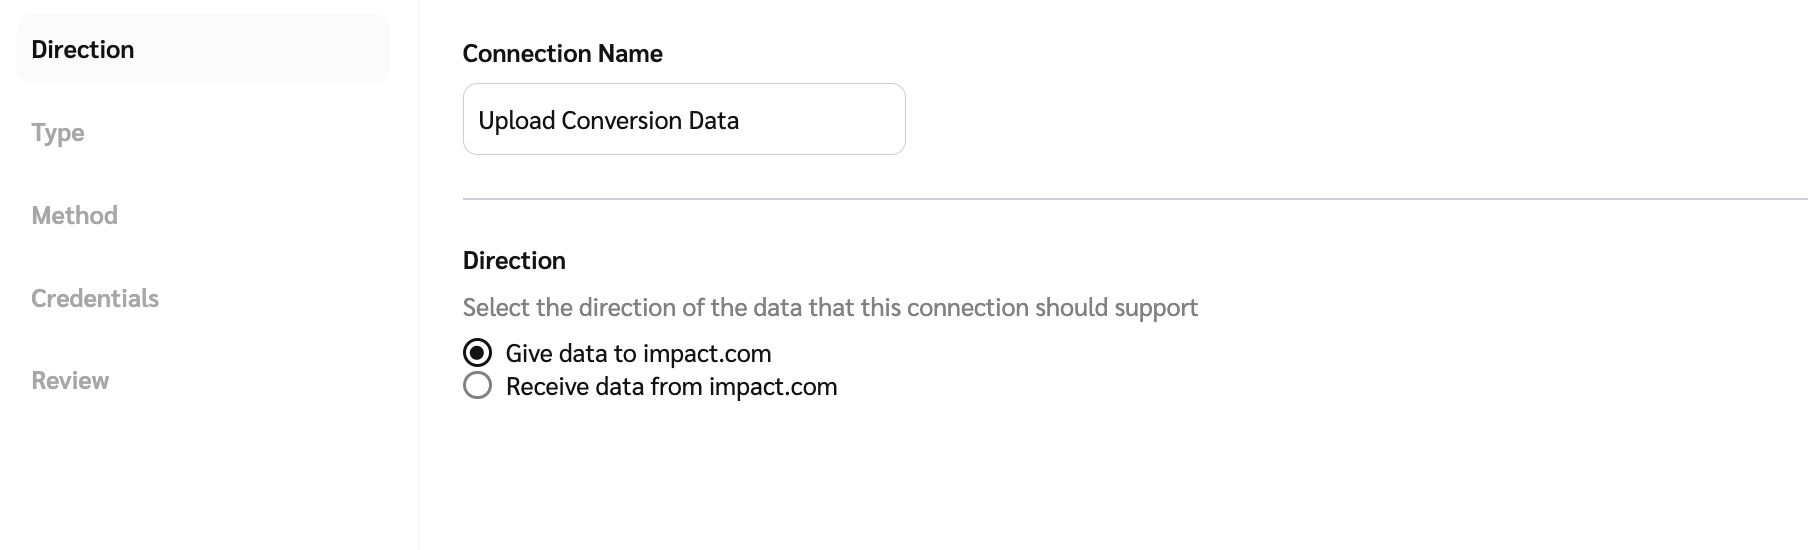
Enter the connection name and select the Direction of the data, in this instance select Give data to impact.com.
Read about receiving data from impact.com.
Select Next to continue.
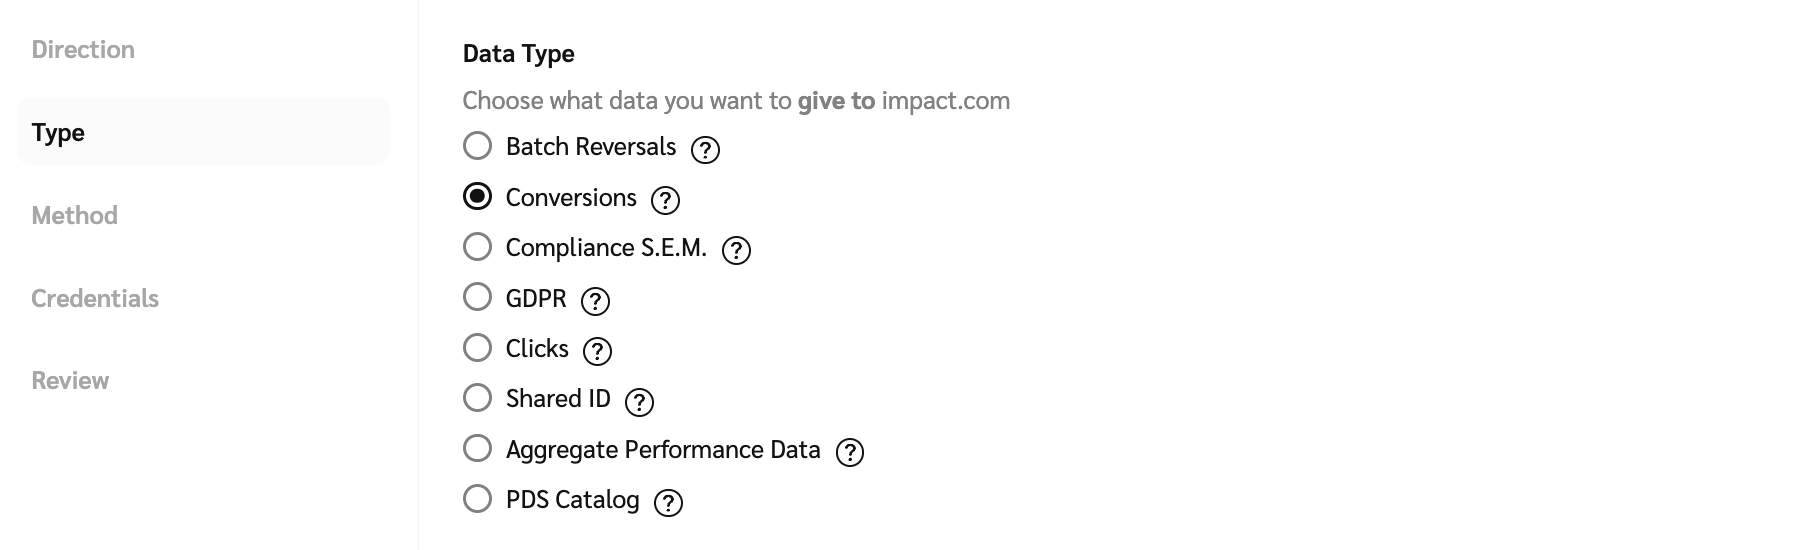
Select the type of data that the connection will support, e.g., Conversions.
Select Next to continue.
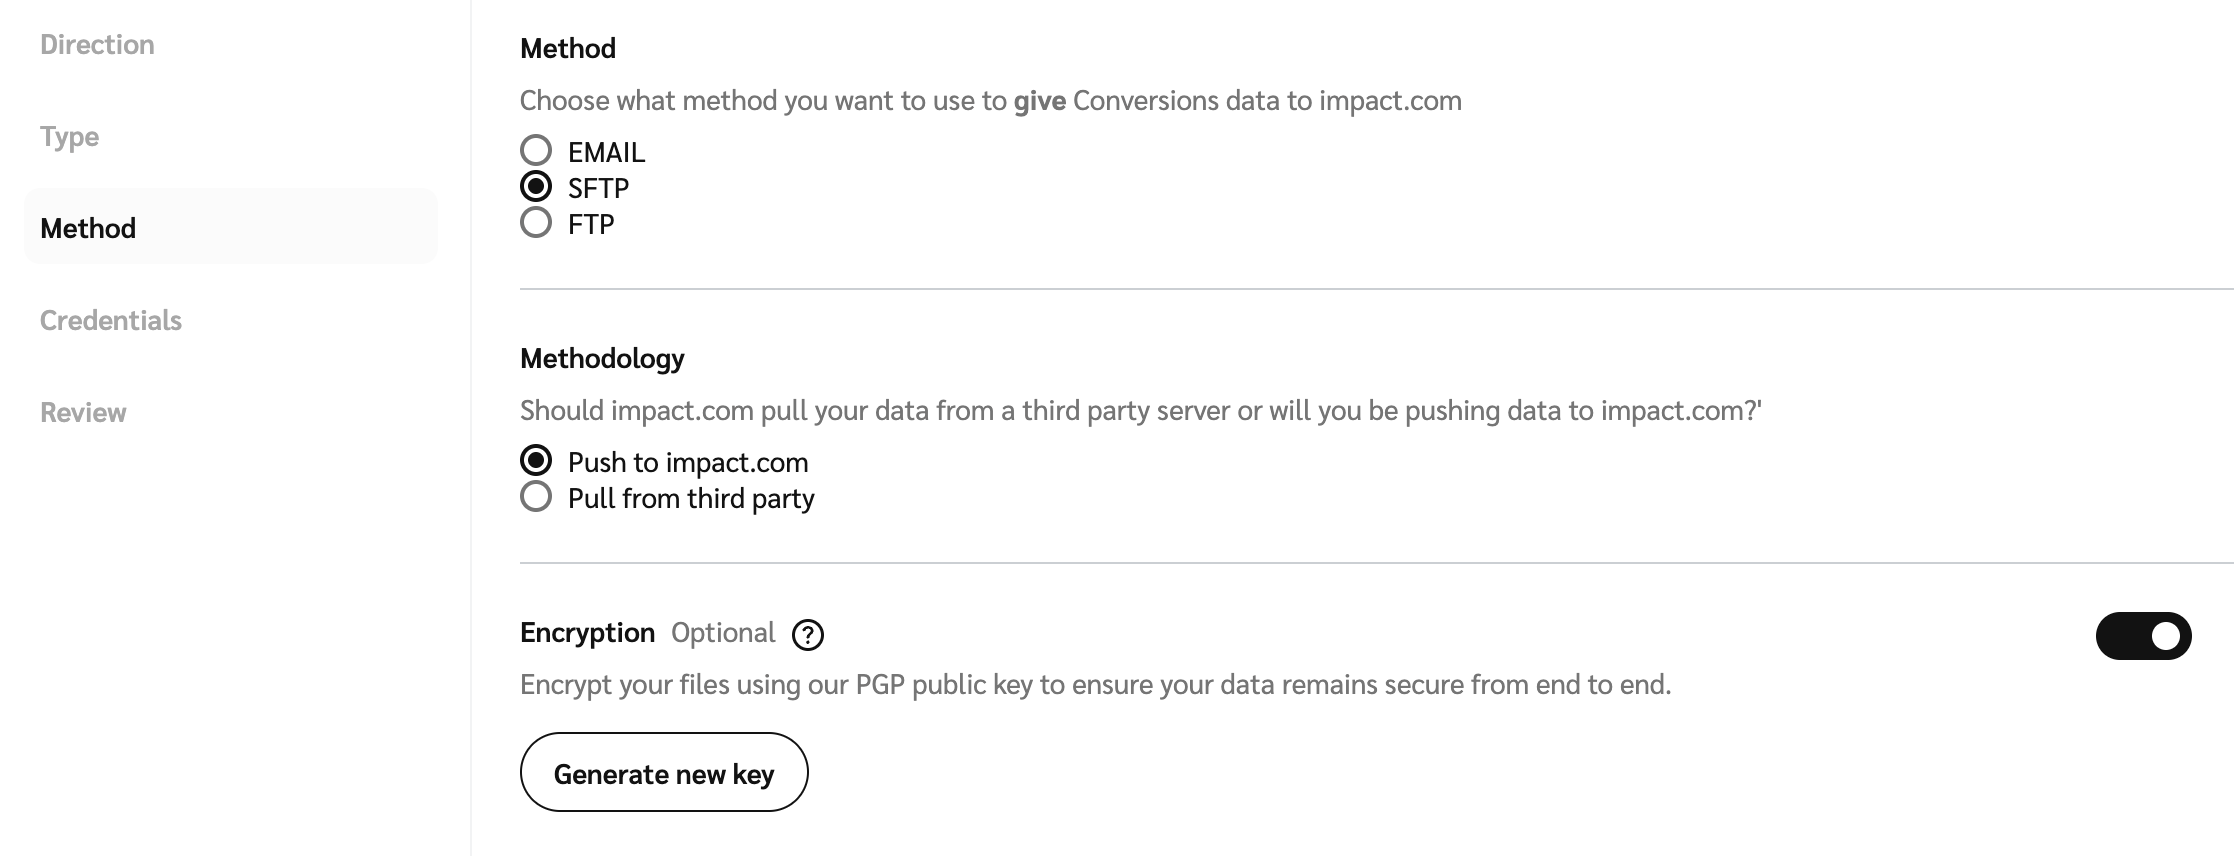
Select the Method to use to give data to impact.com: Email, SFTP, or FTP.
The Email method requires that you add a wildcard pattern that matches filenames of attachments within the email, e.g.,
Conversions_202?_*.csv.*represents any sequence of characters.?represents any single character.
Select the Methodology to use, either Push to impact.com or Pull from third party.
The Pull from third party methodology requires that you enter a Folder with the absolute directory path that contains the file, e.g.,
/home/AcmeAdvertiser/Conversions.
![[Toggle on]](https://paligoapp-cdn-eu1.s3.eu-west-1.amazonaws.com/impact/attachments/f01cdffa431a4d75ff09c130b66974d4-84d1224fd3bb6ba94b899febe2021eaa.svg) [Toggle on] Toggle on Encryption to enable encryption for the connection. Encryption is only available for inbound connections (uploads to impact.com), not outbound (downloads from impact.com).
[Toggle on] Toggle on Encryption to enable encryption for the connection. Encryption is only available for inbound connections (uploads to impact.com), not outbound (downloads from impact.com).Select Generate New Key to generate a new 2048-bit RSA public/private key pair
![[External link]](https://paligoapp-cdn-eu1.s3.eu-west-1.amazonaws.com/impact/attachments/f01cdffa431a4d75ff09c130b66974d4-b8ebe06c75d53cc8d24756ae9b7589e2.svg) . The key pair is valid for two years and is used for PGP encryption and decryption of your data files. You will receive the public key only, which must be used to encrypt your data files before uploading them to this connection.
. The key pair is valid for two years and is used for PGP encryption and decryption of your data files. You will receive the public key only, which must be used to encrypt your data files before uploading them to this connection.(Optional) You can select Copy to clipboard to store the new key on your clipboard.
Select Next to continue.
Either select existing credentials, or create new credentials.
The screens to create credentials may look different depending on the selected method.
Enter the credential's name and the return email address, then click Create.

Enter the credential's name and click Create.

Enter the credential's name and click Create.

You will see a popup displaying your provisioned credentials. Select Copy to proceed.
Select Next to continue.