Designed for e-commerce and retail clients, instant access widgets provide your customer advocates and their referred friends with an easy way to engage with your referral program—no password or authentication required.
There are 2 types of instant access widgets:
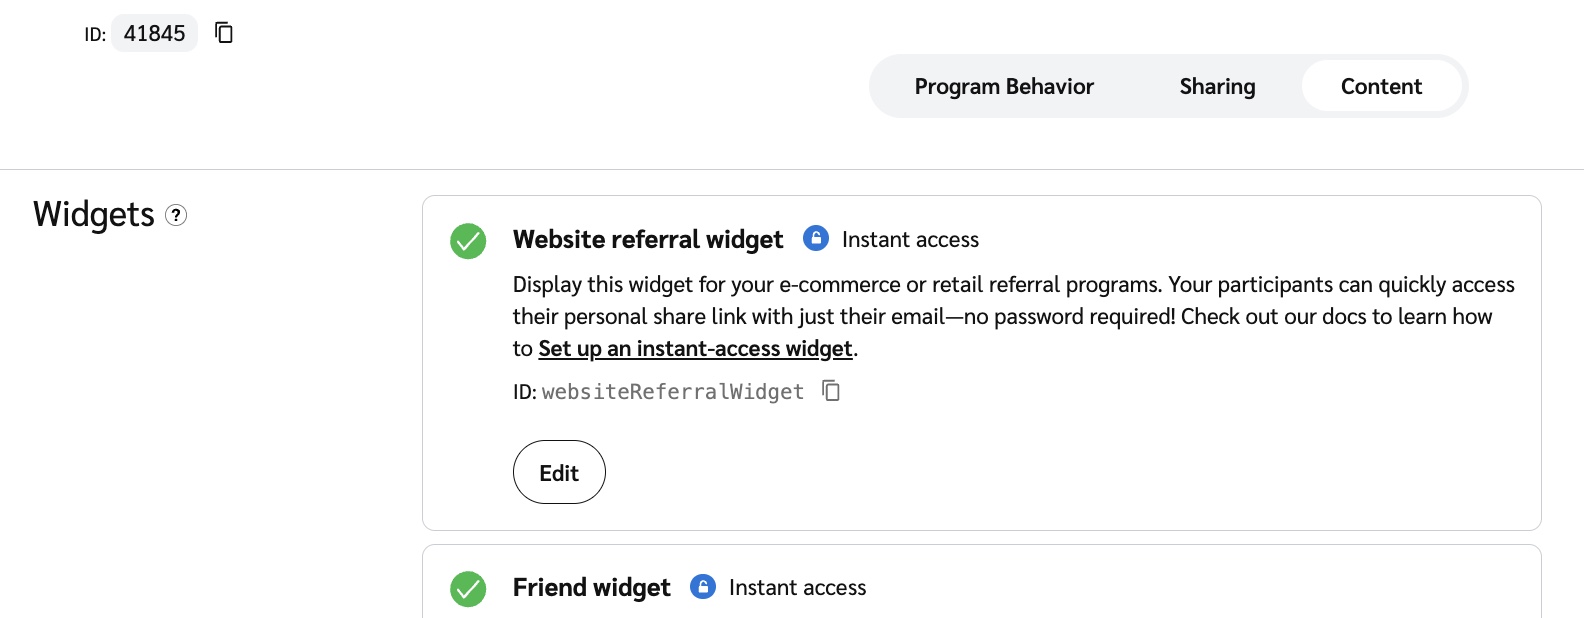
The website referral widget provides your customer advocates an easy way to join your referral program and access their share links.
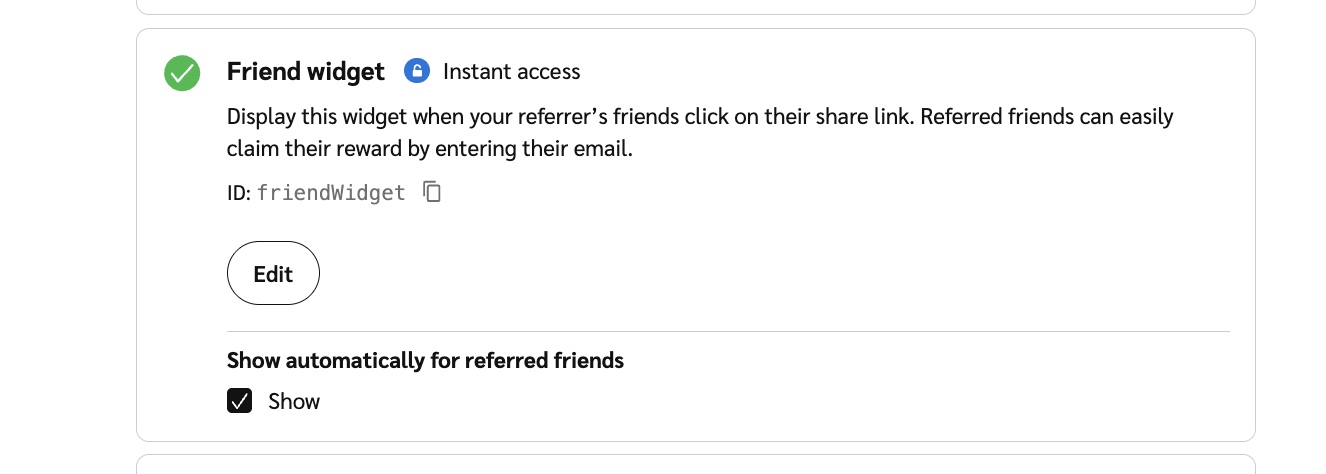
The friend widget will register the referred customer into the Advocate program, then issue a reward—like a discount code—when they provide their email address. It should be displayed on the landing page when your customer advocate's friends click on their share link.
For more details about how instant access widgets work, refer to Widget Types Explained.
First, you’ll need to configure the appearance of your instant access widgets.
From the left navigation menu, select
[Engage] → Program Rules.
Select the Content tab at the top of the page.
On the Website referral widget card, select Edit.

Adjust the appearance and contents of the template.
For more information about how to use the widget editor, refer to Customize Program Widgets. Components from the following groups can’t be added to instant access widgets: Rewards, Statistics, Microsite Components, or Referrals.
Save your changes to the widget.
From the left navigation menu, select
[Engage] → Program Rules.
Select the Content tab at the top of the page.
On the Friend widget card, select Edit.

Adjust the appearance and contents of the template.
For more information about how to use the widget editor, refer to Customize Program Widgets. Components from the following groups can’t be added to instant access widgets: Rewards, Statistics, Microsite Components, or Referrals.
Optionally, select
[Unchecked box] Show on the Friend widget card to Show automatically for referred friends.
This option enables the auto popup feature. Auto popup creates a more engaging referred friend experience by making the friend widget stand out on the landing page.
Save your changes to the widget.
If you’re using the friend widget, you can configure it to provide a discount code to the referred friend. To do so, first you’ll need to set up a fuel tank reward. Then, configure your program rules to issue this reward through the friend widget.
Note: If you already have a fuel tank reward set up for your program, then you can edit the existing reward and change the Access Type to Instant Access instead.
Set up a fuel tank reward.
The fuel tank is where you’ll upload the unique discounts that impact.com will display in the friend widget.
From the left navigation menu, select
[Engage] → Program Rules.
Select the Program Behaviour tab at the top of the page.
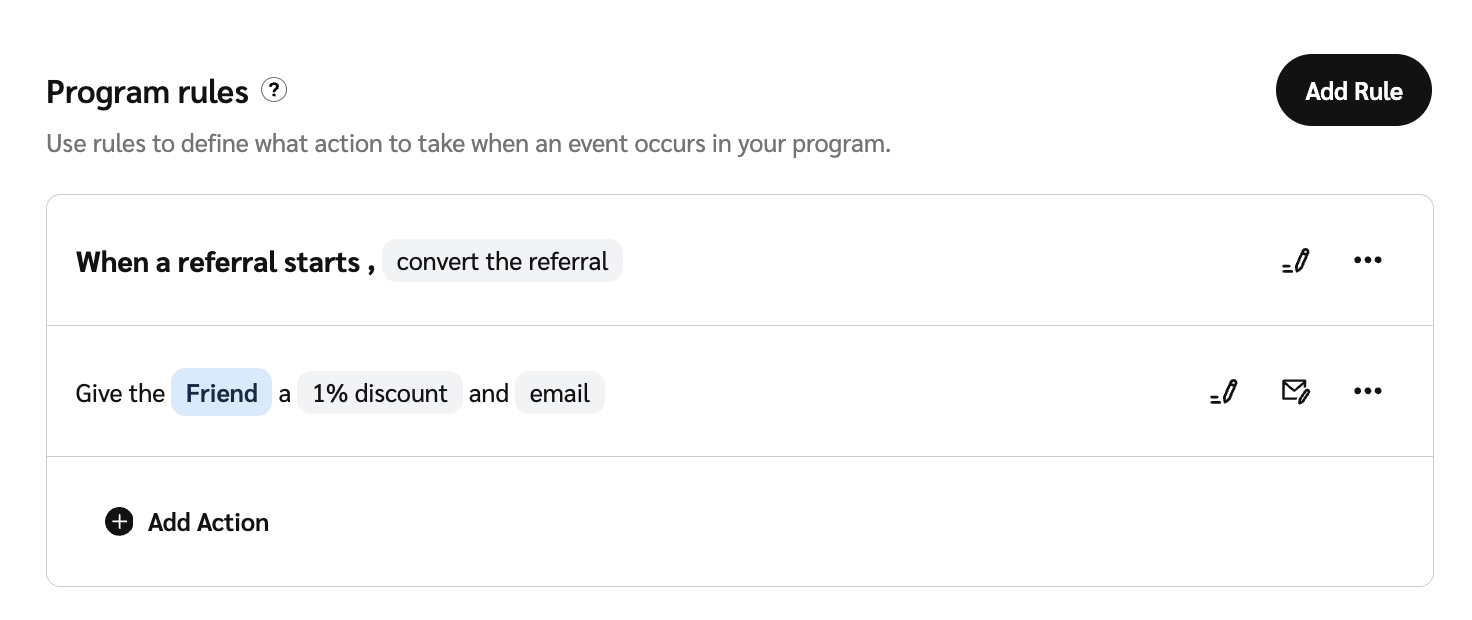
Find the program rule that issues a reward to the referred friend, then select
[Edit action].

Make sure the action sends a Reward and Email to the Friend, then select Next.
At the top of the Edit Reward screen, select Use a pre-configured reward.

From the Reward drop-down list, select the fuel tank reward you created.
Select Next, then review the action and select Save.
Congrats! Your instant access widgets are ready to use. The final step is to generate a code snippet to embed into your post-purchase landing page, checkout flow, or wherever you want participants to access them.
From the top navigation bar, select
[User profile] → Settings.
On the left, below Advocate Settings, select Install.
From the widget drop-down list, select one of the instant access widgets you created.
Choose whether you want to generate a code snippet for an Embedded widget or a Popup widget.
Embedded widgets are displayed directly in your web page.
Popup widgets will load in a popup after the participant clicks on your designated button or link.
Copy the generated code snippet, then add it to your e-commerce platform or landing page.
If you’re using a friend widget without auto popup enabled, the UTT won’t load the widget automatically—so you’ll need to generate the code snippet and place it on your page.
From the top navigation bar, select
[User profile] → Settings.
On the left, below Advocate Settings, select Install.
In the Display Widgets section, select Instant Access as the type of widget you want to display.
From the widget drop-down list, select your friend widget.
Select the Embedded Widget display type.
Copy the generated code snippet, then add it to the page the referred friend will access.