The Fuel Tank feature streamlines the process of handing out rewards using unique coupon codes. Your program participants can redeem these codes for discounts, credits, and other reward types. For more information, see Fuel Tank Rewards Explained.
Fuel Tank rewards can be set up as program-specific rewards or as rewards that can be reused across multiple programs. We recommend setting up a reusable reward in the Reward Catalog.
From the left navigation menu, select
[Engage] → Rewards → Catalog.
Select Create Reward.
Name the reward.
Select the Fuel Tank reward type.
Use the Fuel Tank Type dropdown list to choose a discount or credit reward.
[Toggle on] the Reward pending duration option if you want to set a time buffer for potential retractions.
For example, you want to set a date for a return period to ensure the rewards are only given out once the return period ends.
Enable Link to Shopify to sync codes in Shopify when you upload codes to impact.com.
Refer to the Synced Codes for Shopify section to set up and manage the codes.
[Toggle on] the Reward expiry option if you want to set the reward for a specified time period. Once the time elapses, the reward will expire and no longer be valid.
Set a discount percent, or credit amount and reward unit.
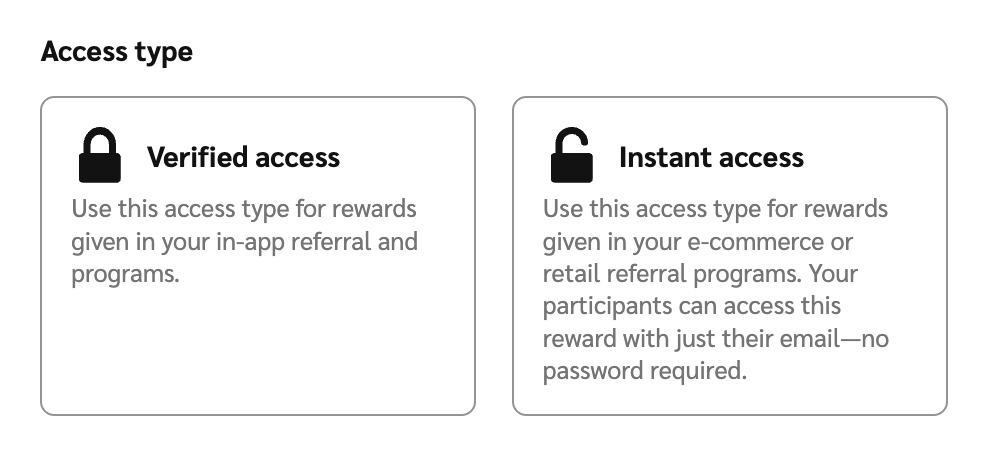
Choose whether the Fuel Tank reward is Verified access or Instant access.

Select Create reward.
For Fuel Tank rewards to work, you'll need to supply unique coupon codes. If you sync your codes with your Shopify account, you'll be informed that the code will be added to Shopify.
From the left navigation menu, select
[Engage] → Rewards → Code Manager.
On the Code Manager screen, hover over the Fuel Tank reward for which you want to upload coupon codes, and select Upload Codes.
Select Choose File and upload a file from your device containing your unique coupon codes.
impact.com recommends editing a copy of this downloadable sample .CSV file as a starting point, although you can also upload your own
.xlsx,.ods,.tsv, or.txtfile (newline-separated only).
Your file should abide by the following guidelines:
All codes you want to import should be in the same column and be the only contents of that column.
Each code may contain up to 64 characters. Any combination of these characters is allowed:
Capital and lowercase letters A-Z
Numbers 0-9
Hyphen ( - )
Underscore ( _ )

If your file has multiple columns, you can Select a data column in the righthand panel to indicate which column contains your coupon codes.
View the preview to see which coupon codes the system deems invalid, if any.
In the left-hand panel, select whether you want the coupon codes in your file to Replace any pre-existing codes, or whether you'd like to Add them to any pre-existing codes.
Select Upload.
Optionally, select View Codes to manage coupon codes.
Once you've uploaded your coupon codes, select View Codes in the pop-up modal.
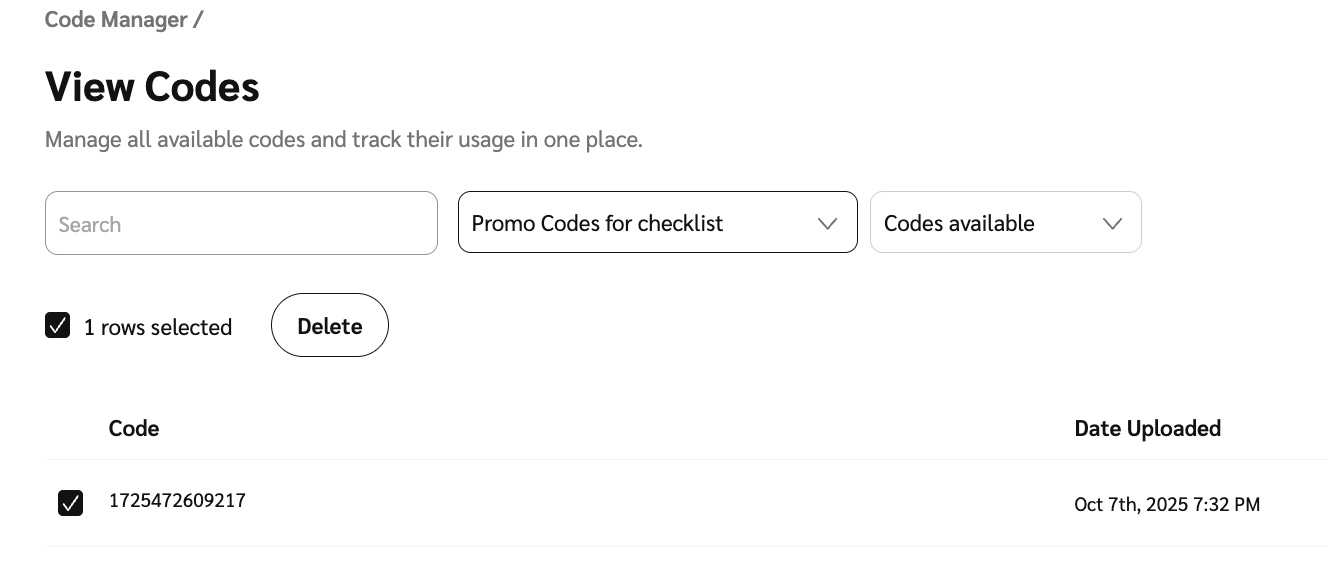
This will take you to the View Codes screen.
Below the page title, you can Search for a specific coupon code by name or use the drop-down menus to filter for codes by program or their status (i.e., whether the codes have been used yet or not).
To delete unwanted codes, select the
[Unchecked box] in the relevant rows and then Delete.

Keeping your codes in sync with Shopify ensures referred customers can redeem their rewards without delay, helping to maintain trust and a smooth referral experience. With Advocate’s Shopify integration, you can automate the creation and syncing of discount codes—saving time and reducing the risk of errors.
In the left navigation menu, select
[Engage] → Rewards → Catalog → Create Reward.
Select Fuel Tank as the reward type.
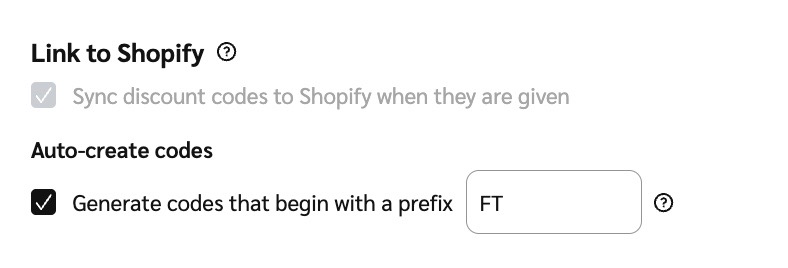
In the Link to Shopify section, select
[Checkbox] Sync discount codes to Shopify when rewards are given.
If you don’t see the screen above, the tooltip will prompt you to reference our documentation about our Shopify integration to set up your Shopify code sync.
In the Auto-create discount codes section, select
[Checkbox] Generate codes that begin with a prefix if you’d like to auto-generate and personalize the codes.
Input the prefix you’d like to add to the auto-generated codes in the provided input field. This prefix will be standard across all your codes, e.g.,
CODE0835A,CODE04359B.

Note: When a reward is given, a unique code is automatically generated in Advocate and then synced to Shopify. We advise you to check back periodically for any errors that may occur.
If you prefer using your own codes, you can do so by uploading them through the Code Manager—and track which codes have been issued, to whom, and whether they’ve successfully synced. This ensures a seamless experience for both your team and your customers.
The Code Manager screen—along with its nested View Codes screen—and the Reward Feed help you manage and monitor the discount codes used as rewards in your Advocate program. If you’re using Shopify, these tools let you sync codes automatically—removing the need for manual uploads.
You can delete rewards codes you have generated, including codes synced with Shopify.
Note: To delete codes synced to Shopify, you'll need to delete the codes via your impact.com advocate account as well as on your Shopify account.
From the left navigation menu, select
[Engage] → Rewards → Code Manager.
In the top right corner, select View Codes.
Hover your cursor over the rewards code you want to view and select Manage.
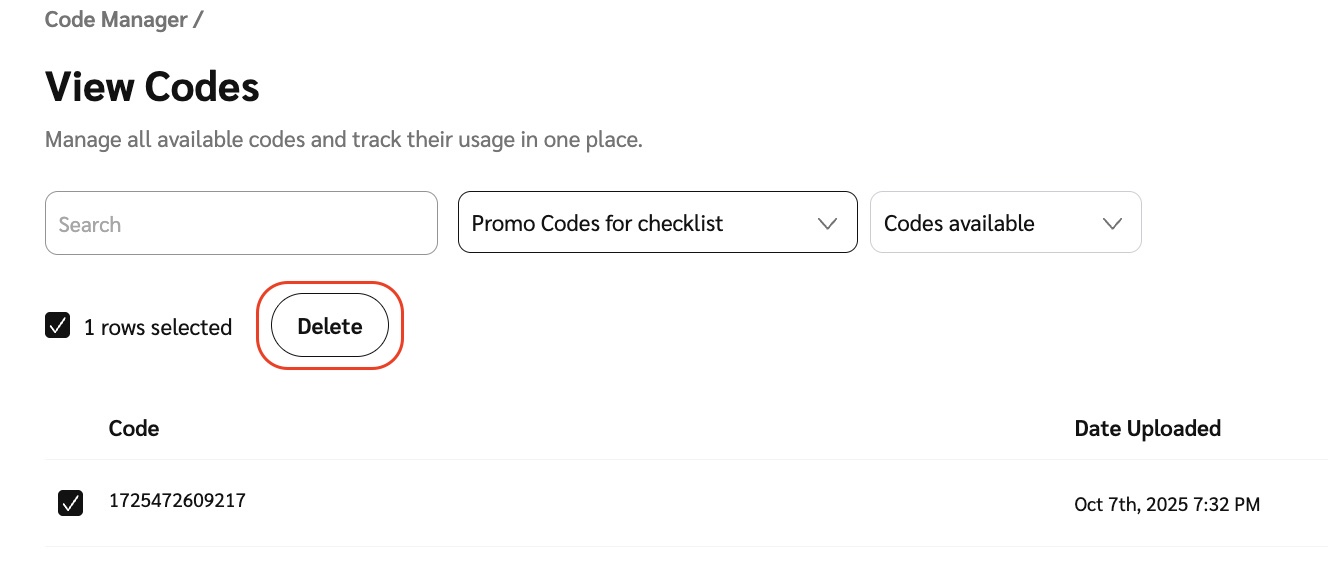
Select the
[Checked box] next to the codes you want to delete.
Once you've selected all the codes you want to delete, select the Delete button.
