You are able to assign up to three custom values to a partner. Once the custom values are assigned, you are then able to add the values to your landing page query string. Assigning custom values to your partner helps:
Identify the partner by name in your internal analytics dashboard.
Specify the type of traffic associated with the partner (e.g. paid search, email, loyalty, coupon, toolbar, etc.).
Track if you have worked with the partner through another network and want to be able to marry the data and assign the Partner ID from the other network.
Note: When you set a custom partner value, data will start populating based on the last date you updated the partner contract. When looking at historical data and to avoid confusion, only consider data collected after the partner value was implemented.
In the left navigation menu, select
[Engage] → Partners → Partners.
Alternatively, for Creator programs, select
[Engage] → Partners → Creators.
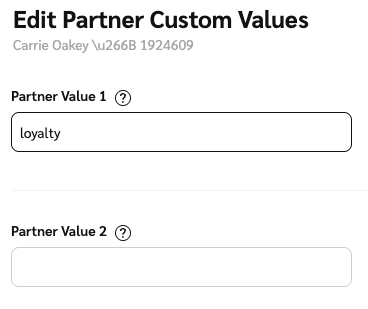
Hover over the partner for whom you want to set custom values and select
[More] → Tracking → Custom Values.
Select the Partner Value field you want to set.
Up to three values can be set.
Input a value and select Save.

To view all your existing Partner Custom Values, select
[User Profile] → Settings → Partner Custom values.
Note: Partner Custom Values correspond to the {mp_value1} dynamic value of the Landing Page Query String Parameters. See Gateway Tracking Templates for more context.
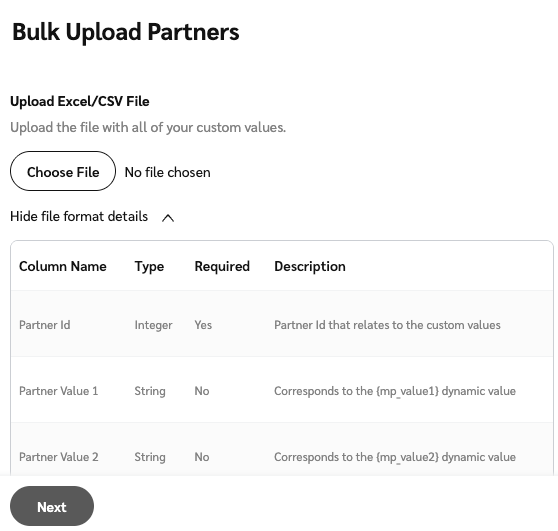
Partner custom values can also be uploaded and configured in bulk with a .XLSX or .CSV file.
In the left navigation menu, select
[Engage] → Partners → Partners.
Alternatively, for Creator programs, select
[Engage] → Partners → Creators and in the upper-right, select
[More] → Revert to old UI.
In the upper-right, select Bulk Edit.
Select Choose file and upload a file with all of your custom values.
Select Show/hide file format details to learn more about the required file format.
You can also select Copy columns to clipboard and paste the template into a spreadsheet.

Select Next.
The data will load onto the Partner Values Bulk Upload screen with all the Partner Ids and custom values you've listed.
Here you can view validation errors, download the error file, and filter to show only errors or passing values.
Select Accept & Create Partner Custom Values.
To set your partner values to the landing page query string:
From the top navigation bar, select
[User profile] → Settings.
Under the Tracking section, select Gateway.
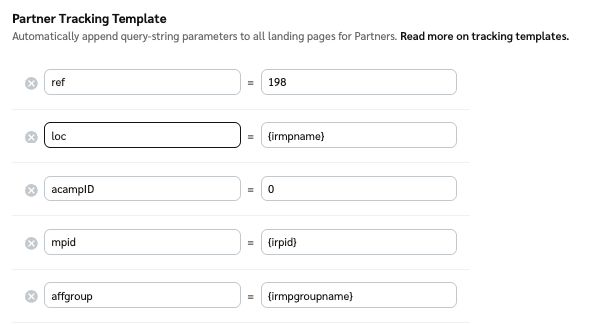
Locate the Partner Tracking Template section.
Note: The Partner Tracking Template automatically appends query-string parameters to all landing pages for Partners. This is useful for passing information to a third-party analytics tool.
Enter the name and custom value in the blocks provided.
See Gateway Tracking Templates for more information.
Select Save.
