Any report you view in impact.com (including saved views and custom reports) can be scheduled for email delivery, to your FTP server, or to hosted SFTP.
From the left navigation menu, select
[Engage] → Reports → More Reports.
Open your preferred report and select
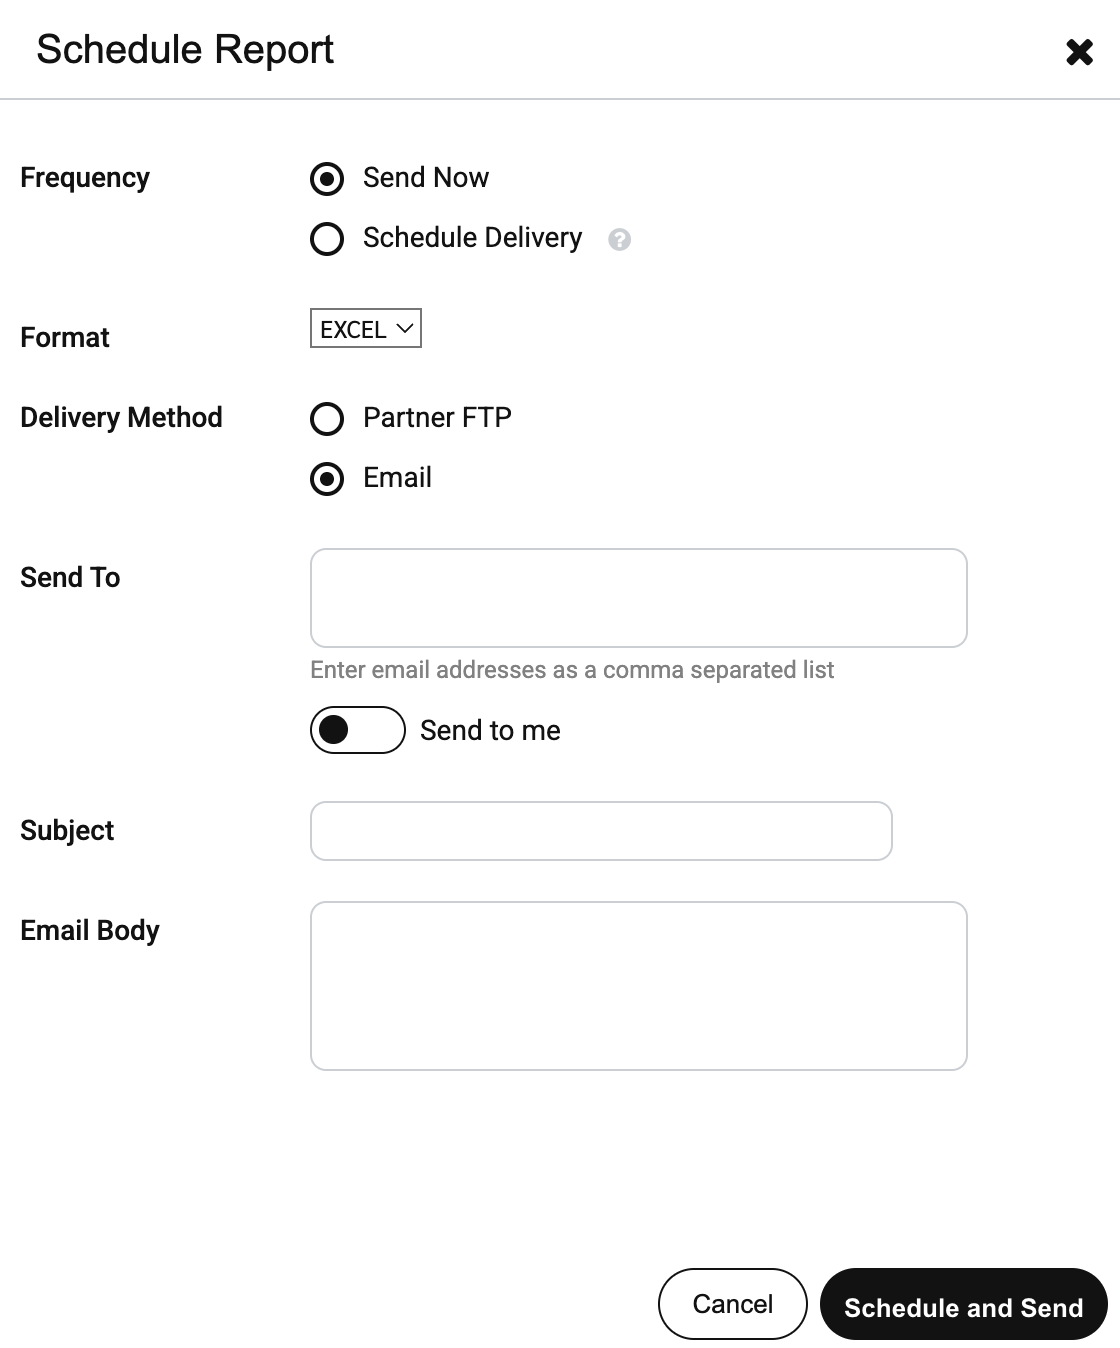
[Schedule] in the top right corner to open the Schedule Report dialog box.
Complete the schedule settings of the report. See the Schedule Report reference below for more information.

Next to Frequency, use
[Radio button] to choose when you want to schedule this report.
Use the
[Drop-down menu] to select the file format of the report.
Next to Send To enter the email addresses you want to the send the report to. Select
[Toggle on] if you want to send the report to yourself.
Select the delivery method: Partner FTP, Email or Hosted SFTP. See below for help with configuring these.
If you choose to have your reports sent via FTP, a folder will be sent to your FTP server, where you can then access the report.
Delivery method field
Description
Server URL
Select the server protocol in which you want to receive FTP files (FTP, SFTP, or FTPS), then enter your server URL.
Directory
Indicate here if you have a specific directory you want reports to be placed in (e.g., /impact/reports/).
Port
Specify the port that your server listens to for new control connections. Post 21 is typical for nonsecure and explicitly secure connections. Port 990 is typical for implicitly secure connections.
Username
Enter the username that impact.com uses to log into the FTP server.
Password
Enter the password that impact.com uses to log into the FTP server.
If you choose to have your reports sent via email, the report will be uploaded to Google Cloud, and you will receive an email with a link that points to the report.
Delivery method field
Description
Send To
Create a CSV of the email addresses where you want to receive this report. Select Send to Me to have the report sent to the email tied to your impact.com account.
Subject
Enter the email subject line.
Email body
Enter the plain text message.
If you select Hosted SFTP, the file will be sent to a hosted location for you.
When connecting to hosted SFTP, you can either make use of an existing connection or create a new one, by selecting Create new... and filling in the following fields:
Delivery method field
Description
Connection User
Select an existing user, or create a new user to connect with.
Display Name
Enter the name to be displayed.
Public Key
[Toggle on] to enter the public key. If you don't enter a public key, a password will be generated for you and displayed when the new connection is created.
Connection Name
Enter a name for the connection.
Select Schedule and Send to schedule your report and start receiving it.
On the Scheduled Reports screen, you can see all of your scheduled reports (and any shared from other users) in the list.
From the left navigation menu, select Reports → Scheduled Reports.
Under the Actions column, select to modify a scheduled report. See the table below for a description of each option.
Action
Description
Edit Delivery
Select this option to change when this report is delivered and the message that is delivered with it.
Edit Report Settings
Select this option to modify the report view of this scheduled report. Select Save once completed, and the scheduled report will reflect your changes on its next delivery.
Pause
Select this option to temporarily stop receiving this report.
Delete
Select this option to permanently delete this scheduled report.
Run Now
Select this option to run this report once right now.