Microsites are one of the key participant touchpoints for your referral program. This help article explains how to use the microsite editor to customize your existing microsite into a space that reflects your brand and provides an engaging experience for your end users.
If you haven’t set up a microsite yet, then you’ll need to do so first.
From the left navigation menu, select
[Engage] → Content.
On the Microsite card, select Edit content.
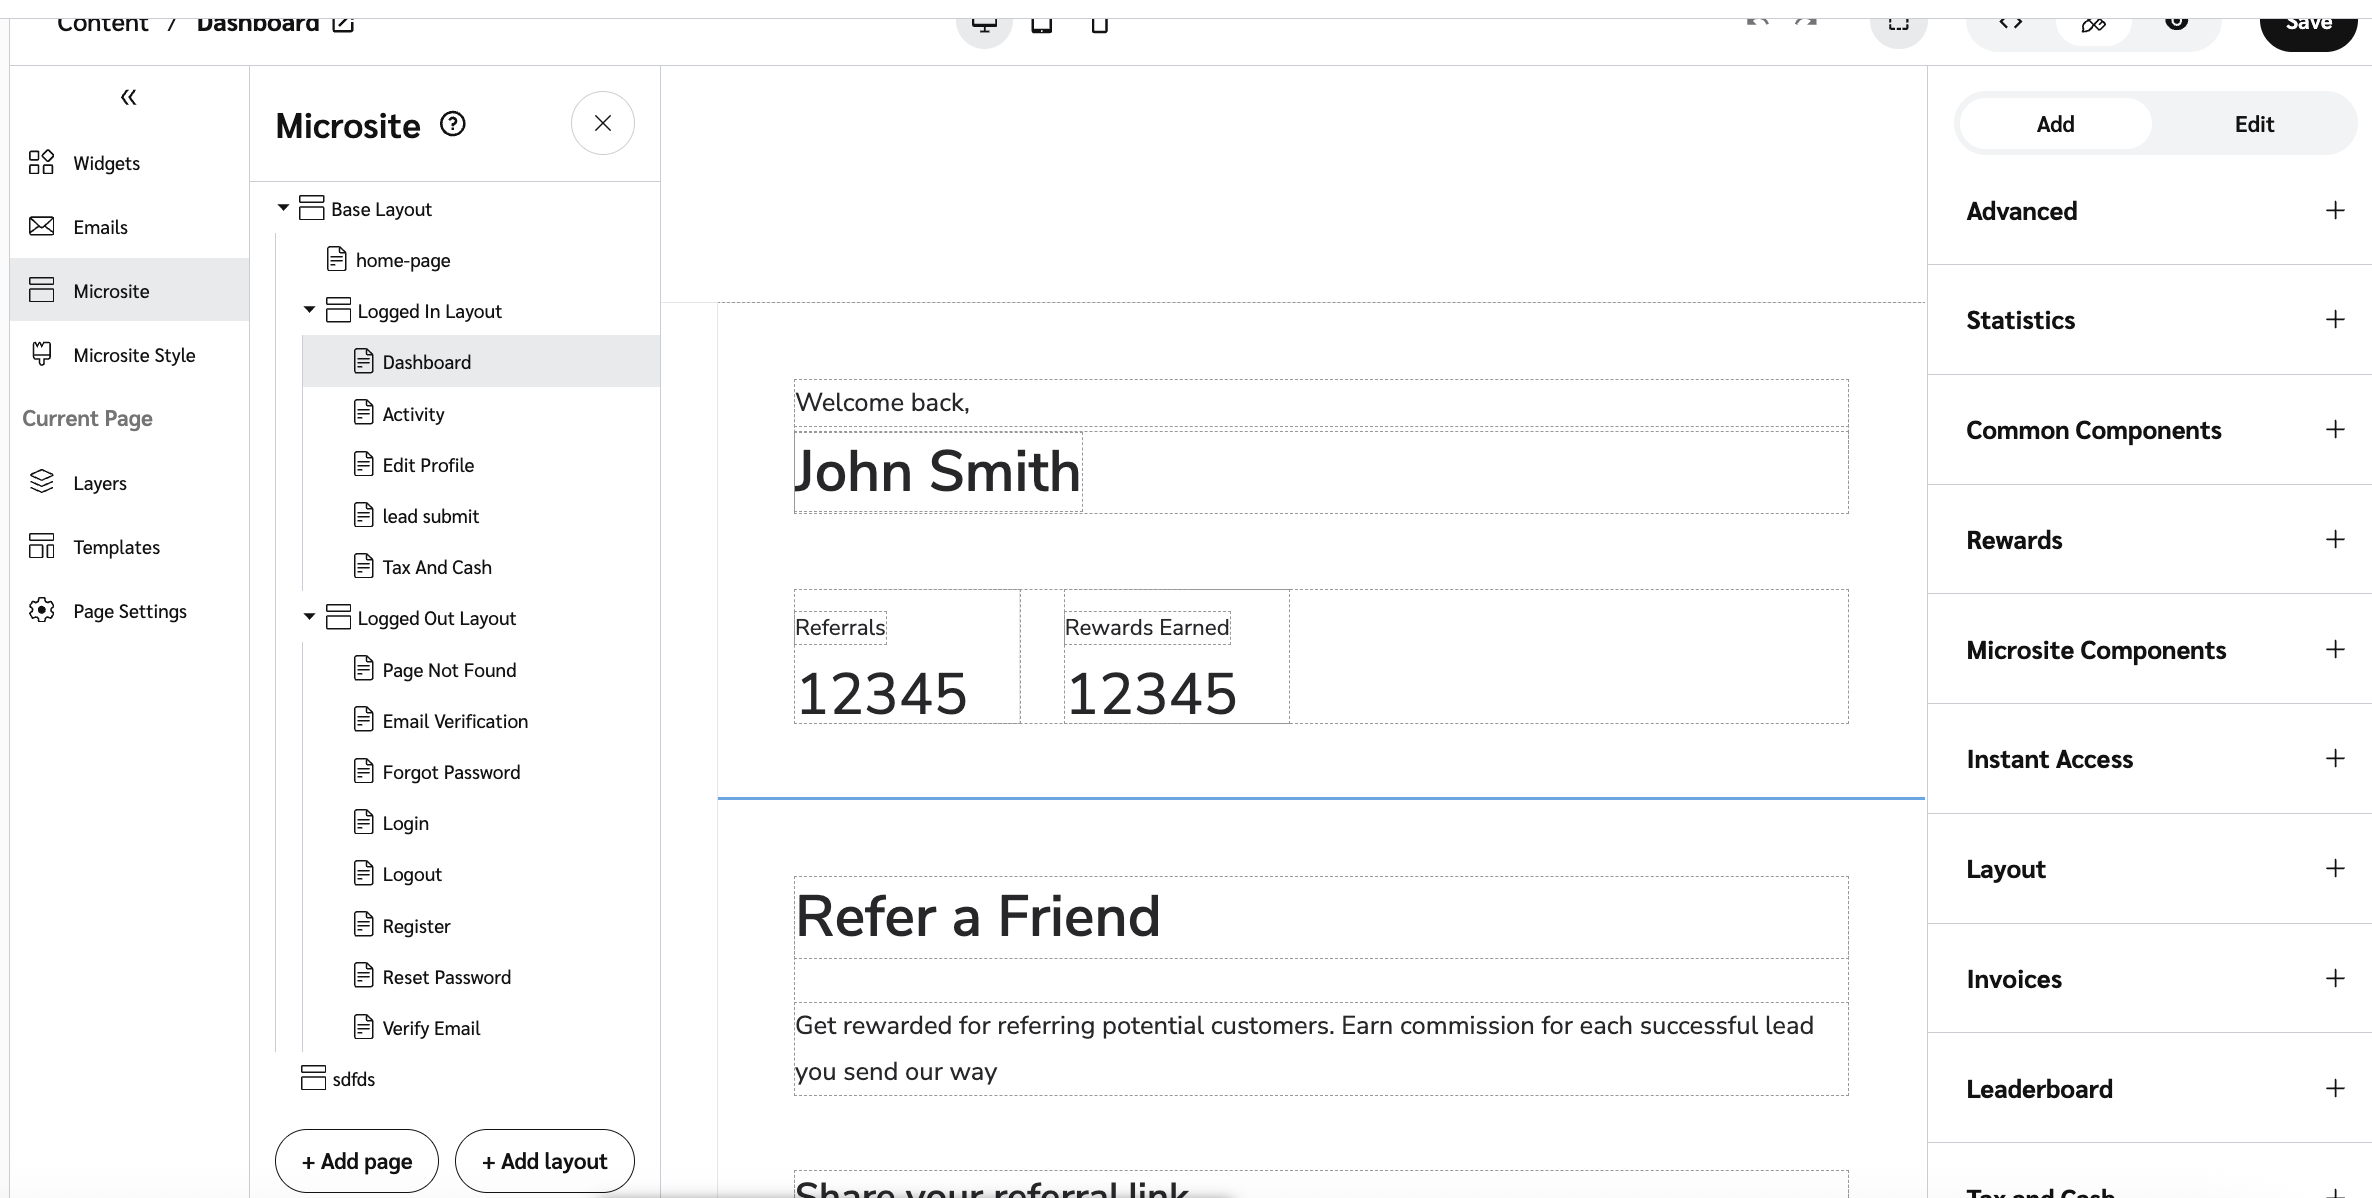
This action opens the microsite editor and displays the Microsite slideout.
Use the microsite editor to update your branding or add new content, like layouts and pages.

Warning: The microsite editor does not autosave your changes. Save frequently to make sure you don’t lose your work.
Step 1: Change your microsite’s branding (Optional)
Your Base layout includes a brand container component that controls your microsite’s font and brand colors. Brand colors are applied to various parts of the microsite, including highlight colors and button colors.
In the Microsite slideout, select the Base Layout.
On the left, under Current Layout, select Layers.
Select the Brand Container.
On the right, in the Brand Container menu, edit the brand color and brand font.

Select Save in the upper-right corner.
You can add a clickable header image that redirects your participants to a page you designate. Set it up in the Base layout.
In the Microsite slideout, select the Base Layout.
On the left, under Current Layout or Current Page, select Layers.
On the right, in the Microsite Frame Header Content menu, provide an image and adjust its height and width as desired.
Set the redirect path. This is where your participants will be redirected upon clicking the image.
Select Save.
In the Microsite slideout, select Microsite.
This action opens the structure view of your microsite, which displays all layouts and pages.
Select the Add Page button.
Optionally, use the Inherited Layout drop-down list to select the layout you want to act as the parent layout.
Example: If you want to add a landing page to your site that anyone can see regardless of whether they’re a logged-in participant, you can nest a new page within the base layout.
Enter the Page title or layout name.
Optionally, adjust the Page key for your page. A page key is automatically generated based on the page title, but you can change it if desired.
Enter the URL for your page.
Add a forward slash before the name you want to use and use hyphens in the case of a multi-word URL, e.g.,
/company-info.
From the Allowed users drop-down list, select the group of users that can access the page.
Public: Viewable by anyone.
Verified: Logged-in participants only.
Unverified: Logged-in participants who haven’t verified their email addresses.
From the Redirect for disallowed users drop-down list, select the page to which you want disallowed participants to be sent.
Select Add.
In the top-right corner of the page, select Save.
In the Microsite slideout, select Microsite.
This action opens the structure view of your microsite, which displays all layouts and pages.
Select Add Layout.
Optionally, use the Inherited Layout drop-down list to select the layout you want to act as the parent layout. This is primarily helpful for site organization purposes.
Enter the Layout name for your layout.
Optionally, adjust the Layout key for your layout. A layout key is automatically generated based on the page title, but you can change it if desired.
Select Add.
At the top-right corner of the page, select Save.
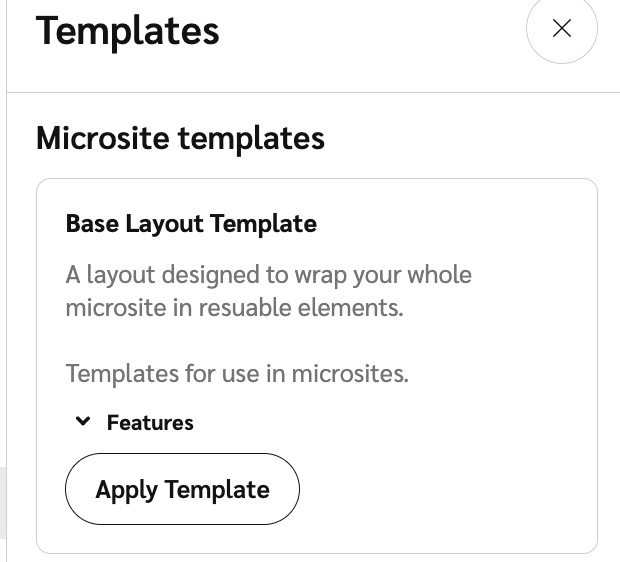
You can apply a template to your new layout or page if you don’t want to start from scratch.
From the Microsite slideout, use the structure view to select the layout or page for which you want to use the template.
On the left, below Current Layout or Current Page, select Templates.
Browse the available templates, then select Apply template on the card of the template you want to use.

At the top-right corner of the page, select Save.
This is recommended if you want logged in participants to be able to get to a page from the microsite's sidebar navigation menu. These steps will show you how to do so, but you can adapt them if you want to add a sidebar item to another layout.
From the Microsite slideout, select Logged In Layout from the structure view.
Select
![[Exit icon]](https://paligoapp-cdn-eu1.s3.eu-west-1.amazonaws.com/impact/attachments/f01cdffa431a4d75ff09c130b66974d4-6b8870ddf0980d012485043e0aacc26e.png) [Exit icon] to close the slideout and access the editing canvas.
[Exit icon] to close the slideout and access the editing canvas.
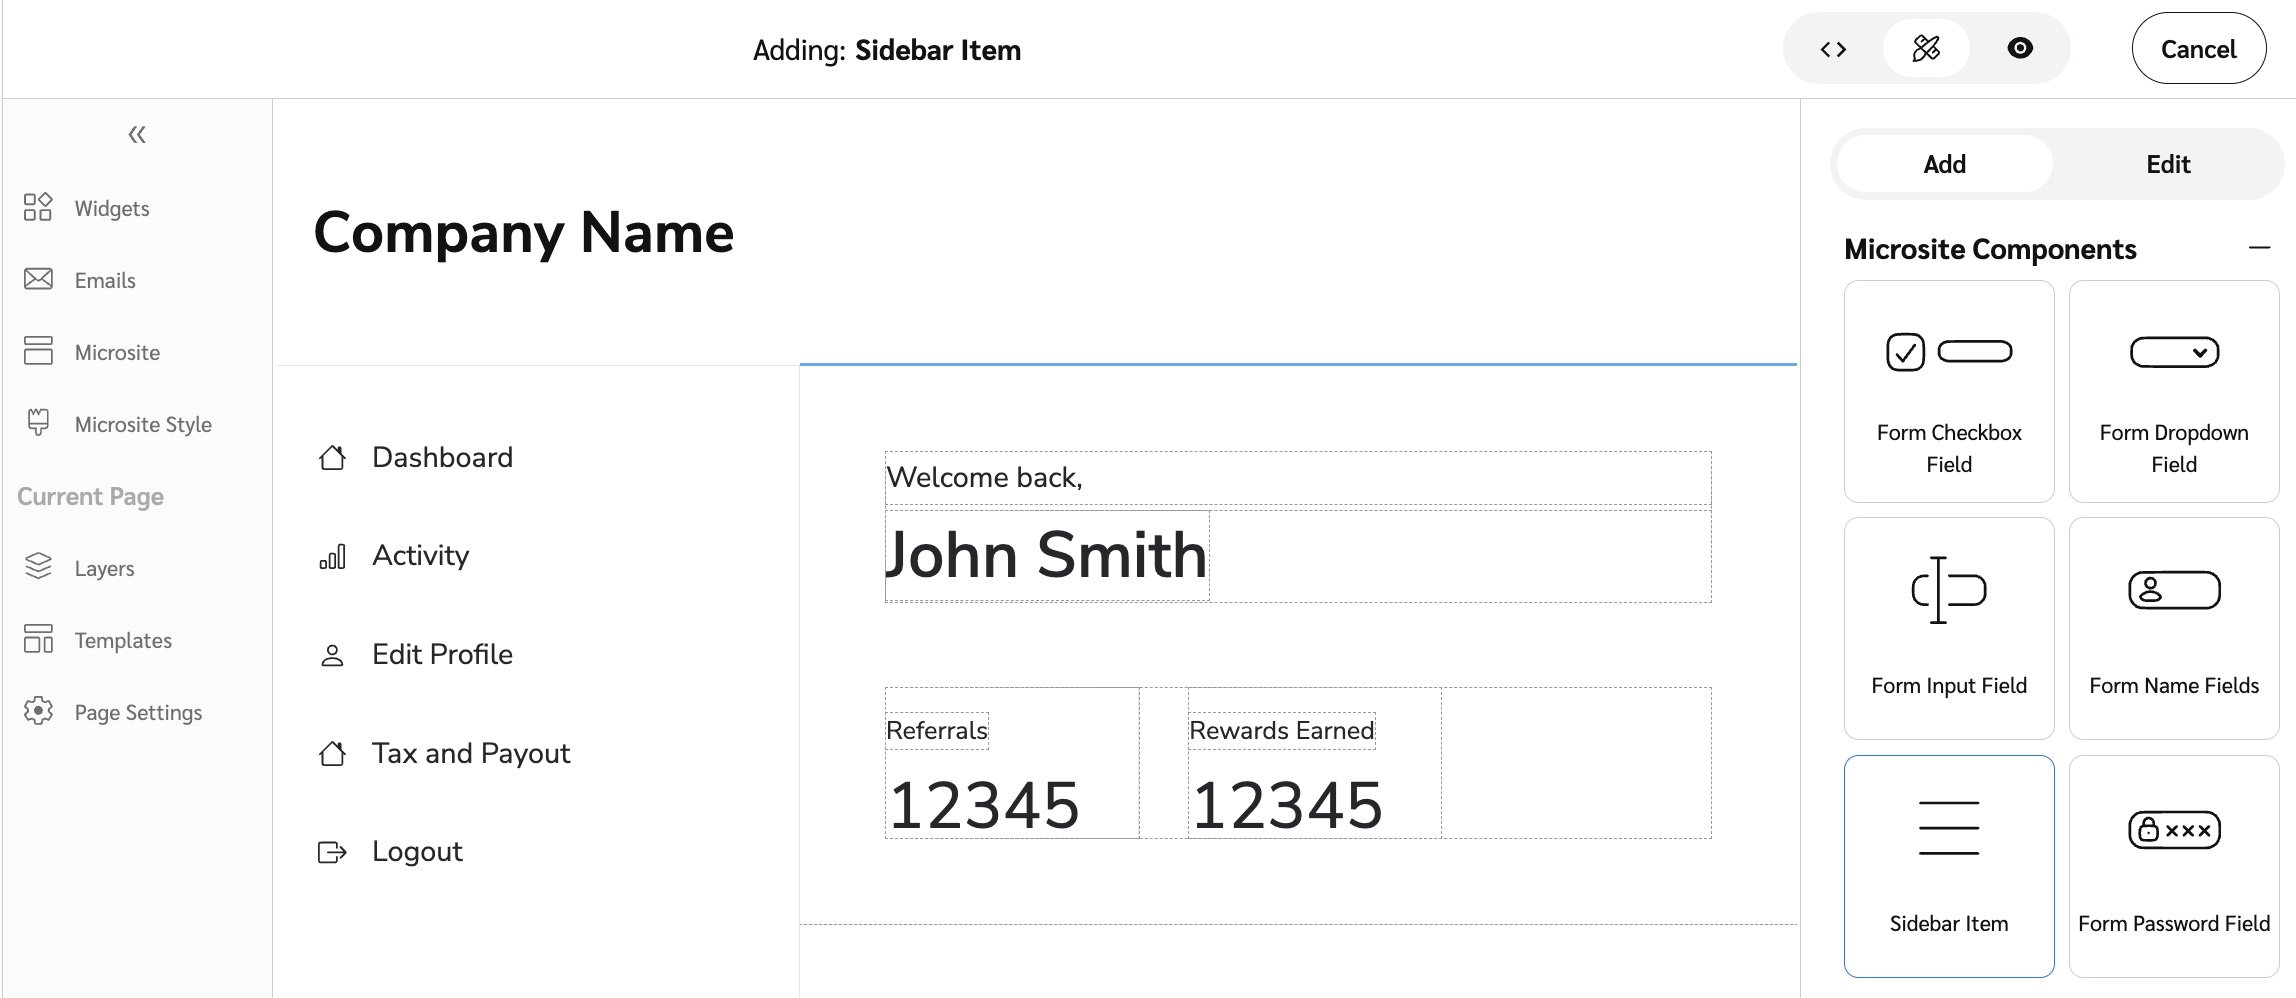
On the right, within the Add menu, expand the Microsite Components category, then select Sidebar Item.

Within the editing canvas, select a valid position to add the sidebar item component. Available positions are designated by a Add to Sidebar Content message.
On smaller screens, select the
[Hamburger menu] to access the Add to sidebar content button.
On the right, within the Edit menu, select an Icon and Label to represent the page.
From the Navigation Path drop-down list, select the URL path of the page to which users should be directed.
At the top-right corner of the page, select Save.
You can preview how the microsite will appear to your participants.
In the top menu bar, toggle between
[Desktop],
[Tablet] or
[Mobile] to see how the microsite will appear on each device.
To enter preview, select
[View] from the top menu bar.
To return to the editing interface, select
[Edit] from the top menu bar.
The microsite editor does not autosave your changes. Save frequently to make sure you don’t lose your work.
After making all relevant changes, select Save in the top right.
Once saved, the changes will appear instantly in the live version of your microsite.
Visit our article on Widget and Microsite Components Explained for more on the component aspects of Microsites and Widgets.