Surveys allow you to collect information from partners to improve or streamline your business. You can survey partners who already joined your program or upon sign-up. Sign-up surveys are shown to new partners when they apply to your brand. Existing partners can respond to their surveys on the Surveys screen.
Create a survey
 This feature is only accessible to specific impact.com editions or add-ons. Contact us to upgrade your account and get access!
From the left navigation menu, select
![[Engage] v2](https://paligoapp-cdn-eu1.s3.eu-west-1.amazonaws.com/impact/attachments/f01cdffa431a4d75ff09c130b66974d4-aa671735ec2b65af79961eaf59ab60af.svg) [Engage] → Partners → Surveys.
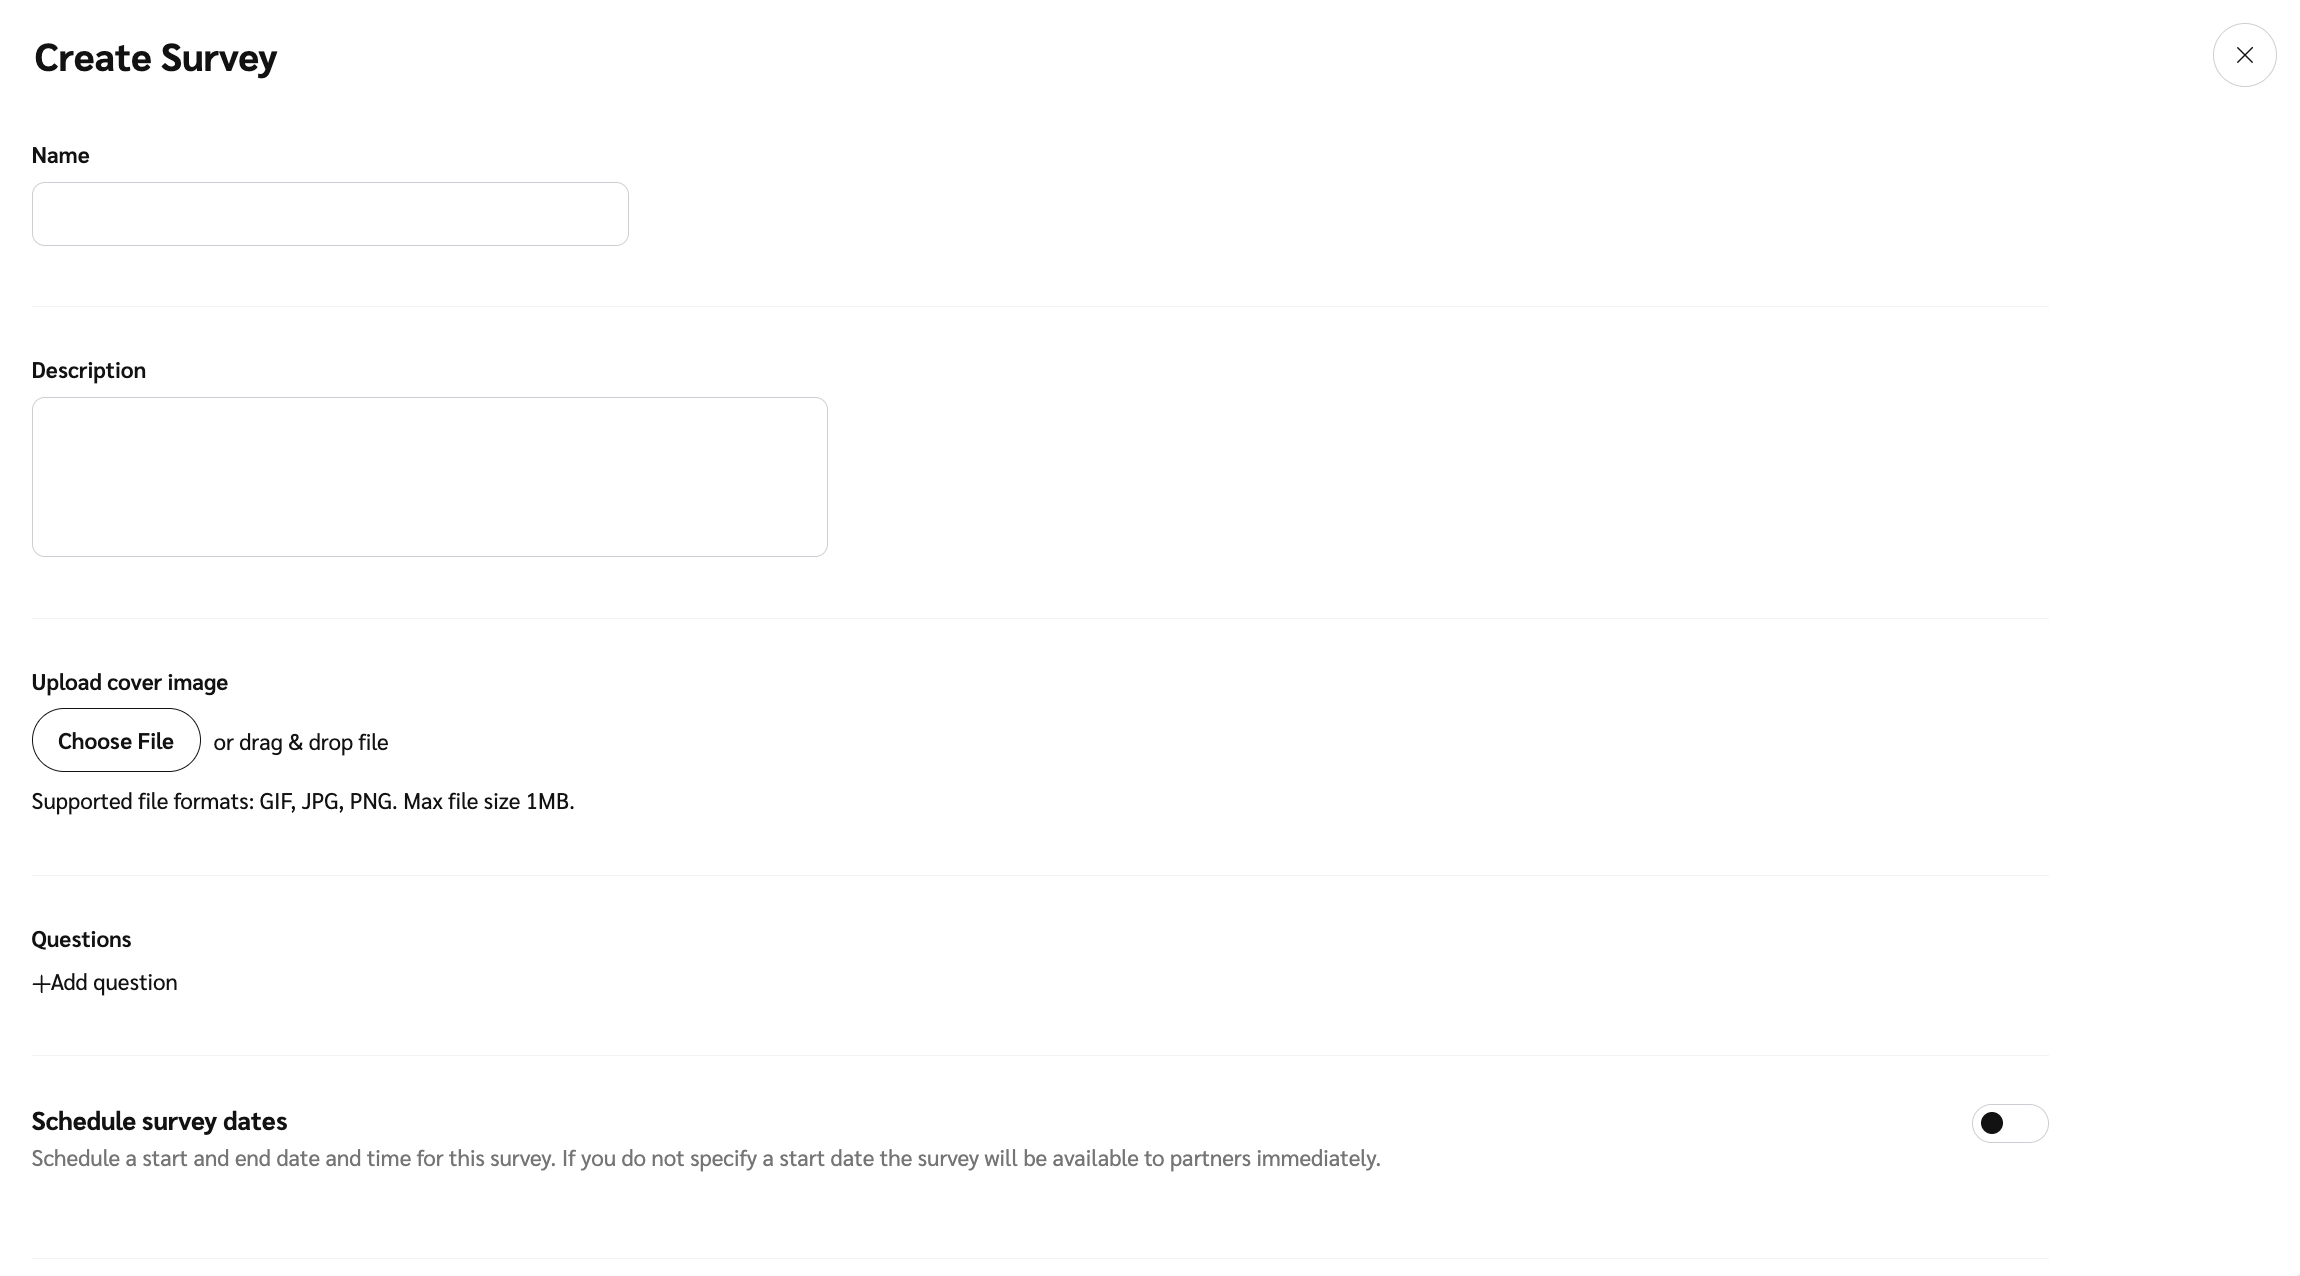
[Engage] → Partners → Surveys.On the Surveys screen, in the upper-right corner, select Create Survey.
Enter a Name and Description for the survey.
Select Choose File to upload a cover image for your survey.
GIF, JPG, and PNG file formats are supported with a maximum file size of 1 MB.
Select
![[Add]](https://paligoapp-cdn-eu1.s3.eu-west-1.amazonaws.com/impact/attachments/f01cdffa431a4d75ff09c130b66974d4-10e4c0b38da10be931c9aeb7bfb84651.svg) [Plus] Add Question to formulate and specify your question details.
[Plus] Add Question to formulate and specify your question details.Enter a Question using 250 characters or less.
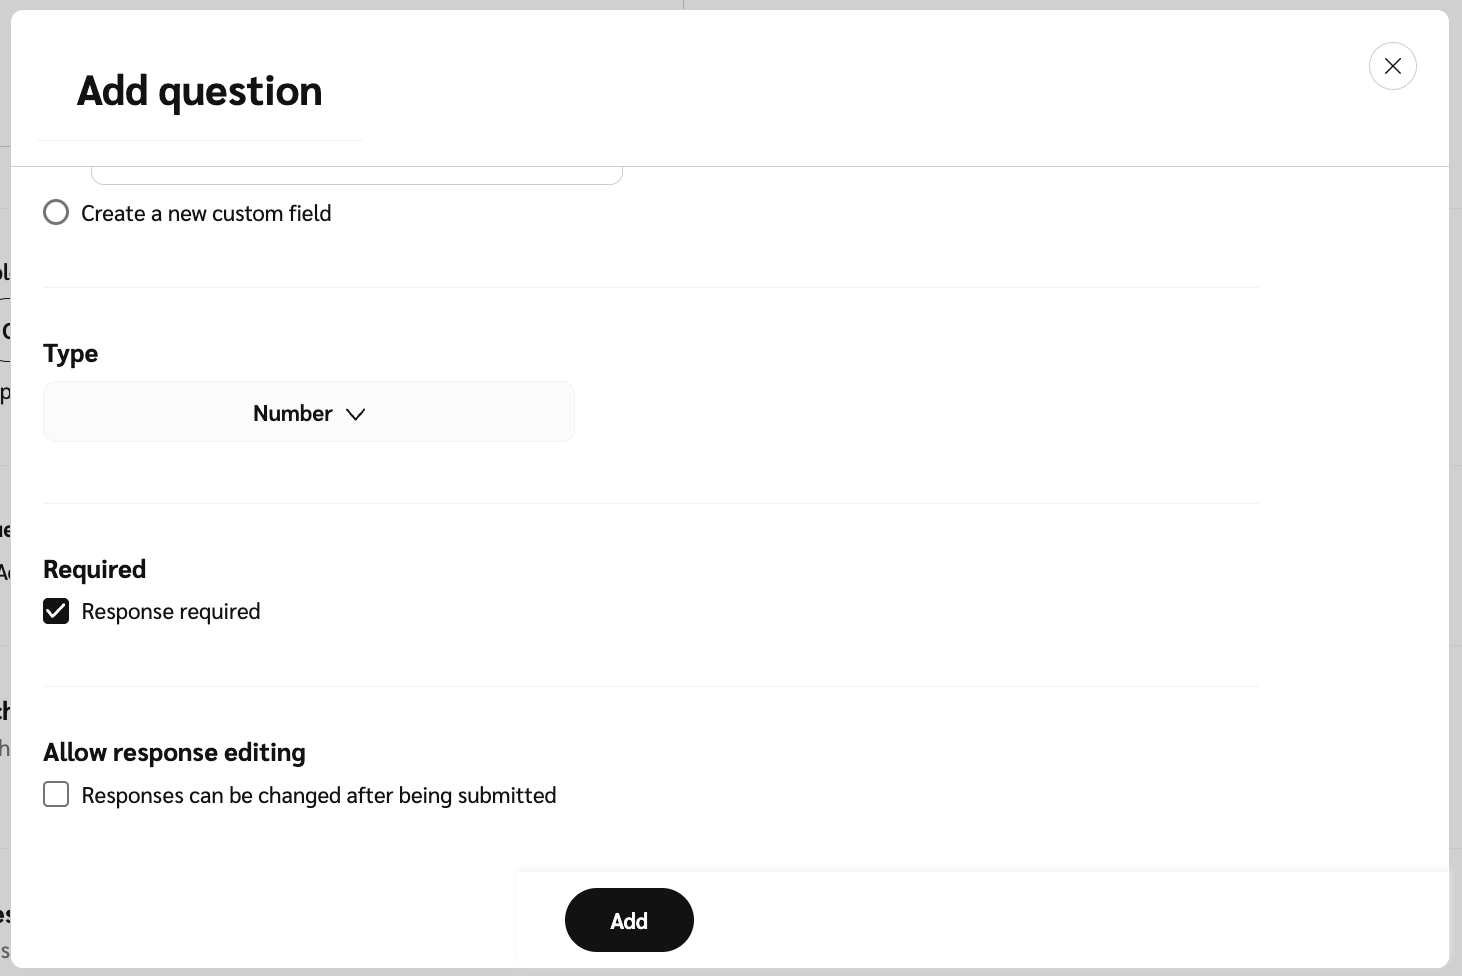
In the Custom Field section choose either of the following:
Select
![[Radio button]](https://paligoapp-cdn-eu1.s3.eu-west-1.amazonaws.com/impact/attachments/f01cdffa431a4d75ff09c130b66974d4-b7d91d1c012267bd96951fe6c2b643a4.svg) [Radio Button] to Use an existing custom field and choose an existing survey from the from the
[Radio Button] to Use an existing custom field and choose an existing survey from the from the ![[Drop-down menu]](https://paligoapp-cdn-eu1.s3.eu-west-1.amazonaws.com/impact/attachments/f01cdffa431a4d75ff09c130b66974d4-d6b35853a9aa1f1fe6bd66da29bd09fa.svg) [Drop-down menu].
[Drop-down menu].- [Radio Button] to Create a new custom field. For example, create an Age custom field with a number input if you frequently collect data about partners' age.
If you selected Create a new custom field above, select the question Type format from the
[Drop-down menu]Paragraph – Open-ended questions that allow unique answers.
Number – Responses that require a numeric input.
Checkbox – Allows respondents to select one or multiple options.
Multiple Choice – Requires the respondent to choose only one option from a list.
Date Picker – For questions that require a specific date as an answer.
Drop Down – Provides multiple options hidden in a dropdown menu (single or multiple selections).
File – Allows the respondent to upload a file attachment.
The question type will be populated with a custom field if you choose an existing custom field.
Select the
![[Unchecked box]](https://paligoapp-cdn-eu1.s3.eu-west-1.amazonaws.com/impact/attachments/f01cdffa431a4d75ff09c130b66974d4-396370c2cdec89ba7d714c4c58e6845b.svg) [Unchecked box] to make the question Required.
[Unchecked box] to make the question Required.Select the
[Unchecked box] to allow partners to edit their responses after submitting.Select Add to add the question.
![[Toggle on]](https://paligoapp-cdn-eu1.s3.eu-west-1.amazonaws.com/impact/attachments/f01cdffa431a4d75ff09c130b66974d4-84d1224fd3bb6ba94b899febe2021eaa.svg) [Toggle on] Schedule Survey Dates to add dates for when the survey starts and ends.
[Toggle on] Schedule Survey Dates to add dates for when the survey starts and ends.You can select a timezone from the
[Drop-down menu] However, if you do not select dates the survey will be available immediately and indefinitely until you disable it.![[Toggle off]](https://paligoapp-cdn-eu1.s3.eu-west-1.amazonaws.com/impact/attachments/f01cdffa431a4d75ff09c130b66974d4-d7d1bd7fa4d616663ec00472adc4f57c.svg) [Toggle off] Schedule Survey Dates for surveys you want to include in the partner sign-up page.
[Toggle off] Schedule Survey Dates for surveys you want to include in the partner sign-up page.
- [Toggle on] Restrict Partner Access to only allow specific partners or partner groups to access and reply to the survey.
Select the Partners
[Drop-down menu] to specify the partners you want to include in your survey.Select the Groups
[Drop-down menu] to specify the partner groups you want to include in your survey.
Select Save when you're done.
Note: Once you select Save, the survey will automatically be available for partners to see and answer.