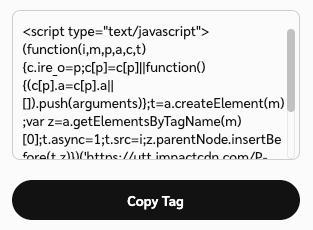
This article explains how to use the Publisher tag, which is a snippet of JavaScript code you can add to your website. The Publisher Tag transforms relevant direct links on your website into tracking links and tracks impressions each time a user loads the page. The basic integration offers the first two features below, while the identifyUser integration offers the third feature:
Transform links — When loaded with your webpages, the Publisher tag will detect any direct links you're using to send traffic to the landing pages of brands you work with and automatically convert them into impact.com tracking links. When users follow these links, you'll receive credit for any actions that result from driving that traffic.
Impression tracking — The Publisher Tag will also count impressions for your transformed links each time it's loaded on the page, which can be viewed as a report in impact.com. For this feature to work, the brands you're working with need to enable it in their impact.com account.
identifyUser integration — The Publisher Tag can track additional information, like traffic information for more accurate conversion path reporting.
Depending on how you want to use the Publisher Tag, it can be placed:
In the
<head>tag of your web pages — [Recommended] place the code at the bottom of the<head>of each of the web pages on which you want it to run.In the
<body>tag of your web pages — place the code in the<body>of each of the web pages on which you want it to run.In the header template of your website — [Recommended] place the code at the bottom of your header template if you want it to run automatically on all of your webpages.
From the top navigation bar, select Content → Ad Tools.
In the Publisher Tag section on the right, under the code snippet, select Copy Tag to copy the code to your clipboard.

The process for installing your Publisher Tag is different depending on whether your website is locally hosted, CMS-hosted, or whether you use a tag manager.
Use this method if you manage your website's code directly, rather than hosting it on a CMS or website platform.
Open the source code of the web page on which you want to install the Publisher Tag.
In your web page's code, find the
<head>opening tag at the top.Paste the entire Publisher tag code at the end of the section, making sure that everything is before the
</head>closing tag.Repeat this for each webpage on which you want the Publisher Tag to run.
If you use a Content Management System (CMS) or 3rd-party website platform like Wordpress, Squarespace, Wix, etc., refer to their help docs on how to add a JavaScript tag to your website. A quick web search should surface some results on how to install a JavaScript tag for your particular CMS. See examples below:
If you use a Tag Management System (TMS) for your website, you'll need to add a custom HTML tag to your website. Refer to the tag manager's help docs on how to do this. For example:
Once you've installed the Publisher Tag code snippet on your website, you should test the integration to make sure it's working correctly. Use your browser’s developer console to check that the link transformation and impression tracking features are working.
Open your browser's developer console by hovering over a link, then right-click and select Inspect (or Inspect Element).
Check that the link in the
<a href=””>quotation marks looks like an impact.com tracking link (e.g.,https://advertiser.sjv.io/).
Alternatively, hover over links on your web page. Most browsers will show the link's path in the browser’s status bar in the lower-left corner. The link should look like an impact.com tracking link (e.g.,
https://advertiser.sjv.io/or similar).
Note: If you're using Safari, make sure to enable the Status bar from the top menu. Select View → Show Status Bar (or on your keyboard, hold ![[Command]](https://paligoapp-cdn-eu1.s3.eu-west-1.amazonaws.com/impact/attachments/f01cdffa431a4d75ff09c130b66974d4-c0485219bb76ade0b5350c7b06b2443b.svg)
Open your browser's developer console by hovering over a link, then right-click and select Inspect (or Inspect Element).
In your browser’s developer console, select the Network tab. Refresh the page to capture fresh data.
In the list under Type, check that an
xhrorbeaconhas fired with a Status of200.
Alternatively, you can search your Partner ID in the Network tab. The format of the line item is
{trackingdomain}/i/partnerId/adId/campaignIdwith anxhrorbeaconType and Status of200.
Heads up! The advanced integration requires a skilled web developer who understands how this integration changes the script, along with the implications of the function. We strongly advise consulting with a developer before attempting this integration.
Integrating using identifyUser is the recommended approach, because submitting authenticated user data through identifyUser can allow for improved attribution.
The identifyUser function also captures non-personally identifiable information (non-PII).
Add the following line of code to the Publisher Tag body before the other function calls:
impactPublisher('identifyUser', {properties}, {options});Once you've added the new code, the full tag will look similar to this:
<script type="text/javascript">
    (function(a,b,c,d,e,f,g){e['ire_o'] = c;e[c] = e[c] || function(){(e[c].a = e[c].a||[]).push(arguments)};f = d.createElement(b);g = d.getElementsByTagName(b)[0];f.async = 1;f.src = a;g.parentNode.insertBefore(f,g);})('//d.impactradius-event.com/<UNIQUE_ID>.js','script','impactPublisher',document,window);
    impactPublisher('identifyUser', {properties}, {options});
    impactPublisher('transformLinks', {properties}, {options [augmentLinksOnly, addImpressions]});
    impactPublisher('trackImpression', {properties}, {options});
    impactPublisher('trackLinks');
</script>
Once you’ve modified the script, you can follow the basic integration instructions to install the script.
Once you've installed the Publisher Tag code snippet on your website, you should test it to make sure it's working correctly. Testing the advanced integration requires knowledge of how to dynamically pass the partnercustid or customeremail variables.
Once this is configured, check the Network tab of your browser’s developer console for partnercustid={passedid} and customeremail={passedemail}.
Note: For more information on the Publisher Tag, read the Publisher Tag FAQ. If you’re unsure how to accomplish any of the mentioned steps in this article, contact support.
![[External link]](https://paligoapp-cdn-eu1.s3.eu-west-1.amazonaws.com/impact/attachments/f01cdffa431a4d75ff09c130b66974d4-b8ebe06c75d53cc8d24756ae9b7589e2.svg)