impact.com accounts are managed by account users (also known as members). When you log into impact.com, you use your member account credentials to access an impact.com account.
Example
Carrie Oakey creates an impact.com partner account: OakeyInfluencer. During this process, she also creates a member account (e.g., "carrieoakey") which she uses to log in to impact.com and access her partner account.
Carrie Oakey wants her colleague Earl E. Bird to able to access her account, so she sends an invitation via email.
Earl E. Bird accepts the invitation and creates his own member account ("earlebird") to log in to impact.com.
Carrie Oakey approves Earl E. Bird, who can now login with his member account ("earlebird") to access the OakeyInfluencer partner account.
From the top navigation bar, select
[User profile] → Settings.
In the General section, select Account Users.
In the upper-right corner, select Invite
[Drop-down menu] → Invite User.
Enter the invitee name, invitee email address, an invitation message (optional), and the permissions this user will have.
Select Submit to send the invitation.
Once someone receives an invitation, they'll need to view the email to accept it.
Have the invitee view the invitation email and select Accept Invitation.
Invitees with an existing member account (user profile) can sign-in with their credentials to accept the invitation. Alternatively, invitees who don't have a member account can create one to accept the invitation.
From the top navigation bar, select
[User profile] → Settings.
In the General section, select Account Users.
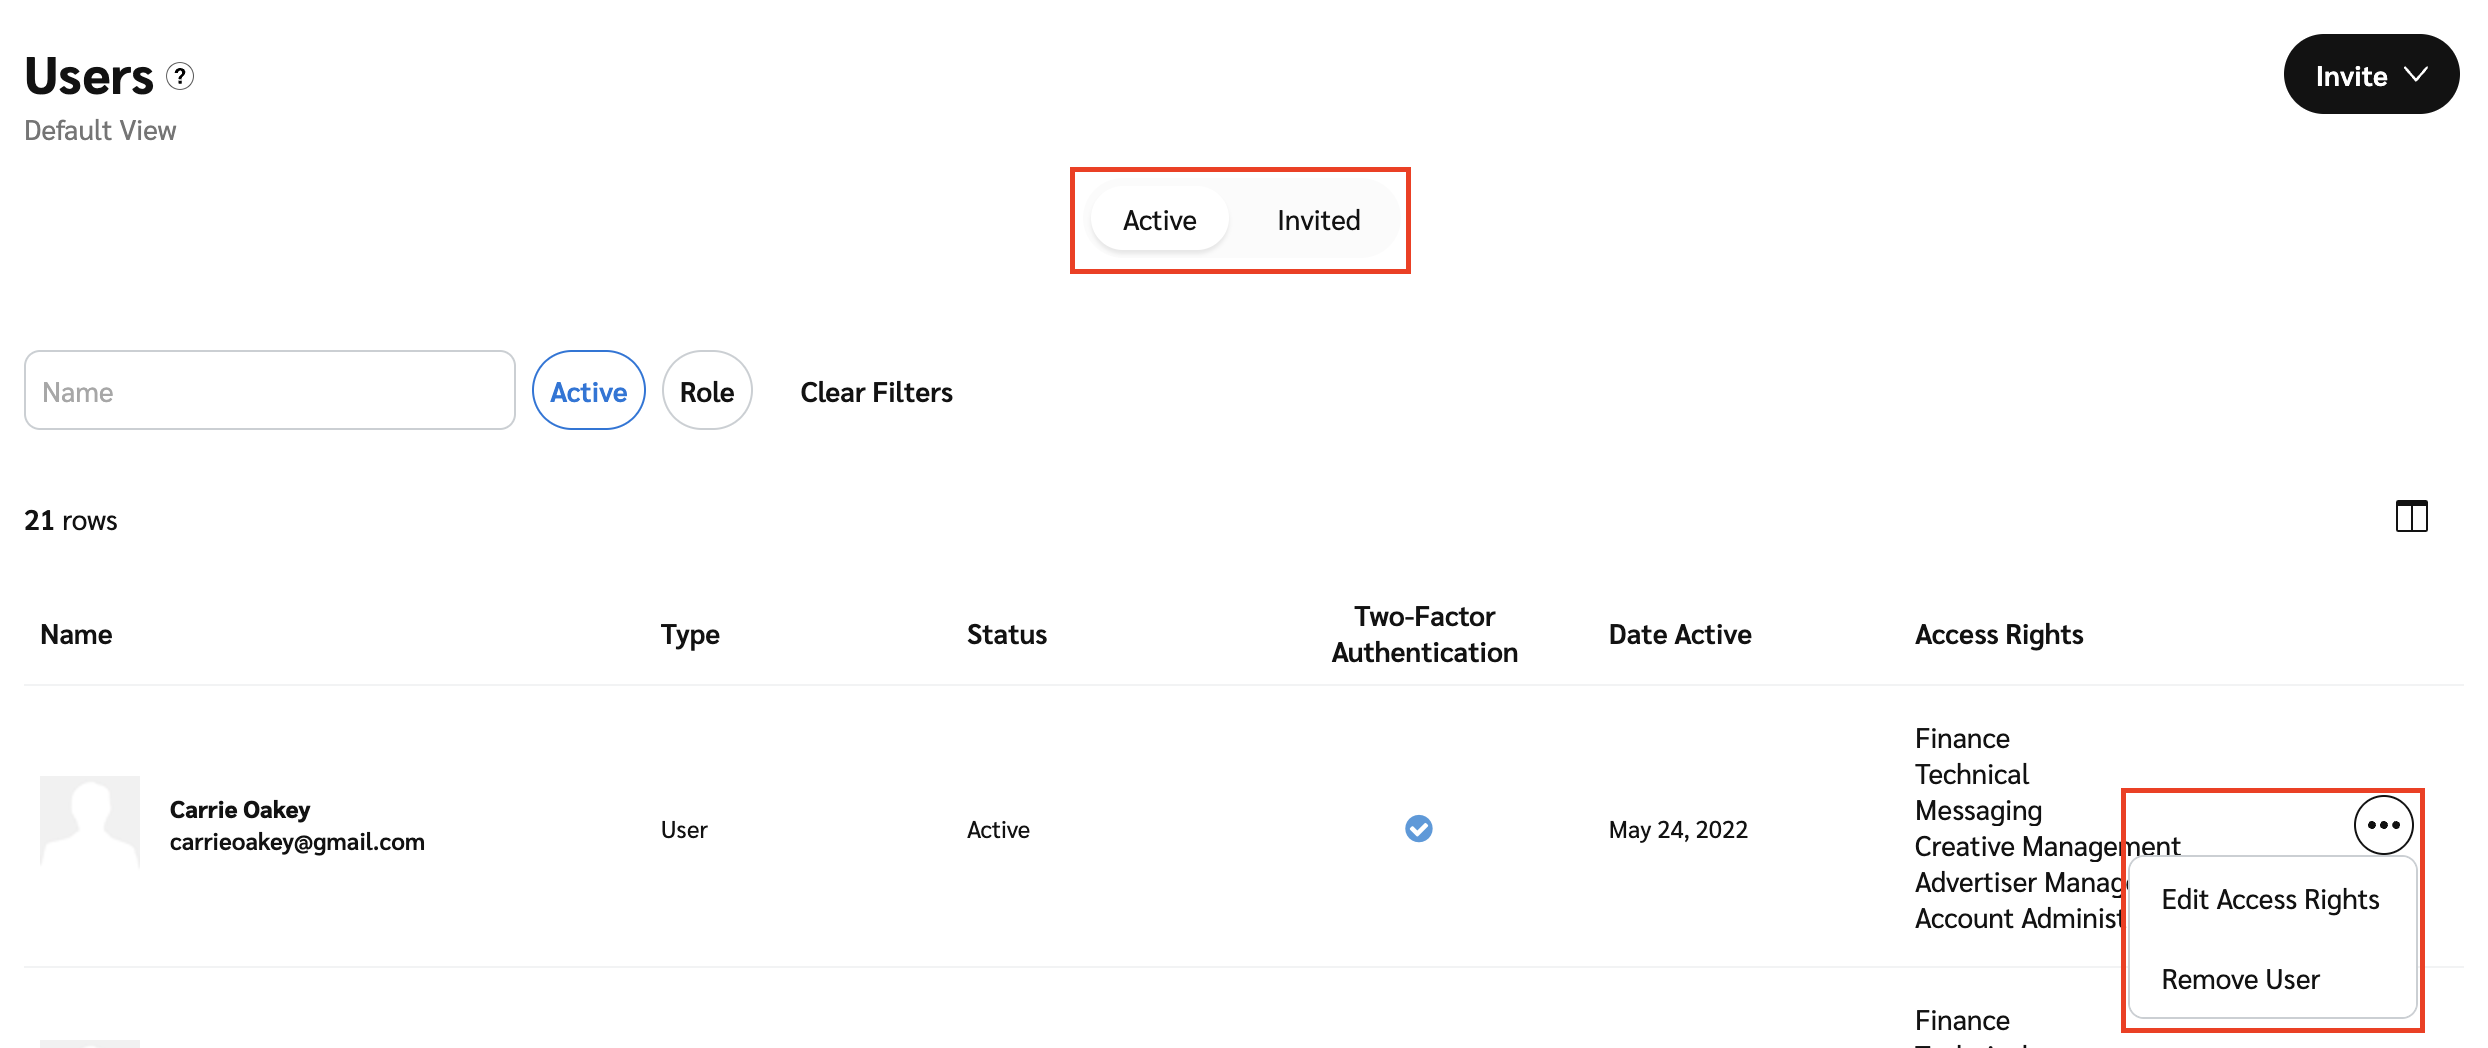
On the Account Users screen, find the name of the user and select
[More] → Edit Access Rights in their row.
You can edit access rights for both active and invited users.

Use the toggles and checkboxes on the Edit User Access Rights screen to customize the user's permissions.
Select Submit to finalize the permission changes.
Users can enable Two-Factor Authentication on their account for extra security. Learn how to Enable Two-Factor Authentication for your impact.com account.
From the top navigation bar, select
[User profile] → Settings.
In the General section, select Account Users.
On the Account Users screen under the Active tab, find the name of the user. Select
[Menu] → Remove User.
To revoke an invite, navigate to the Invited tab instead and select
[Menu] → Revoke Invitation.
Accept the warning to remove the user's access.
You'll need the agency's Account Id to invite them to manage your account. Reach out to your CSM (or create a support ticket) to discuss inviting an agency to manage your account.
From the top navigation bar, select
[User profile] → Settings.
On the left, under General, select Account Users.
In the top-right corner of your screen, select Invite
[Drop-down menu] → Invite Agency.
Enter the Agency Account Id and set the agency's Permissions.
Select Submit to send an invitation to the agency.
![[Legacy tooltip]](https://paligoapp-cdn-eu1.s3.eu-west-1.amazonaws.com/impact/attachments/f01cdffa431a4d75ff09c130b66974d4-4887b2bb2e3a3c247d937c7ed256303e.svg)