When deciding whether you'd like to accept or decline a partner's application, you might want to first determine whether the partner is a good fit. To open an applicant's profile:
From the left navigation menu, select
![[Engage] v2](https://paligoapp-cdn-eu1.s3.eu-west-1.amazonaws.com/impact/attachments/f01cdffa431a4d75ff09c130b66974d4-aa671735ec2b65af79961eaf59ab60af.svg) [Engage] → Partners → Applications.
[Engage] → Partners → Applications.On the Applications screen, find the partner you're interested in and select their name.
This will open a slide-out with a range of details about the partner and allow you to reach out to the partner.
Useful: To email a potential partner, select
![[Email]](https://paligoapp-cdn-eu1.s3.eu-west-1.amazonaws.com/impact/attachments/f01cdffa431a4d75ff09c130b66974d4-cca31a241674dbbd001d8c49733cc0d9.svg) [Email] and follow the Email details reference for guidance.
[Email] and follow the Email details reference for guidance.
You can email the partner by selecting the
![[Mail]](https://paligoapp-cdn-eu1.s3.eu-west-1.amazonaws.com/impact/attachments/f01cdffa431a4d75ff09c130b66974d4-3c42dc600b68f1554c9efdea4d8c7d23.svg) [Email icon] and proceeding with the following steps:
[Email icon] and proceeding with the following steps:Enter the From Name that the recipients will see when they receive the email.
Enter the Reply to email address that the recipient will contact when they respond to this email.
Enter the Subject of this email.
In the Content section, use the WYSIWYG editor to create or edit your email content. Hover over the icons to view formatting and content options (e.g., to upload an attachment, select
![[File]](https://paligoapp-cdn-eu1.s3.eu-west-1.amazonaws.com/impact/attachments/f01cdffa431a4d75ff09c130b66974d4-4f4d8f33ca8a26b47592ff2609de0091.svg) [File] and drop your file).
[File] and drop your file).Optionally, select Show special token options. This allows you to embed special tokens into your email content that dynamically populate values.
See the Special Token reference below for more info about these options.
Token
Description
{adcode<adid>}
The ad code for a particular ad (example: {adcode_12}).
{mpid}
The partner ID (e.g., 98765).
{mpname}
The partner company name.
{firstName}
The first name of the partner account user (e.g., John).
{lastName}
The last name of the partner account user (e.g., Doe).
{currentDay}
The current day (e.g., January 19, 2038).
{currentTime}
The current time including seconds (e.g., 19-Jan-2038 03:14:08 UTC).
{currentMonthYear}
The current month and year (e.g., January 2038).
Select Send.
This tab lists the partner's media properties, namely their:
Websites
Social media pages
Mobile apps
Email newsletters
Podcasts
Offline and other media properties

This tab shows the partner's self-provided description, their business model, promotional categories, available media kit downloads, related links, promotional areas, and finance details.
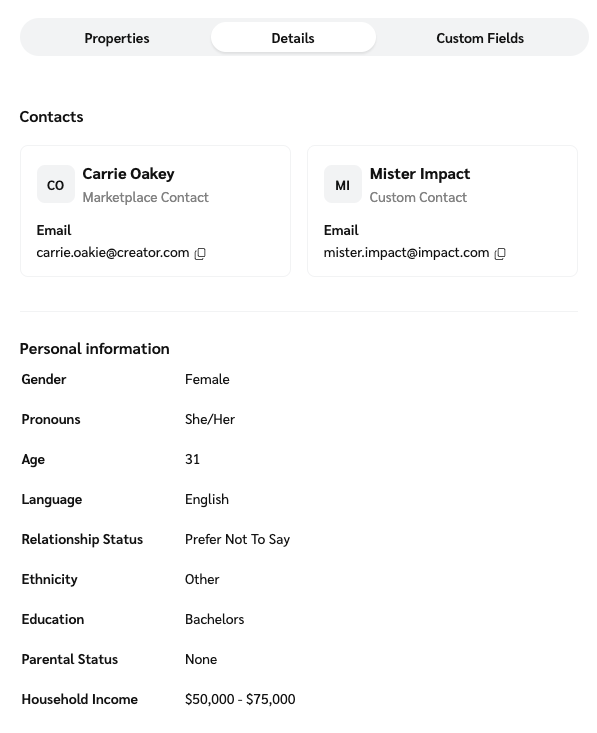
This tab is only visible if you have surveys enabled with custom fields. It shows the partner's responses to your custom field questions and any files they've attached.

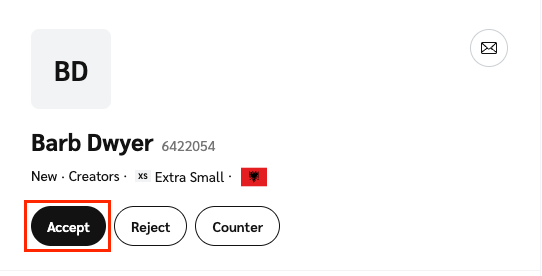
From the left navigation menu, select
[Engage] → Partners → Applications.On the Applications screen, find the applicant you're interested in and select their name, then on the slide-out modal, select Accept.
Alternatively, hover over the application in the Applications screen and select
![[More] vNext](https://paligoapp-cdn-eu1.s3.eu-west-1.amazonaws.com/impact/attachments/f01cdffa431a4d75ff09c130b66974d4-73f43076a692f2dcc8960037fabdca9c.svg) [More] → Accept.
[More] → Accept.
The Accept Application modal will appear. Review and update the following settings as necessary:
Contract Terms: Review the contract terms to which the partner applied, or send a new proposal. For more information, see Send a counter-proposal to a new partner.
Start Date: Select whether the contract should take effect Immediately or In the future.
Contract Length: Select whether the contract should be Ongoing or Temporary. If temporary, select an end date and fallback terms for when the contract expires.
Partner Groups: Type a partner group name to add the partner to a specified group.
Add selected applicants into additional programs:
![[Toggle on]](https://paligoapp-cdn-eu1.s3.eu-west-1.amazonaws.com/impact/attachments/f01cdffa431a4d75ff09c130b66974d4-84d1224fd3bb6ba94b899febe2021eaa.svg) [Toggle on] if you manage multiple programs and want to add the partner to more programs besides the one to which they applied.
[Toggle on] if you manage multiple programs and want to add the partner to more programs besides the one to which they applied.Mark applicants as Pre-Selected Partners:
[Toggle on] if you want to auto-accept the partner for any future programs you create.Message: Optionally, leave an acceptance message for the partner. The message will be sent as a default or customized welcome email.
At the bottom of the modal, select Accept.
From the left navigation menu, select
[Engage] → Partners → Applications.On the Applications screen, find the applicant you want to decline and select their name, then on the slide-out modal, select Reject.
Alternatively, hover over the application in the Applications screen and select
[More] → Reject.
The Reject Application modal will appear. Review and update the following settings as necessary:
Contract Terms: View the contract terms to which the partner applied.
Reason: Select a reason for declining the application to give the partner some insight into why they've been rejected.
Block partner from reapplying: Select whether you wish to block the partner from reapplying to the specific program or all programs. (Selecting All my programs only applies to programs to which you have access, and may not include all the available brand programs.)
Message: Optionally, leave a rejection message for the partner to receive via email. Here you can expand on why the partner didn't meet your requirements.
At the bottom of the modal, select Reject.

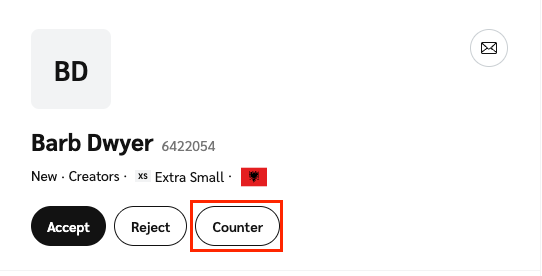
If a partner has proposed their own terms for joining your program, you can counter-propose with a different contract (e.g., a different set of terms that better fits the partner’s business model).
From the left navigation menu, select
[Engage] → Partners → Applications.On the Applications screen, find the applicant you want to decline and select their name, then on the slide-out modal, select Counter.
Alternatively, hover over the application in the Applications screen and select
[More] → Counter.
On the Counter screen, review and update the following settings as necessary:
Template Term: Use the dropdown to select the new Template Term.
Contract Dates: Set the contract start date and specify whether the contract should be Ongoing or Temporary. If temporary, select an end date and fallback terms for when the contract expires.
Approval Options: Select Propose and use the checkboxes to specify whether this counter-proposal has an expiration date, and whether the partner can react to your counter-proposal with a counter-proposal of their own.
Comments: Optionally, leave a comment to explain your counter-proposal.
At the bottom of the screen, select Save.