You can create custom email notifications that will alert you when a specific event occurs. Learn how to set up and customize these notifications.
From the top navigation bar, select
[Notifications].
In the upper-right corner of the notification panel, select Settings to edit notification settings.
From the top navigation bar on the Notifications Frequency Settings screen, select Custom Notifications.

You'll see a table with any currently existing notifications.
To modify a notification, hover over the table entry and select
[More] at the end of the row.
For more information on the modification options, see the Options reference below.
Option
Description
Edit
Modify the notification's Notification Details, Notification Rules, or Sharing settings.
Subscribe/Unsubscribe
Select this option to receive (or stop receiving) this notification.
Deactivate/Re-Activate
Select this option to disable (or enable) this notification.
Delete
Once a notification is deactivated, you can select this option to delete it.
From the top navigation bar, select
[Notifications].
In the upper-right corner of the notification panel, select Settings to edit notification settings.
From the top navigation bar on the Notifications Frequency Settings screen, select Custom Notifications.
On the Custom Notifications screen, select Create Custom Notifications
[Drop-down menu] in the upper-right corner.

You can choose between creating a Fraud notification or a Performance notification from the drop-down menu.
Choose the Account the notification should apply to, then add a Notification Name and Description.
These will appear when you receive the notification.
Add Notification Rules.
Optionally, select
[Checked box] Make Public if you want other account members to also access the notification.
Select Save to complete the creation process.
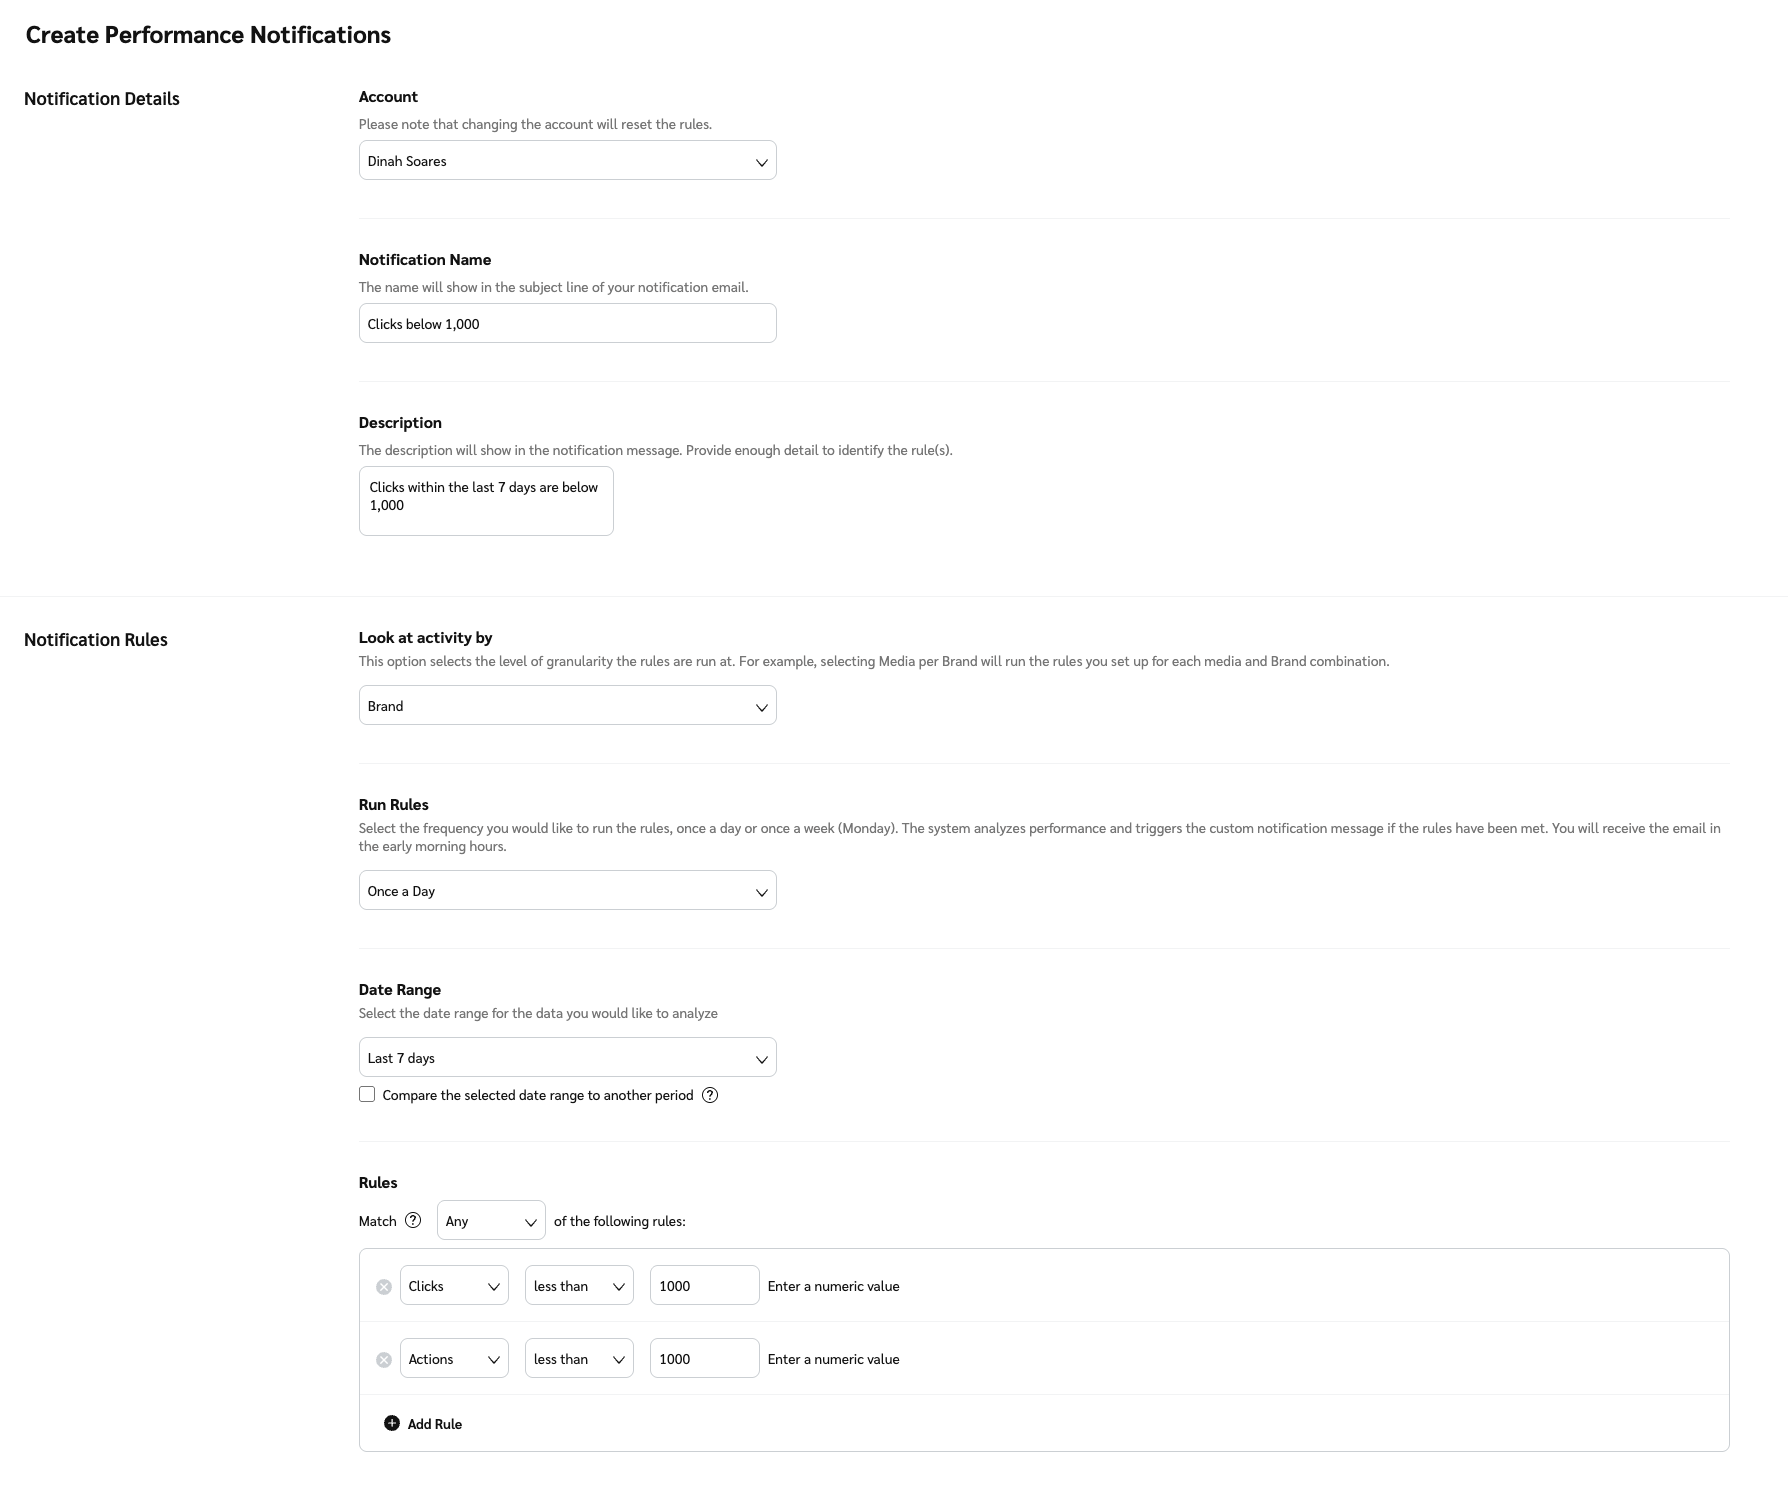
Example custom notificationHere's a quick example of a custom notification to get you started!
Scenario: Dinah Soares wants to receive an email notification whenever customer clicks amount to less than 1,000 in 7 consecutive days, in addition to whenever actions amount to less than 1,000 in 7 consecutive days. The notification should prompt her to contact her marketing team so that they can optimize their digital asset spend.
We suggest that she create a Performance notification using the following configurations:

![[Legacy tooltip]](https://paligoapp-cdn-eu1.s3.eu-west-1.amazonaws.com/impact/attachments/f01cdffa431a4d75ff09c130b66974d4-4887b2bb2e3a3c247d937c7ed256303e.svg)