There are two main types of action lifecycle postbacks. Global-level creates postbacks for your entire account and event-level creates postbacks for specific event types. Select the one that best suits your needs to learn more about the setup process.
Warning: For global-level postbacks, you should receive a postback whenever a "non-standard" event occurs, such as a modification or a reversal. Note that event-level postbacks will not fire non-standard action lifecycle events.
This section will cover creating postbacks for your entire account at once. Partners who only have one system that can receive and consume these postbacks or who want notifications for all non-standard events should set up global-level action lifecycle postbacks.
From the top navigation bar, select
[User profile] → Settings.
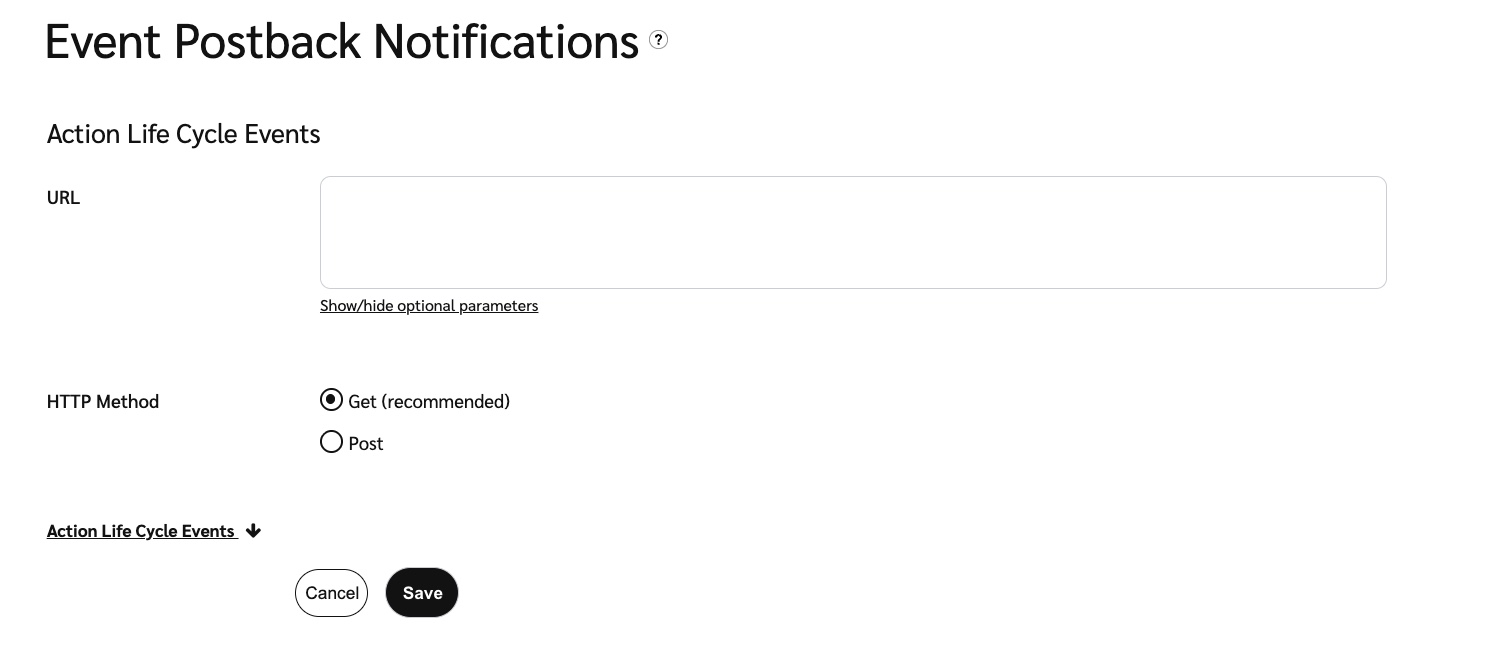
Under Technical, select Event Notifications.
Next to Action Life Cycle Events, select
[Edit].
Enter your server's URL. This is the URL to which impact.com will send postbacks.
Select your preferred HTTP method.
View some of impact.com's available body parameters.
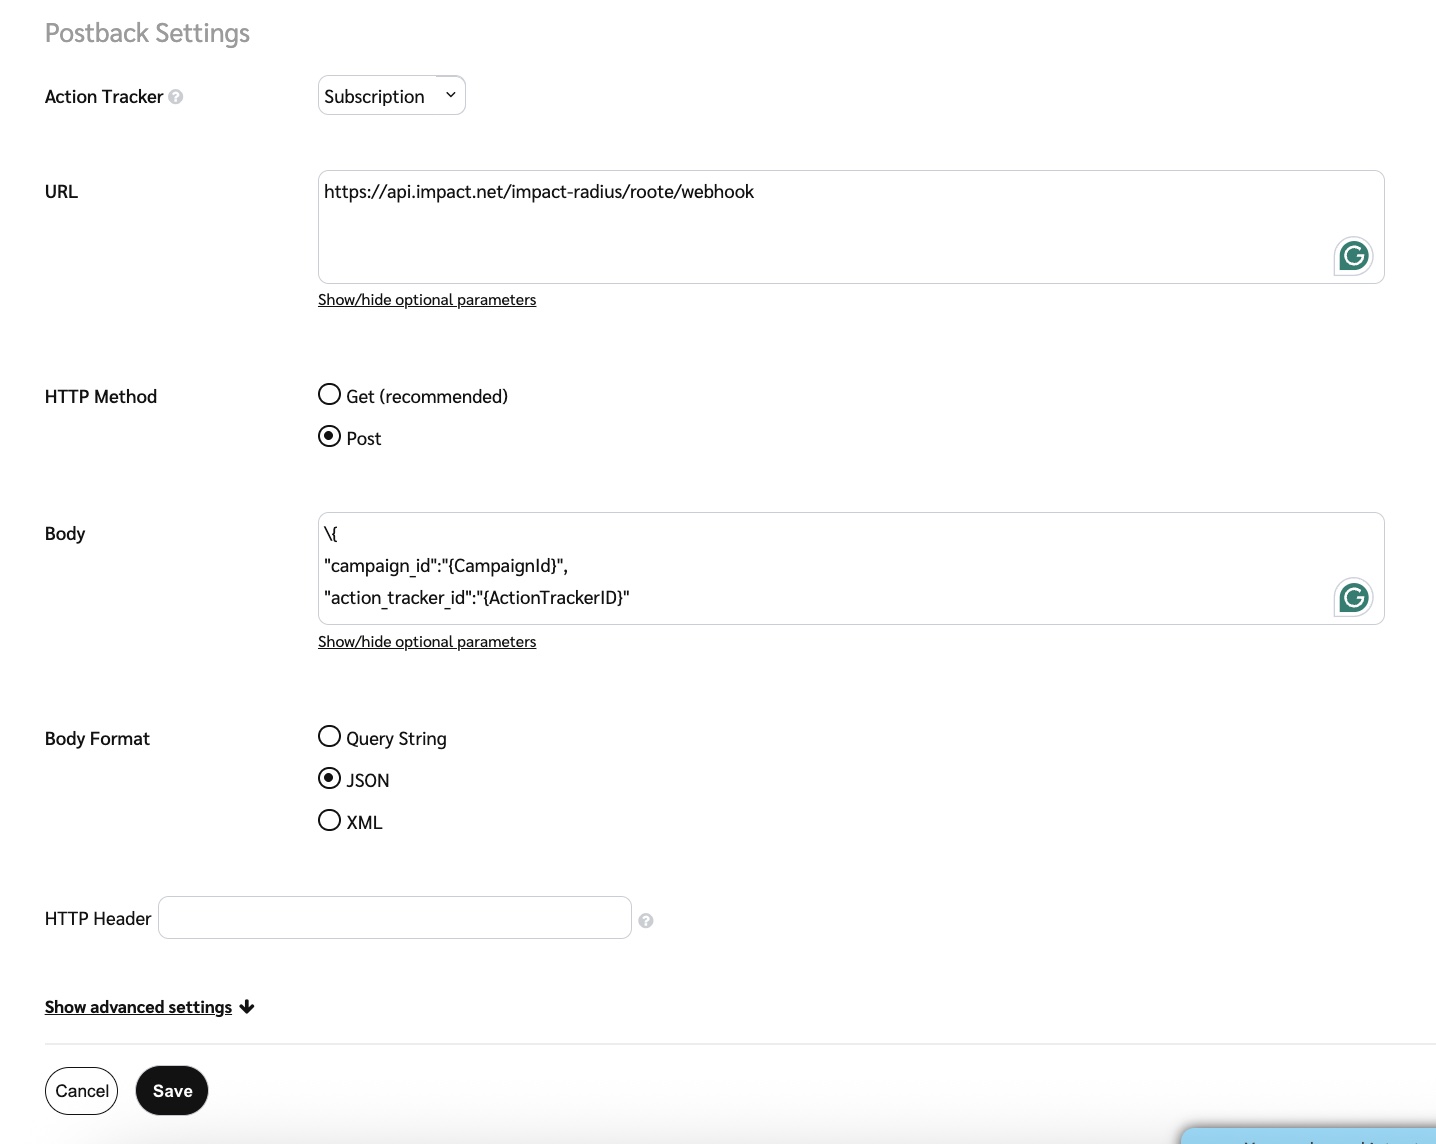
If you select POST, you will then enter the body of the request and select a Body Format. Below is an example of how you might want to map each data point for a JSON format. The keys in each key-value pair should be sourced from your own system’s setup, and the values will be your chosen coinciding data point that impact.com provides and should be entered in brackets
{ }.
Don't see a value you need? Reach out to your Account Manager (or contact support).
Select Action Life Cycle Events. These settings are optional.
Enter an HTTP Header. If multiple pairs are needed, separate them with a semicolon.
Enter a Minimum Delay between when a non-standard event happens and when the postback is generated and sent to your system.
Enter a rate limit for the Maximum Requests impact.com can make to your system per second.
Enter what you want the Success Response to a postback to be.
Enter what you want the Error Response to a postback to be.
Select Save.
Now that you have global-level postbacks set up, your system should begin receiving postbacks whenever non-standard events happen, regardless of the brand performing the non-standard actions. To learn how to test your new postback setup, view the Test an action lifecycle postback section below.
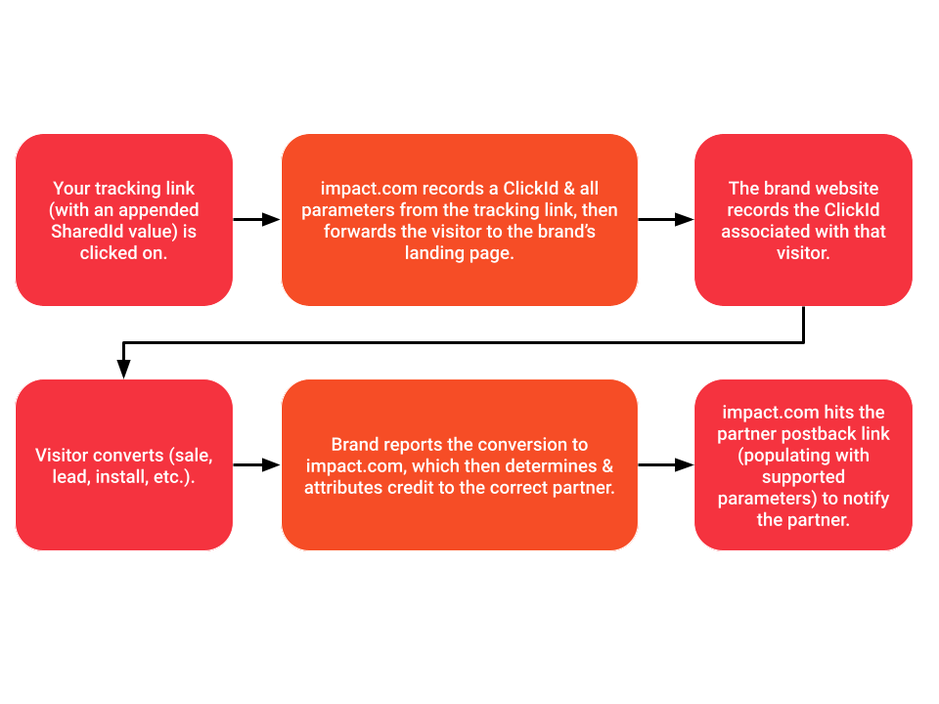
If you've configured dynamic variables for your tracking links, you can configure a Postback URL to your own server to notify you when actions occur and retrieve the dynamically populated value(s) associated with the action.
This example shows how to pass a SharedId value (a value you want to share with brands) to a parameter in a postback (MyParam). Some brands may require you to configure this.

A postback URL would look something like:
https://postback.example.com/postback?secure=ed7e46f&MyParam={SharedId}
The postback URL will populate the MyParam parameter with the value retrieved from SharedId.
This section will cover creating postbacks for specific event types that track when you drive actions. If you want to be more selective with the event types for which you receive postbacks, you should set up event-level action lifecycle postbacks.
From the top navigation bar, select Discover → My Brands.
Select the card for the brand that owns the postback you want to test.
Under the brand's name, select
[More] → Tracking Integration.
Near the top-right corner of the page, select Add Postback.
Select the event type (formerly action tracker) for which you want to set up action lifecycle postbacks.
Enter your server's URL. This is the URL to which impact.com will send postbacks.
Select your preferred HTTP method.
If you select POST, you will then enter the body of the request and select a Body Format. Below is an example of how you might want to map each data point for a JSON format. The keys in each key-value pair should be sourced from your own system’s setup, and the values will be your chosen coinciding data point that impact.com provides and should be entered in brackets { }.

View some of impact.com available body parameters.
Don't see a value you need? Reach out to your Account Manager (or contact support).
Select Show advanced settings. These settings are optional.
Enter a Minimum Delay between when a non-standard event happens and when the postback is generated and sent to your system.
Enter a rate limit for the Maximum Requests impact.com can make to your system per second.
Enter what you want the Success Response to a postback to be.
Enter what you want the Error Response to a postback to be.
Select Save.
Now that you have event-level postbacks set up, your system should begin receiving postbacks for the event type you selected in Step 5. To learn how to test your new postback setup, view the Test an action lifecycle postback section below.
If you've configured dynamic variables for your tracking links, you can configure a Postback URL to your own server to notify you when actions occur and retrieve the dynamically populated value(s) associated with the action.
This example shows how to pass a SharedId value (a value you want to share with brands) to a parameter in a postback (MyParam). Some brands may require you to configure this.

A postback URL would look something like:
https://postback.example.com/postback?secure=ed7e46f&MyParam={SharedId}
The postback URL will populate the MyParam parameter with the value retrieved from SharedId.
Once you set up an action lifecycle postback, regardless of what level it applies to, you should test it. You can either run a test postback in impact.com (available for event-level postbacks only) or perform a conversion.
If you set up an event-level postback, then you can test it within your impact.com account.
From the top navigation bar, select Discover → My Brands.
Select the card for the brand that owns the postback you want to test.
Under the brand's name, select
More → Tracking Integration.
From the Postback section, select
[Down arrow] Actions, then select Launch Test.
Confirm that URL of the postback is correct, then select Start test.
This test will not be performed in the impact.com web app. Instead, you will be performing an end-to-end test that follows a typical user journey. Make sure you notify your partnered brand that you will be performing the test.
From the top navigation bar, select Content → Assets.
Select an ad.
Below the ad name, select Get Tracking Link.
Select
[Toggle On] Tracking Parameters.
Enter Sub IDs or a Shared ID as required. Each field requires at least one entry.
Skip this step if you already have values in these fields.
Optionally, select a Property from the dropdown list.
Select Save.
Select Copy Tracking Link.
Paste the link into a fresh browser window.
Complete the action.
After about 15 minutes, check your system for the postback that was generated from this test action.
15 minutes is usually how long action processing takes.
You will also be able to see this new pending action on the Pending Actions screen. If you see the action on the Pending Actions screen but have not received a postback yet, double-check your postback setup.
Ask your brand to reverse the action.
Check your system for the postback that was generated from this reversal.
If you see the reversed action on the Reversed Actions screen, but have not received a postback, double-check your postback setup.
Error | Description |
|---|---|
Missing mandatory parameter | Your server is likely expecting a value instead of a variable. Modify your Postback URL to pass a test value (e.g., "12345678" instead of |
Case-sensitive variables | Dynamic variables are case-sensitive and must be exact, meaning that |
Access Denied | Most Postback servers have a security token or value that must be passed along with the dynamic variables. Work with your website's technical team (or refer to your website provider's documentation) to learn about the token or security value needed to access the server. |
Note: If you cannot find any issues with your postback setup but are still not receiving them, contact support. impact.com can check if postbacks are being generated, what the response code for them is, as well as the body for each postback. This information might help you successfully debug your setup
![[Legacy tooltip]](https://paligoapp-cdn-eu1.s3.eu-west-1.amazonaws.com/impact/attachments/f01cdffa431a4d75ff09c130b66974d4-4887b2bb2e3a3c247d937c7ed256303e.svg)