Use Partner Funds Transfers (PFTs) to send money to your partners outside of a contract's payout terms. Partner Funds Transfers are used to make bonus payouts to partners with outstanding commissions.
PFTs are billed against the Payment Processing Volume (PPV) of the month that they are processed (captured into the system), not the invoice month, nor the scheduled month, nor the clearing month.
Example: If you schedule a PFT in January with a clearing date in March, the PFT value will be counted towards your payment processing volume for January.
You can view your scheduled PFTs via two reports: Upcoming Partner Payments Report and Usage Volume by Status & Transaction Type.
Warning: Setting up a Partner Funds Transfer incorrectly may cause your impact.com account to go into default. If you have any concerns or want to verify your setup, contact your CSM (or contact support).
Create a partner funds transfer
 This feature is only accessible to specific impact.com editions or add-ons. Contact us to upgrade your account and get access!
From the left navigation menu, select
![[Menu]](https://paligoapp-cdn-eu1.s3.eu-west-1.amazonaws.com/impact/attachments/f01cdffa431a4d75ff09c130b66974d4-d3b5cc4952c19da1607fade39f63066b.svg) [Menu] → Finance.
[Menu] → Finance.From the left navigation menu, select Transfers.
In the top-right corner, select Create Transfer.
Proceed by completing the following fields:
Transfer to: From the
![[Drop-down menu]](https://paligoapp-cdn-eu1.s3.eu-west-1.amazonaws.com/impact/attachments/f01cdffa431a4d75ff09c130b66974d4-d6b35853a9aa1f1fe6bd66da29bd09fa.svg) [Drop-down menu], select the partner who will receive the funds.
[Drop-down menu], select the partner who will receive the funds.Program: From the
[Drop-down menu], select from which program this transfer should originate.Event Type: To associate this transfer with a specific event for reporting, select the
![[Checked box]](https://paligoapp-cdn-eu1.s3.eu-west-1.amazonaws.com/impact/attachments/f01cdffa431a4d75ff09c130b66974d4-aee23966cd91ec2a9f9985361c43ab1a.svg) [Checked box] and choose the event type from the [Drop-down menu].
[Checked box] and choose the event type from the [Drop-down menu].

Complete the Transaction Details section.
Field Name
Description
Amount
Enter the amount (and the currency in which it will be sent) that will be sent to the chosen partner.
If any taxes or VAT needs to be added to the transaction, or if the chosen partner's account currency is different from your account's or the transaction's, those amounts will appear here.
Optionally, select the
[Checked box] if you do not want to apply indirect tax on the payment.
Type
From the
[Drop-down menu], select the type of PFT that will be sent to the chosen partner.In the Invoice Details section, set up when a transfer should occur.
Field
Description
Invoice Month
The invoice month chosen will cause the transfer to be included in the invoice that is generated after the end of that invoice month.
For example, if you choose May as the invoice month, the transfer will appear on the invoice generated in June.
The invoice month doesn’t need to be directly after the activity date; if May is selected as the invoice month, the activity date can fall between February 1 and June 30.
Activity Period
When processing a PFT, you can choose a start date and an end date. Both dates are included in the selected period.
By default, only a single date is selected — the end date will match the start date unless you change it. You can set an end date up to 12 months after the start date.
The cost will be spread evenly across the full date range for performance reporting.
Transfer Date
View on which date this transfer will occur.
Transfer Now
Select the
[Checked box] if you want to send the partner funds transfer immediately.If you choose this option and set up the transfer without sufficient funds in your impact.com funding account, you'll be notified of the shortfall, and continuing will put your impact.com account into default.

Optionally,
![[Toggle on]](https://paligoapp-cdn-eu1.s3.eu-west-1.amazonaws.com/impact/attachments/f01cdffa431a4d75ff09c130b66974d4-84d1224fd3bb6ba94b899febe2021eaa.svg) [Toggle on] Reporting Details to add any reporting fields to this transfer for your account's reporting. After adding the field, enter the field value.
[Toggle on] Reporting Details to add any reporting fields to this transfer for your account's reporting. After adding the field, enter the field value.Optionally,
[Toggle on] Comment to add any notes about the transfer that only other brand account members will see. The chosen partner will not be able to see this note.Select Next.
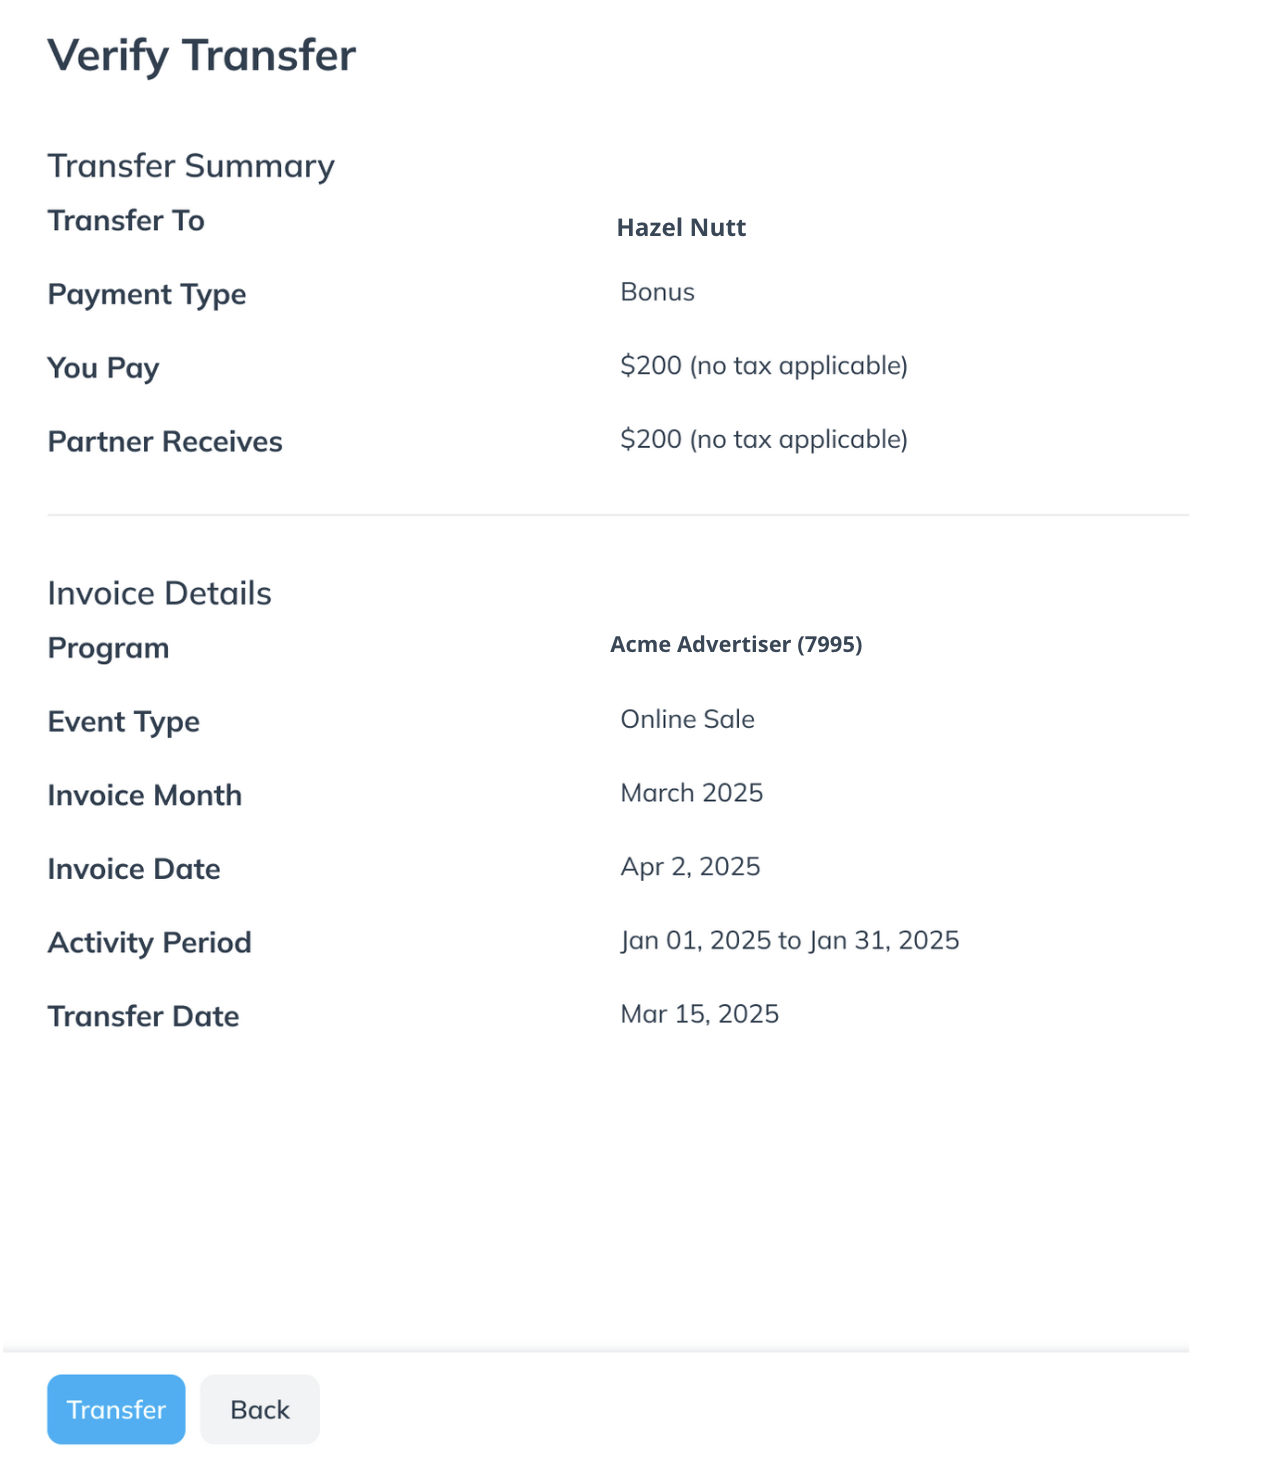
Confirm the details of the transfer, then select Transfer.
After you select Transfer, you will be redirected to the Transfers screen. You can select a Transfer row to view created transfers or select
![[More]](https://paligoapp-cdn-eu1.s3.eu-west-1.amazonaws.com/impact/attachments/f01cdffa431a4d75ff09c130b66974d4-e177a55169a53da65352a87e441df82e.svg) [Menu] → Download PDF to download the transfer confirmation.
[Menu] → Download PDF to download the transfer confirmation.
Learn more about viewing transfer details and filtering them.