impact.com allows you to create test actions that you can use to check that your tracking integration and confirm your partners’ tracking links are working correctly.
In order to create and test actions, you should have a set of template terms with a Default payout set to 0% in order to test conversions on your site. Learn more about Creating Template Terms.
[PXA-How-to-test-an-action-on-impact.com]
From the left navigation bar, select
[Engage] → Transactions → Test Actions.
Select Start New Test at the top-right of the page.
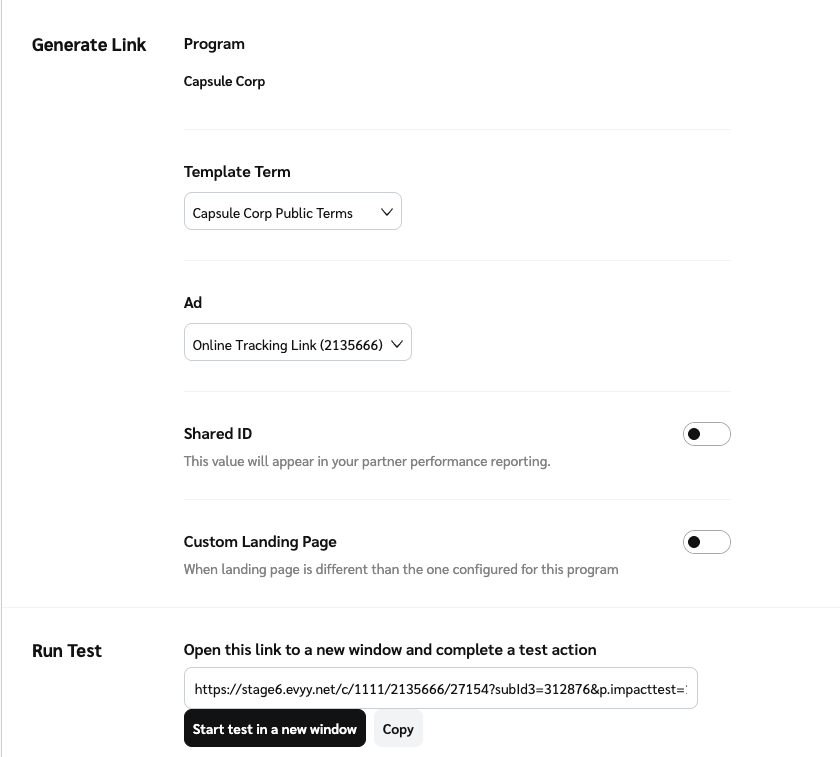
Fill in the required fields.
Refer to the Fields reference below for more information about the required fields.
Field
Description
Template Term
Select your test terms. Learn more about Creating Template Terms.
Ad
Specify an additional parameter you can use to dynamically pay your partners.
Shared ID
[Toggle icon] Shared ID and enter an ID, if you want one to appear in your partner performance reporting. The Shared ID is a tracking value shared with the brand.
Custom Landing Page
[Toggle icon] Custom Landing Page and enter the custom page's URL.
Start the test using the generated test link. You can select Copy to copy the URL to your clipboard, or select Start test in new window to open the test URL in a new tab.
From the left navigation bar, select
[Engage] → Transactions → Test Actions.
Refer to the Column reference below for more information about this screen.
Column
Description
Status
The test action’s status.
Action Date
The date of the test action.
Order Id
The test action’s unique order identifier.
Event Type
The type of action event.
Shared Id
An additional parameter that you can use to dynamically pay your partners.
Promo Code
The promo code associated with the test link, if one exists.
Locking Date
The date on which the generated actions will lock.
Revenue
The amount of revenue earned by the test action.
Payout
The payout accrued by the test action.
Hover your cursor over a test action and select
[More] → View Details to open the Test Event Details screen.
Here, you can approve or reject the test action, or view more information about the event. Refer to the Attribute reference for information about some of the available information on the Test Event Details screen.
Attribute
Description
Test Status
Current status of the test action.
Action Event Date
The date of the test action.
Action Locking Date
The date on which the generated actions will lock.
Total Revenue
The amount of revenue earned by the test action.
Total Payout
The payout accrued by the test action.
Processing Latency (seconds)
The amount of time, in seconds, that the test action took to process.
Advertiser ID
The Id of the brand (also known as an advertiser).
Event Type
The specific action by your partners' audience that was tracked, e.g., Online Sale/CPA, App Install, etc.
Order ID
The unique identifier of the test action order.
Batch ID
The unique identifier for a batch file.
Landing Page Url
The landing page URL that was specified during the creation of the test action.
Click ID
The clickId associated with the test action.
Ad ID
The unique ID that impact.com has assigned to the promotional asset.
Region
The state/region that impact.com believes the customer is based in from the IP address at the time of the conversion.
Country
The state/region that impact.com believes the customer is based in from the IP address at the time of the conversion.
Referring URL
The URL a consumer came from.
At the top right of the page, select Approve or Reject to alter the status of the test action.
