When participants register for your program through your microsite, we collect and store their registration data via forms. When you set up a microsite using auto setup, a form will be created automatically. This help article explains how to set your registration form’s submission rules and map additional form fields.
You can set submission handling rules for your form so that someone on your team is notified whenever there’s a new submission attempt. This can be useful if you want to track when you receive new participants or get notified when someone attempts to register, but the submission fails. You also have the option to automatically add or remove newly updated participants from a specific user segment.
From the left navigation menu, select
[Engage] → Data Sources → Forms.
Hover over the registration form you want to customize, then select Edit.
On the Update Registration Form page, scroll down to the When the form succeeds.
Choose who receives an email when someone signs up successfully.
Choose the user segment (if any) that the participant should be added to after registering successfully.
Below the When the form fails section, choose who receives an email when an attempted submission fails.
Select Update Registration.
When your microsite registration form is created, you can configure Advocate participant fields to be set to form values or static data during registration. Your microsite comes with the following default microsite form fields: First Name, Last Name, Email, and Password. You can modify the registration form to collect additional information about your microsite users, like Phone Number, Country/Location, Business Type, etc. You can also add a terms and conditions checkbox to prompt users to accept their terms.
From the left navigation menu, select
[Engage] → Content.
On the Microsite card, select Edit content.
This action opens the Microsite editor and displays the Microsite slideout.
Below the Logged Out Layout section, select Register.
In the Component menu, select Add → Microsite Components.
Select the component suited for collecting additional data, then select Add to Additional Fields.
In the Component menu, ensure you’ve selected the Edit tab, then complete the following information:
Required error message: The message displayed when a required field is missing information.
Input label: The name of the additional field that will be displayed on the registration form.
Input name attribute: The additional field’s key for mapping the additional field to user data.
[Toggle on] Optional if it isn’t a required field.
From the Input type drop-down menu, select how the field collects information.
Select Save.
From the left navigation menu, select
[Engage] → Data Sources → Forms.
Hover over the registration form you want to customize, then select Edit.
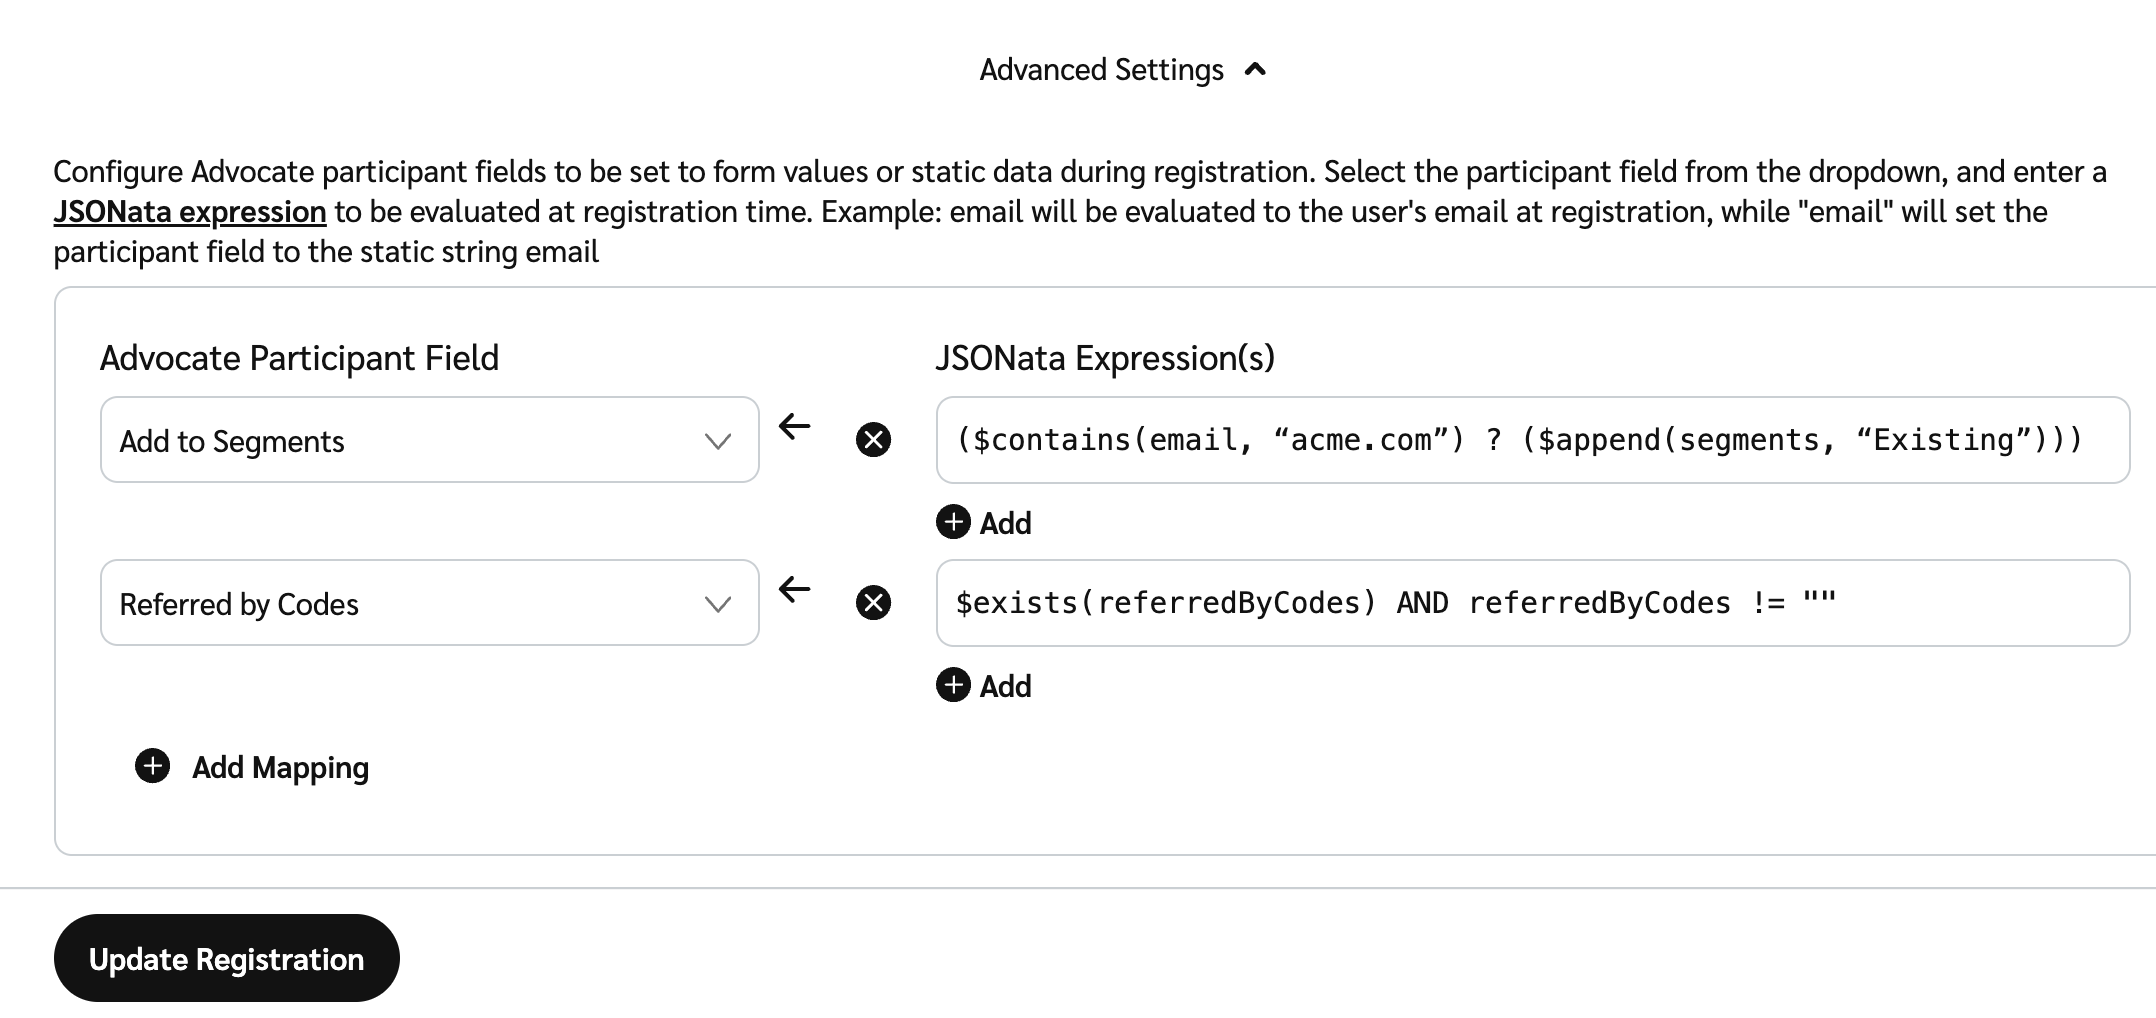
On the Update Registration Form page, select Advanced Settings.
Below Advocate Participant Field, select Add Mapping.
Select an Advocate value from the drop-down list and enter a mapping value in the JSONata Expression(s) text box to be evaluated at registration time.
Add to Segments: Configure specific rules for adding participants to segments after registration.
Example:
($contains(email, “acme.com”) ? ($append(segments, “Existing”)))Custom Field: Map a custom value you want to capture on the registration form.
Example: cellPhone →
cellPhoneCountry: Capture the user's country code.
Example: Country →
countryCodeLocale: The value of the locale form field named and mapped to the participant’s locale field.
Example: Locale →
localeReferred by Codes: Capture the referrer's unique referral code.
Example:
$exists(referredByCodes) AND referredByCodes != ""Referable: Indicate if a user can be referred or not.
Example: Referable →
false
Select Update Registration when you’re done.
To view your registration form submissions, refer to View Your Registration Form Submissions.
