> For the complete documentation index, see [llms.txt](https://help.impact.com/llms.txt). Markdown versions of documentation pages are available by appending `.md` to page URLs; this page is available as [Markdown](https://help.impact.com/partner/zh/ni-xiang-liao-jie-shen-me/account-management/account-settings/connect-media-properties/connect-your-instagram-account-to-impactcom.md).
# 将你的 Instagram 账户连接到 impact.com
本文将引导您通过 4 个简单步骤,将您的 Instagram 账号链接到 Facebook 页面。
{% hint style="warning" %}
**重要:** 由 Meta 旗下的 Instagram 要求您先拥有一个已关联的 Facebook 页面,才能将您的 Instagram 连接到 impact.com。A *Facebook 页面*,不同于个人 *Facebook 个人主页*,是您业务的公开门面,可由多人管理。
{% endhint %}
{% stepper %}
{% step %}
#### 创建 Facebook 页面
您只需几分钟即可创建一个 Facebook 页面,即使是一个极简页面也足够。请按照以下步骤在桌面端或移动端创建该页面。
{% tabs %}
{% tab title="在桌面端" %}
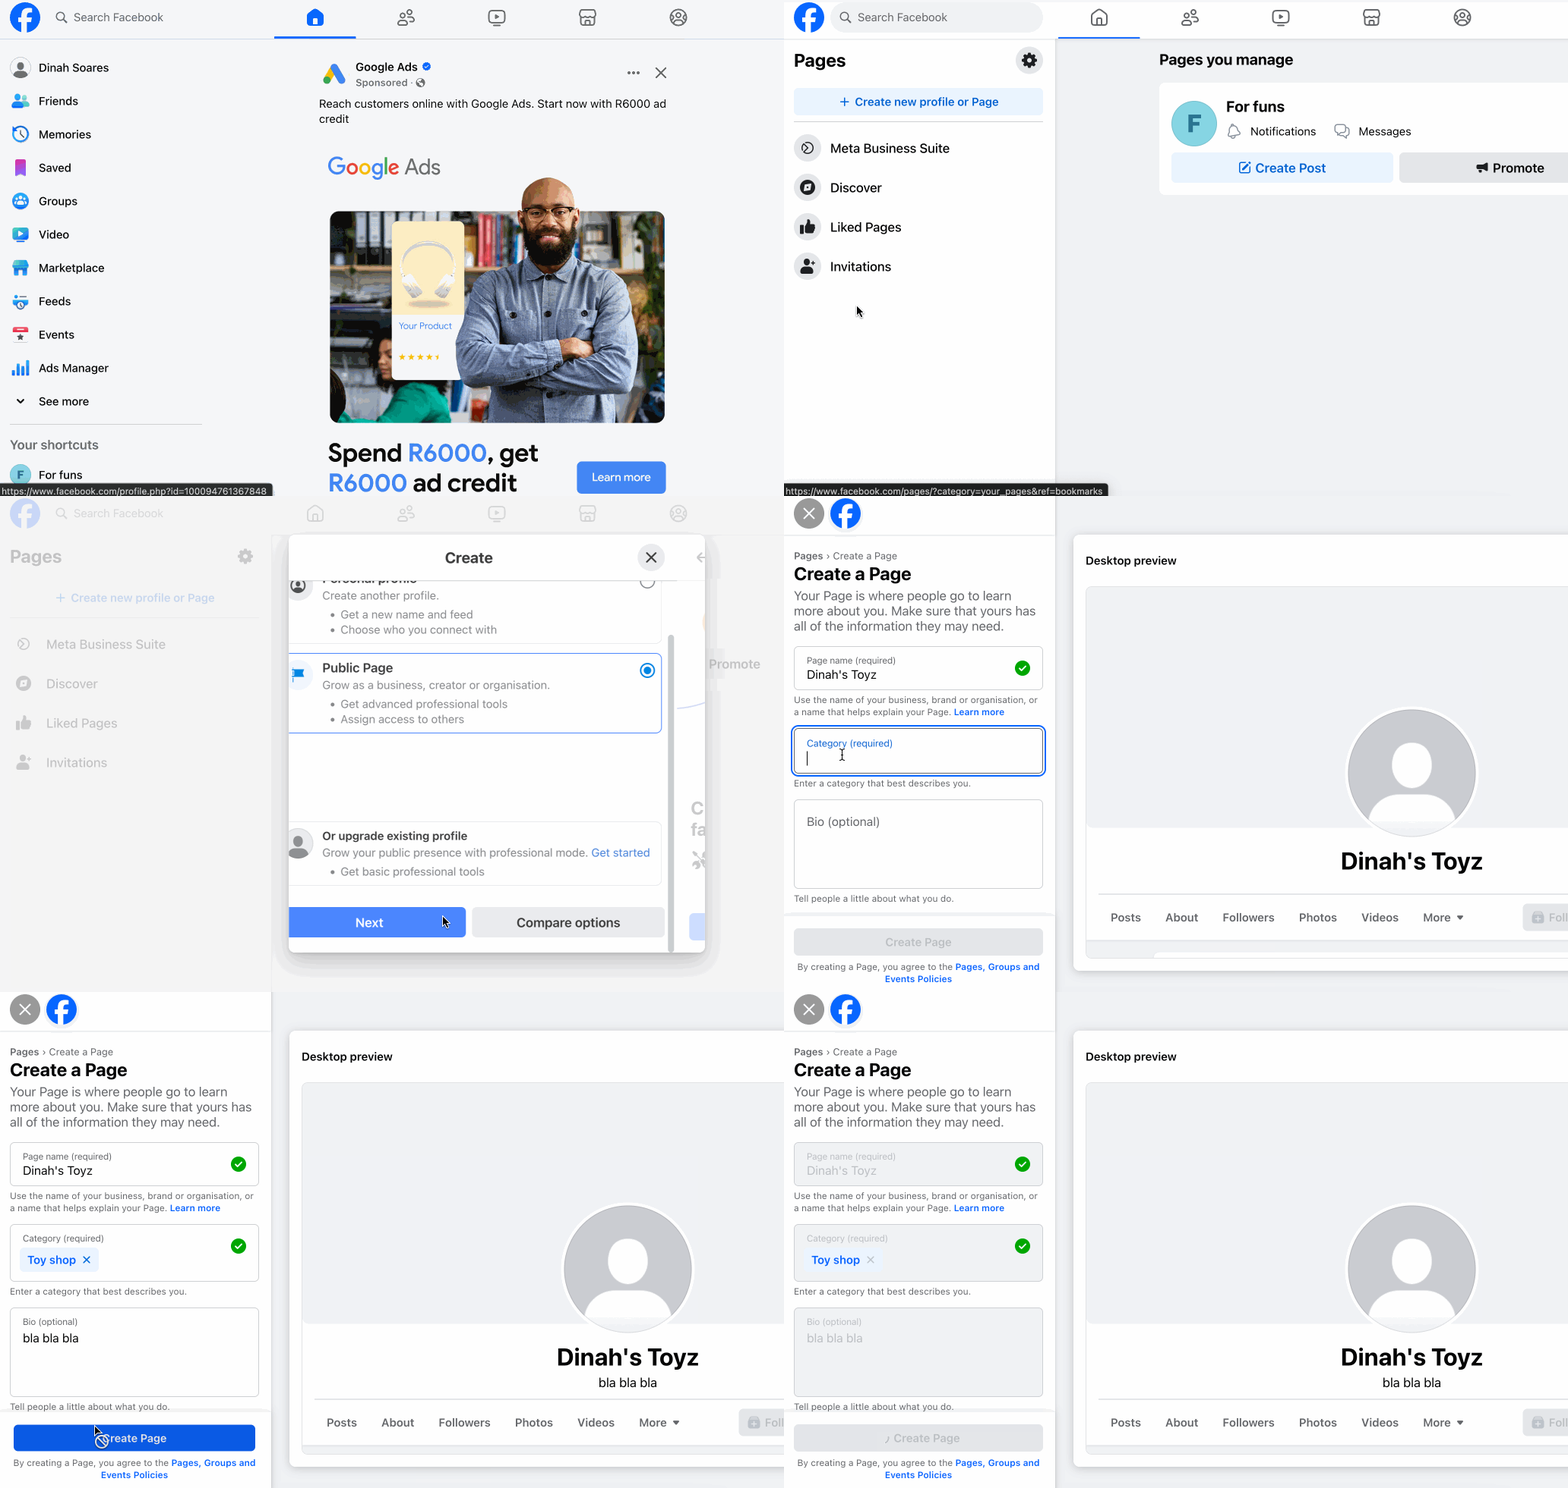
1. 登录您的 Facebook 账号。
2. 请确保您位于 *首页* 选项卡,然后从左侧导航菜单中选择  **\[查看更多]** → **页面**.
3. 选择 **创建新个人资料或页面**.
4. 在 *创建* 弹窗中,选择 **公共页面 → 下一步 → 开始使用**.
5. 输入一个 *页面名称*, *类别*,以及 *简介*.
6. 选择 **创建页面**.
{% endtab %}
{% tab title="在移动端" %}
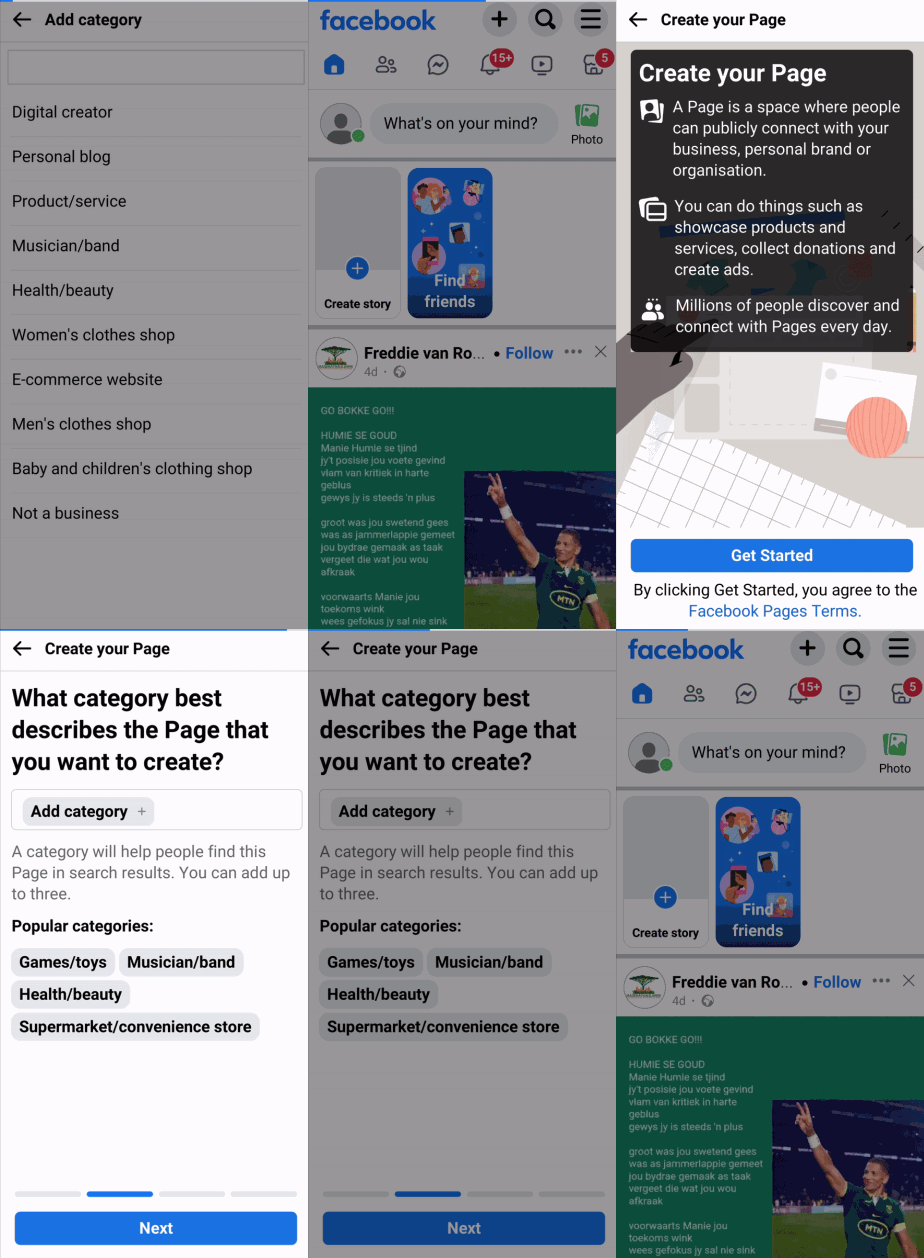
1. 登录您的 Facebook 账号。
2. 请确保您位于 *首页* 选项卡,然后选择  **\[菜单]** → **页面**.
3. 选择  **创建** → **开始使用**.
4. 输入一个唯一的 *页面名称*.
5. 选择 **下一步** → **添加类别** 并选择合适的类别。
6. 继续选择 **下一步** 直到您 **完成**.
{% endtab %}
{% endtabs %}
* 了解更多关于如何 [创建 Facebook 页面](https://www.facebook.com/business/help/1199464373557428) .
{% endstep %}
{% step %}
#### 将您的 Instagram 转换为专业账号
如果您拥有个人 Instagram 账号,必须先将其转换为专业账号,然后才能将其链接到您的 impact.com 平台。请按照以下步骤在桌面端或移动端完成此操作。
{% tabs %}
{% tab title="在桌面端" %}
1. 登录您的 Instagram 账号。
2. 在左下角,选择  **\[更多]** →  **\[设置]**.
3. 在 *设置* 菜单,选择 **账号类型和工具**.
4. 选择 **切换到专业账号** → **创作者** → **下一步**.
5. 在 *创作者* 页面中,选择 **下一步**.
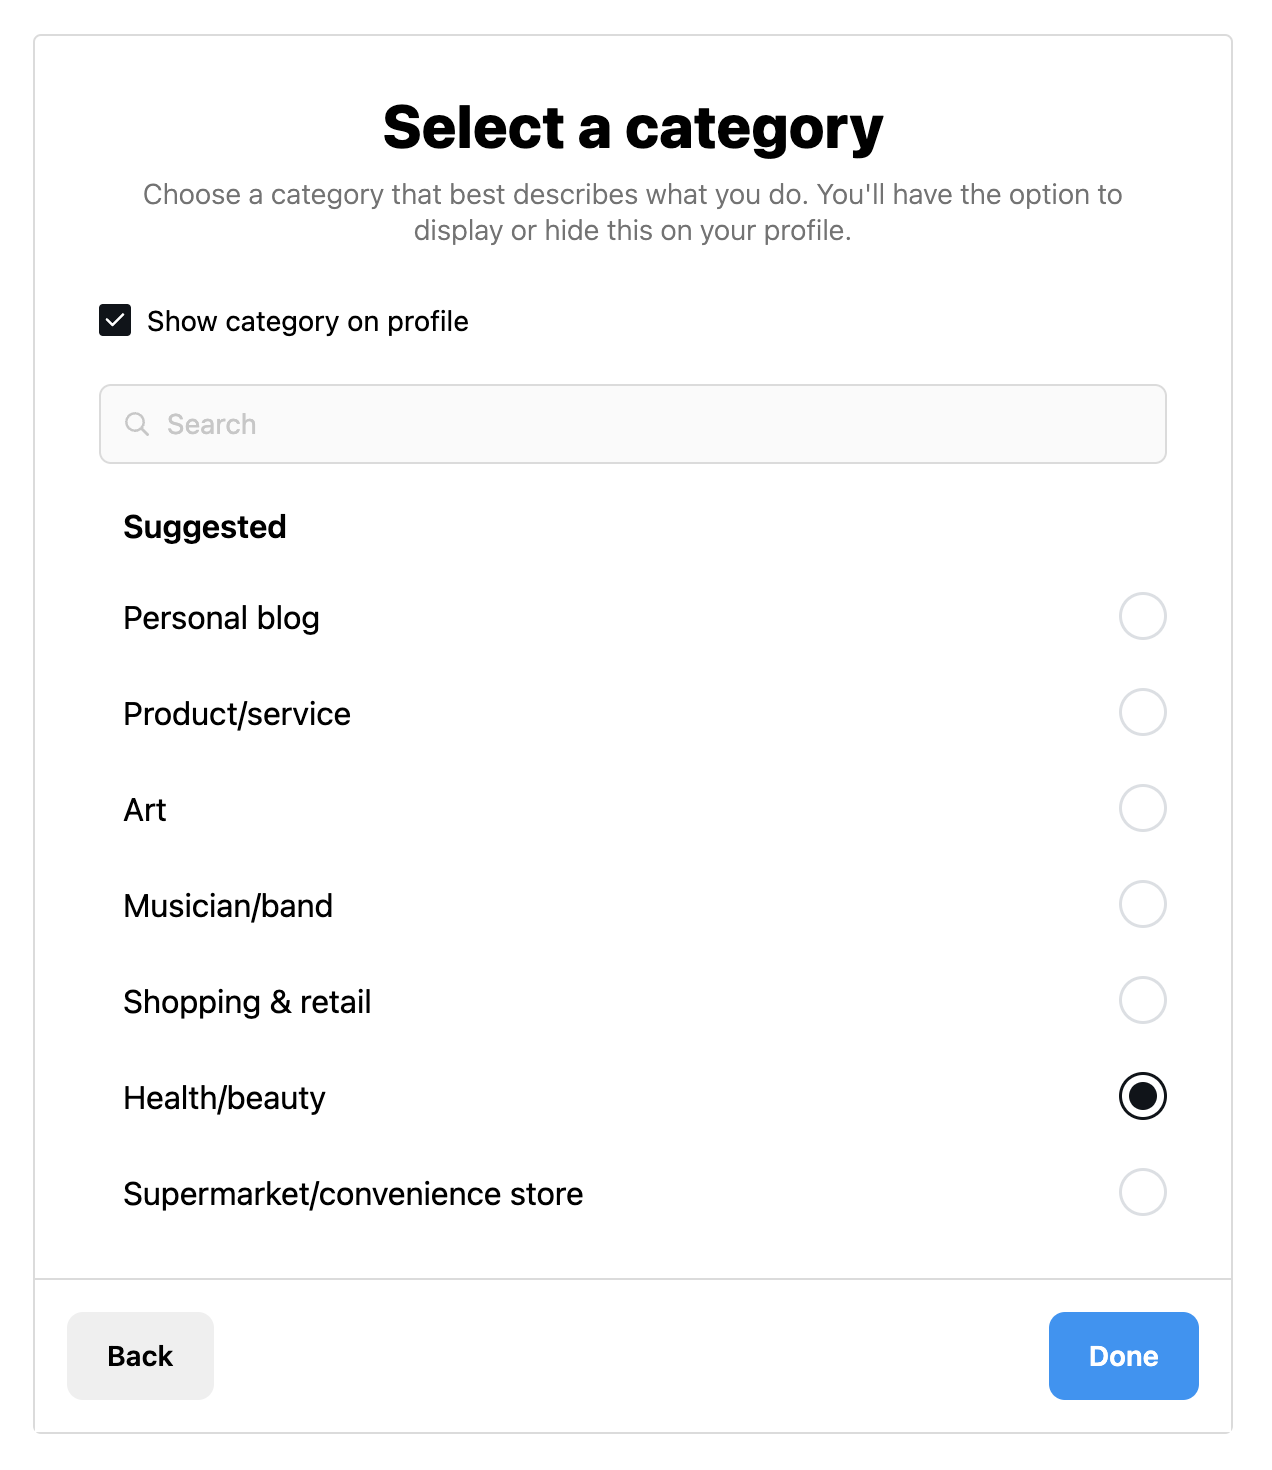
6. 指定您属于哪类创作者(例如:健康/美妆)。
* 也可选择  **\[已勾选复选框]** **在个人主页显示类别**.
7. 选择 **完成**.
* 了解更多关于如何 [在桌面端的 Instagram 上设置创作者账号](https://help.instagram.com/2358103564437429/?cms_platform=www) .
{% endtab %}
{% tab title="在移动端" %}
1. 登录您的 Instagram 账号。
2. 选择  **\[用户个人资料]** →  **\[更多]**.
3. 滚动到 *面向专业人士* 部分,然后选择 **账号类型和工具**.
4. 选择 **切换到专业账号** → **下一步**.
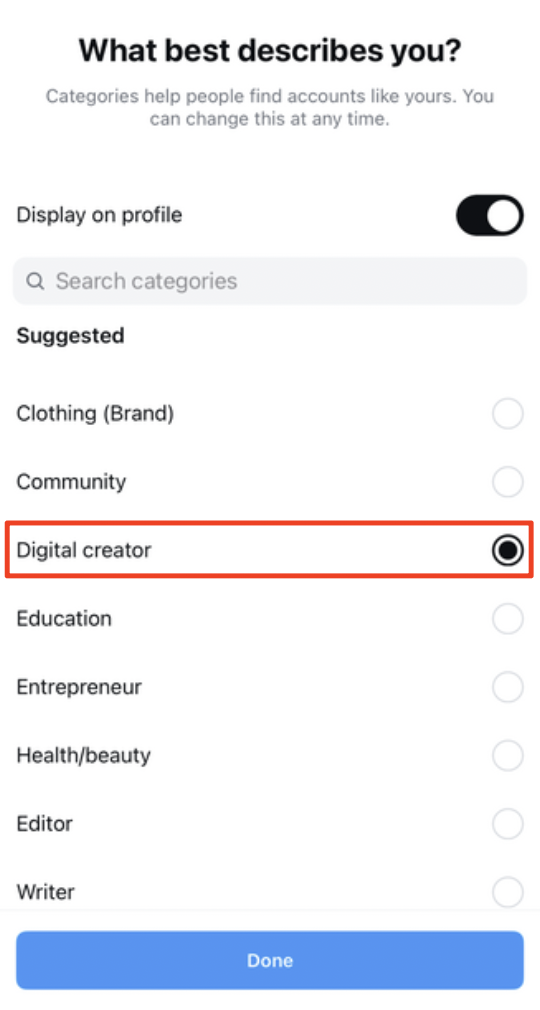
5. 在 *最能描述您的是什么?* 部分,选择 **数字创作者** → **切换到专业账号**.
* 可选地,  **\[开启切换开关]** **在个人主页显示**.
6. 在 *您是哪种类型的专业人士?* 部分,选择 **创作者** → **下一步**.
7. 继续设置您账号的其余部分。
* 了解更多关于如何 [在移动设备上的 Instagram 上设置创作者账号](https://help.instagram.com/2358103564437429/?cms_platform=android-app) .
{% endtab %}
{% endtabs %}
{% endstep %}
{% step %}
#### 将您的 Facebook 页面链接到您的 Instagram
在 impact.com 上验证之前,您需要先将 Facebook 页面链接到您的 Instagram 账号。
{% hint style="warning" %}
**重要:** 将 Facebook 页面链接到 Instagram 只能通过桌面端完成。
{% endhint %}
1. 登录您的 Facebook 账号。
2. 在屏幕右上角,选择  **\[用户个人资料]** 并切换到您的页面。
3. 进入您的 Facebook 页面后,选择  **\[用户个人资料]** 右上角的
4. 选择 **设置与隐私** → **设置**.
5. 在左侧菜单中, *权限* 部分,选择 **已关联账号**.
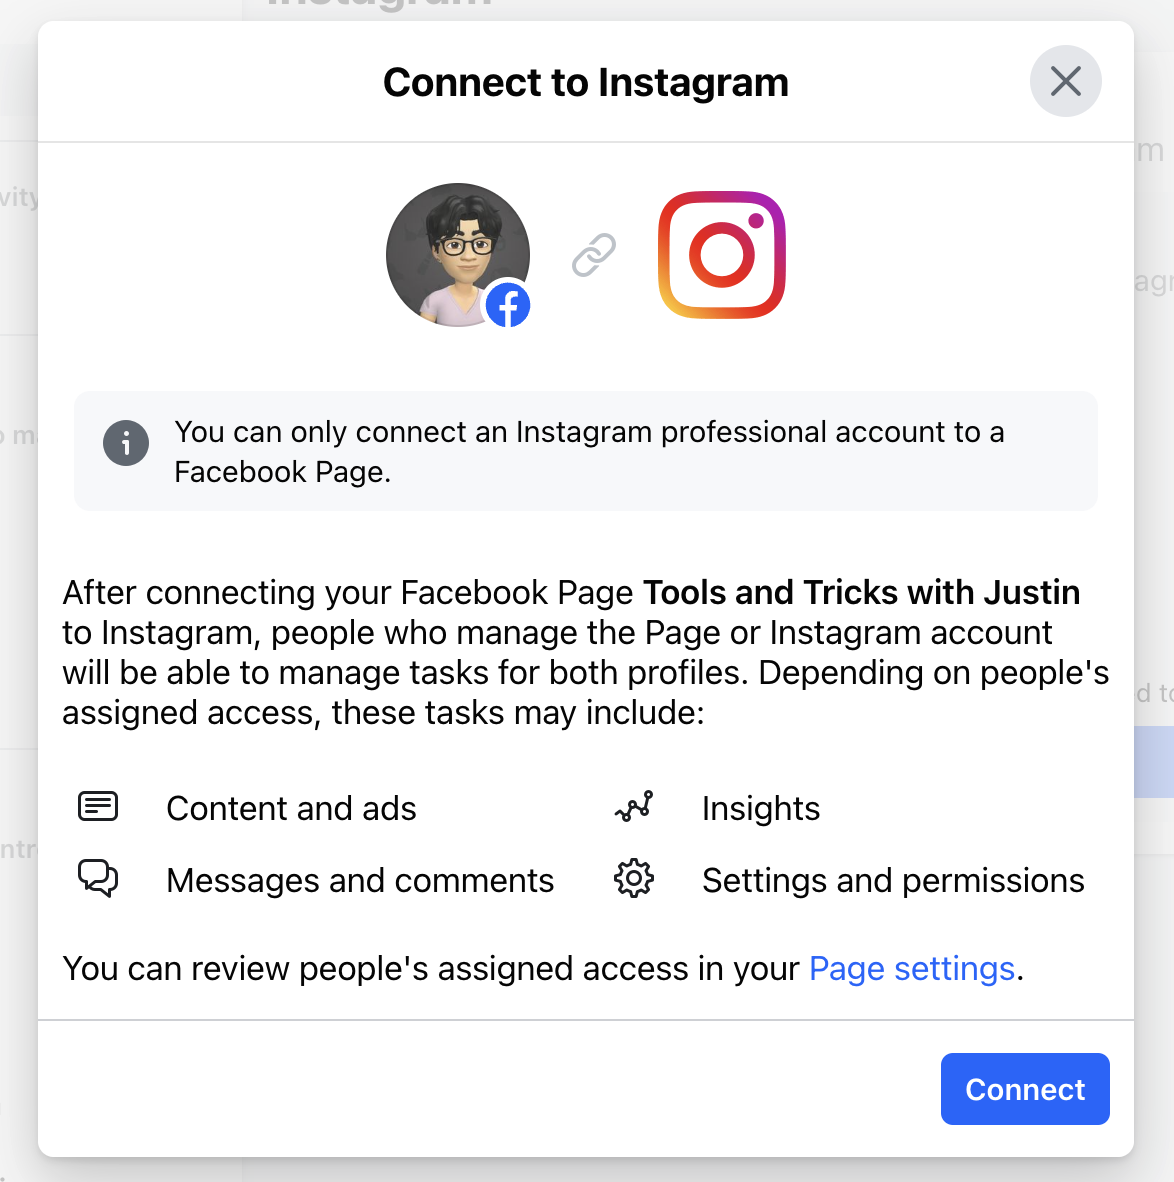
6. 选择 **查看** 在 Instagram 选项旁边 → **连接账号** → **连接**.
7. 选择 **确认**.
* 可选地,  **\[开启切换开关]** 以 **允许在收件箱中访问 Instagram 消息**.
8. 按提示登录您的 Instagram 账号。
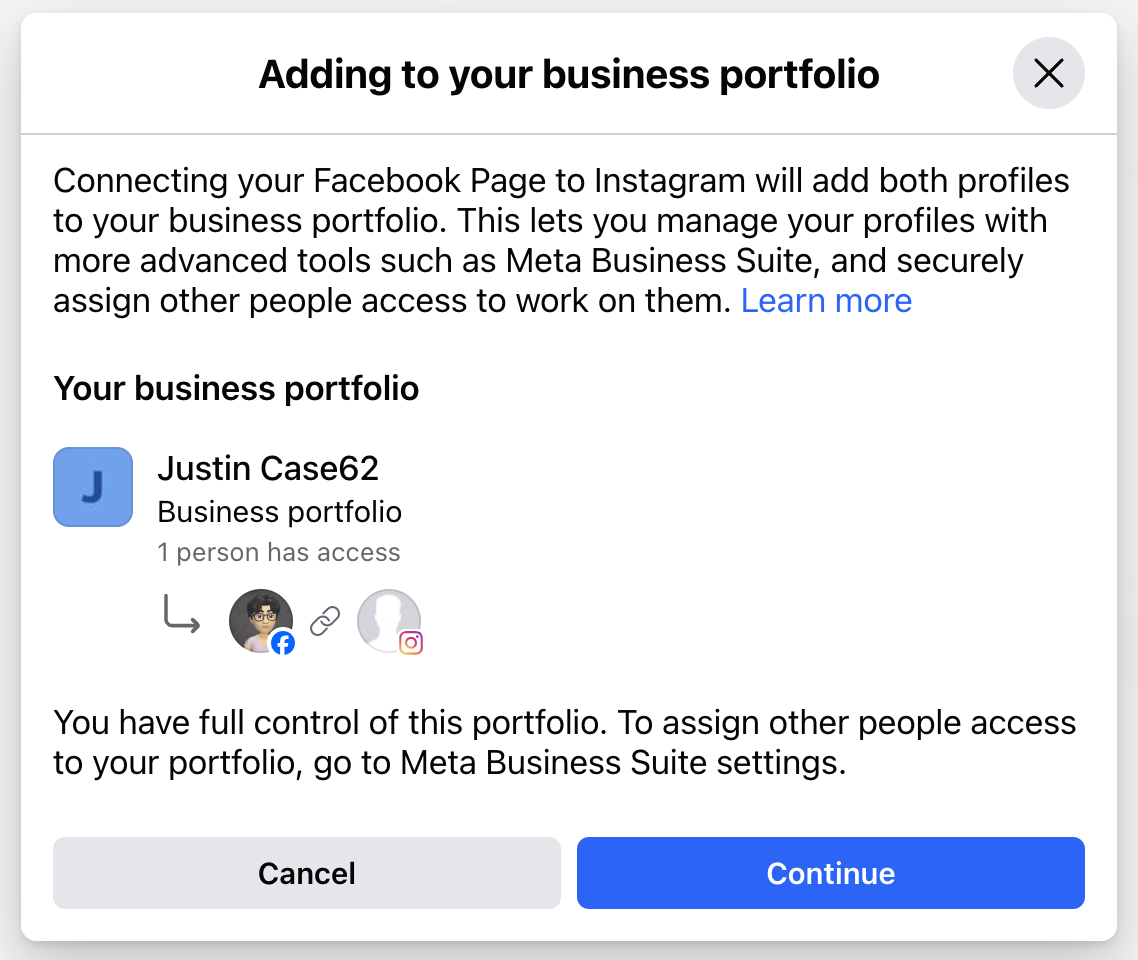
9. 在 *添加到您的业务组合* 步骤中,选择 **继续 → 完成**.
{% endstep %}
{% step %}
#### 将您的 Instagram 账号连接到 impact.com
1. 在顶部导航栏中,选择  **\[用户资料] → 设置**.
2. 在 *资料* 部分,选择 [**媒体资料**](http://app.impact.com/secure/mediapartner/fr/mediakit/promotional-channels.ihtml).
3. 在 *推广渠道* 屏幕,在下方 *添加新渠道*下,选择 **Instagram**.
4. 按照提示验证您的账号。
* 您需要登录您的 Instagram 账号才能完成该过程。
* 如果这是您添加的第一个 Instagram 推广渠道,系统会先提示您退出之前已连接的账号。
* 一旦您的 Instagram 账号连接到 impact.com,它将具有 **已连接** 状态。
{% endstep %}
{% endstepper %}
---
# Agent Instructions
This documentation is published with GitBook. GitBook is the documentation platform designed so that both humans and AI agents can read, navigate, and reason over technical content effectively. Learn more at gitbook.com.
## Querying This Documentation
If you need additional information that is not directly available in this page, you can query the documentation by asking a question.
Perform an HTTP GET request on the following URL with the `ask` and `goal` query parameters:
```
GET https://help.impact.com/partner/zh/ni-xiang-liao-jie-shen-me/account-management/account-settings/connect-media-properties/connect-your-instagram-account-to-impactcom.md?ask=&goal=
```
`ask` is the immediate question: it should be specific, self-contained, and written in natural language.
`goal` is what the user is ultimately trying to achieve, the reason they need the answer. Sharing it helps GitBook give you a better, more relevant answer. A goal is most helpful when it describes the outcome the user wants rather than restating the question. For example, with `ask=how do I create an API token`, a goal like `automate deployments from our CI pipeline` lets GitBook tailor the answer to that use case.
The response will contain a direct answer to the question and relevant excerpts and sources from the documentation.
Use this mechanism when the answer is not explicitly present in the current page, you need clarification or additional context, or you want to retrieve related documentation sections.