> For the complete documentation index, see [llms.txt](https://help.impact.com/llms.txt). Markdown versions of documentation pages are available by appending `.md` to page URLs; this page is available as [Markdown](https://help.impact.com/brand/zh/what-would-you-like-to-learn-about/platform-features/cross-channel-performance-insights/configure-affiliate-networks-for-deduplication.md).
# 配置联盟网络以进行去重
如果你除了 impact.com 之外还通过其他网络推广品牌,就可能会出现一个转化由多个解决方案同时归因的情况。这可能会导致重复付款。
借助 impact.com 的 Optimize 报告解决方案,你可以在 impact.com 平台内跟踪这些额外网络,并配置设置来控制付款行为,以避免重复付款。
在 impact.com 中,这些网络被配置为媒体来源。
{% stepper %}
{% step %}
**步骤 1:选择要配置的网络**
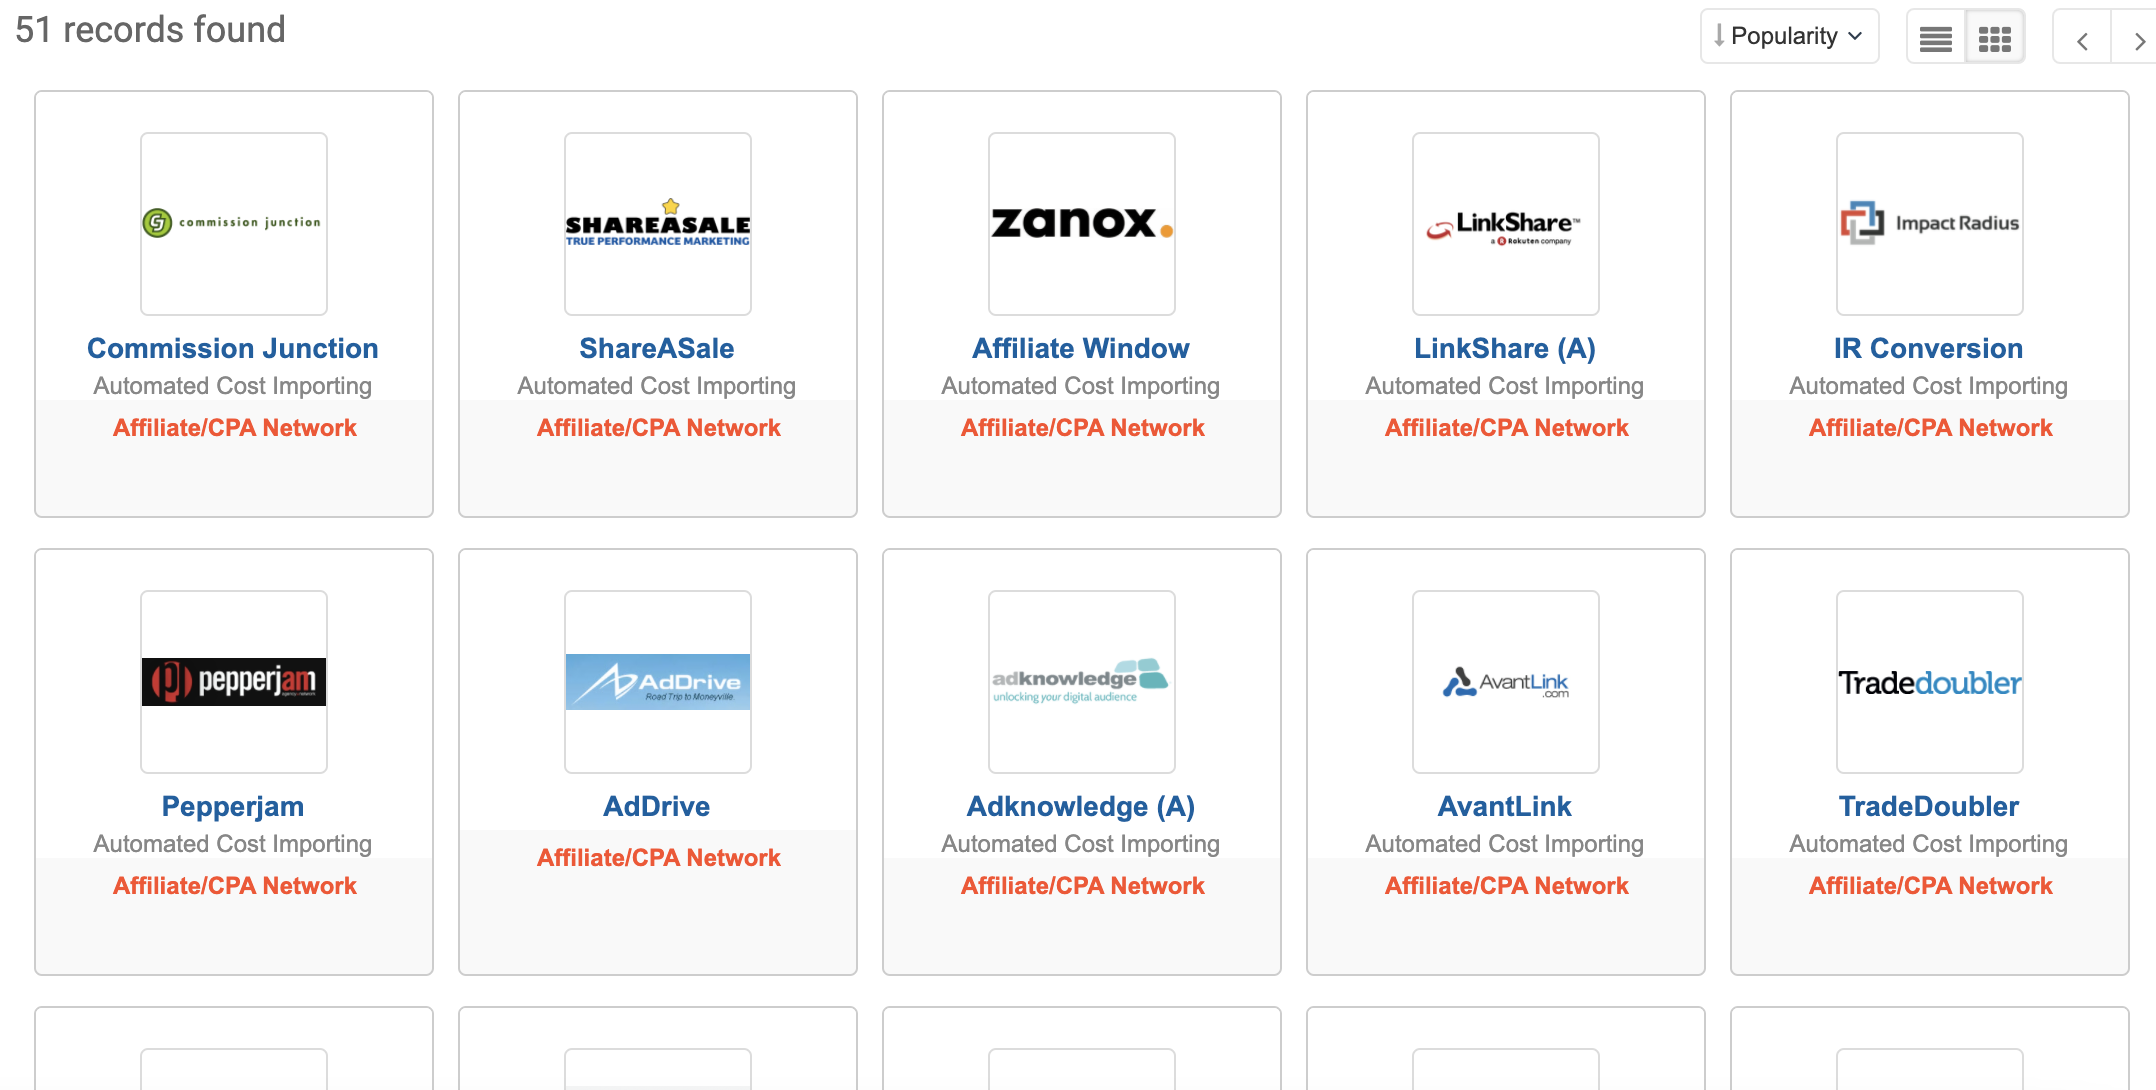
impact.com 拥有一个庞大的网络列表,帮助你充分利用 Optimize。设置网络跟踪的第一步,是从我们的列表中找到你的网络。
1. 在左侧导航栏中,选择  **\[Optimize]** **→ 设置 → 网络**.
2. 在右上角,选择 **创建媒体来源**.
3. 在屏幕顶部,使用搜索栏搜索你正在使用的网络。
* 设置 *渠道类型* 筛选器为 **联盟/CPA 网络** 以更快找到你的网络。
4. 从可用的网络卡片中选择你的网络。
* 如果你没有看到列出的网络,请选择 **创建自定义媒体来源**,它位于你屏幕顶部附近。
{% hint style="info" %}
注意
**此时你只应设置网络**. *媒体来源*,例如 GoogleAds,可以在 Optimize 中跟踪,但必须由 impact.com 设置。如果你想添加媒体来源(例如 Google SEO、Criteo 等),请联系你的 CSM(或 [创建支持工单](https://app.impact.com/support/portal.ihtml?createTicket=true)).
{% endhint %}
{% endstep %}
{% step %}
**步骤 2:输入基本信息**
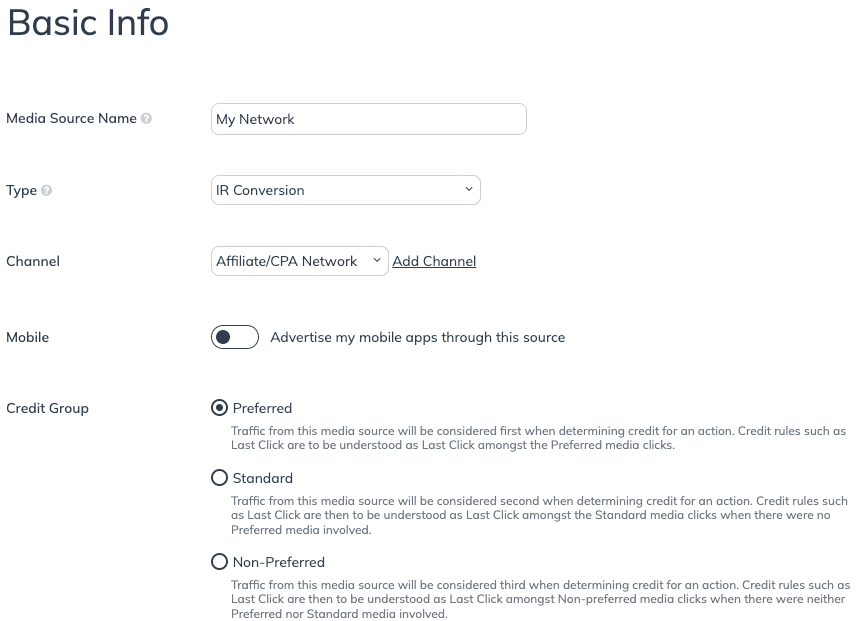
在你找到正在使用的网络(或开始创建自定义网络)后,你必须提供该网络的一些基本信息。如果你选择了某个网络卡片,其中一些字段会为你自动填充。
1. 在……旁边 *媒体来源名称*,更新或填写该网络的名称。
* 如果你选择了某个网络卡片,这里会已提供该名称,不过你可以将其更新为适合你的报告偏好的名称。
2. **请勿更改该网络的类型**.
3. 在……旁边 *渠道*,选择 **联盟/CPA 网络** ,从下拉菜单中选择。
4. 在……旁边 *移动端*,  **\[关闭]** **通过此来源推广我的移动应用**.
5. 在……旁边 *归因组*,选择该网络属于哪个 [归因组](/brand/zh/what-would-you-like-to-learn-about/platform-features/actions-and-payouts/credit-groups-explained.md) 。
6. 选择 **下一步**.
{% endstep %}
{% step %}
**步骤 3:设置跟踪设置**
如果你在 *步骤 1*中选择了某个网络卡片,你将看到一些针对所选网络的通用信息。
在任何情况下,你都可以从以下 3 个跟踪选项中进行选择:
| | |
| -------- | ------------------------------------------------------------------------------------------------------------------------------------------------------------ |
| **跟踪选项** | **说明** |
| 网关跟踪 | 使用我们的 [网关链接](/brand/zh/what-would-you-like-to-learn-about/account-administration/program-settings/tracking-settings/configure-gateway-tracking-settings.md). |
| 直接跟踪 | 使用我们的 [通用跟踪标签](/brand/zh/what-would-you-like-to-learn-about/platform-features/tracking/javascript-tag-tracking/tracking-with-universal-tracking-tag-utt.md). |
| 促销代码跟踪 | 跟踪来自此来源的转化,使用已分配的 [促销码](/brand/zh/what-would-you-like-to-learn-about/platform-features/promo-codes/promo-codes-overview.md). |
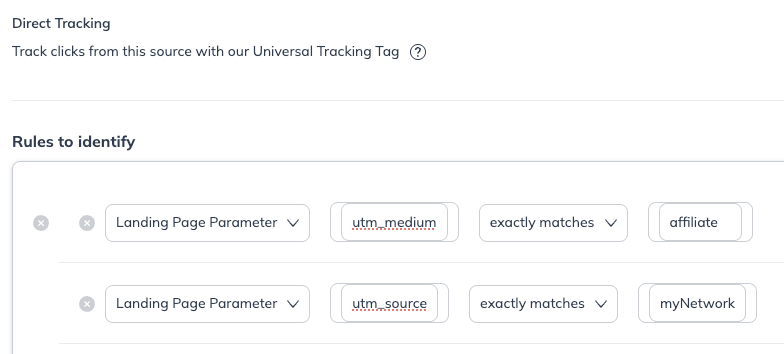
用于跟踪网络的最常见跟踪选项是 [直接跟踪](/brand/zh/what-would-you-like-to-learn-about/platform-features/tracking/set-up-tracking/set-up-direct-traffic-tracking.md)。如果你想配置 [用于识别的规则](/brand/zh/what-would-you-like-to-learn-about/platform-features/cross-channel-performance-insights/set-up-rules-to-identify-channel-traffic.md) 来识别与此来源相关的流量。例如,如果你的落地页 URL 如下:
`https://www.landingpage.com?utm_medium=affiliate&utm_source=myNetwork`
你可以按如下方式配置“用于识别的规则”:
| | | | |
| -------- | ------------ | -------- | ----------- |
| **规则目标** | **规则值 1** | **规则逻辑** | **规则值 2** |
| 落地页参数 | `utm_medium` | 完全匹配 | `affiliate` |
| **和** | | | |
| 落地页参数 | `utm_source` | 完全匹配 | `myNetwork` |
要配置直接跟踪,请打开切换开关以显示规则构建器。然后配置相应的规则选项。你可以在以下内容中阅读更多关于配置“用于识别的规则”的信息: [渠道设置策略](/brand/zh/what-would-you-like-to-learn-about/platform-features/cross-channel-performance-insights/optimize-channels/channel-setup-strategy.md) 和 [渠道设置场景](/brand/zh/what-would-you-like-to-learn-about/platform-features/cross-channel-performance-insights/optimize-channels/optimize-channel-setup-scenario-examples.md) 文章。虽然这些文章讲述的是如何设置 Optimize 渠道,但它们同样适用于为你的网络设置用于直接跟踪的识别规则。
{% endstep %}
{% step %}
**步骤 4:事件通知**
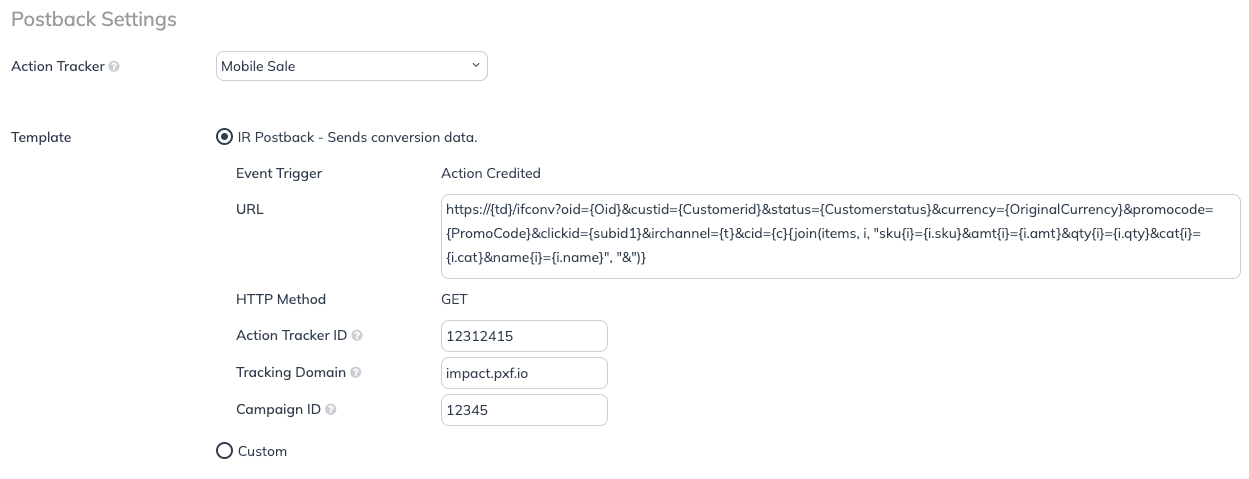
决定你是否要使用 [piggyback 像素](/partner/zh/ni-xiang-liao-jie-shen-me/platform-features/tracking/piggyback-pixels/partner-piggyback-pixels-overview.md),它依赖于植入在特定页面(如订单确认页面)上的跟踪像素在触发前先加载,或者使用 [postback](/partner/zh/ni-xiang-liao-jie-shen-me/platform-features/action-management/event-notifications-and-postbacks/action-life-cycle-event-notification-faqs.md),它会调用一个 postback URL 来检索有关该操作的信息。
impact.com **强烈** 建议使用 postback,因为 piggyback 像素更容易产生虚假报告,且往往提供不够准确的数据。另外,如果你的项目不使用像素跟踪, **不能** 则不能使用 piggyback 像素,因为没有可供 piggyback 的跟踪像素。
{% endstep %}
{% step %}
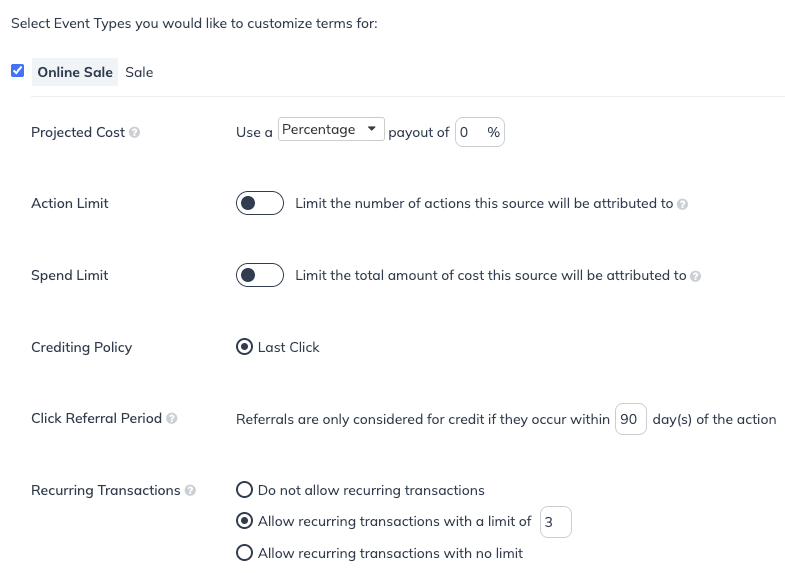
**步骤 5:归因**
最后,选择你想要为其设置自定义归因条款的事件类型。请记住,你正在设置的网络可以像你 impact.com 项目中管理的合作伙伴一样,对推动某个动作获得归因。不过,该网络不会因为推动这些动作而从你的 impact.compact 项目中获得付款。
当你的网络因推动某个动作而获得归因时,你 impact.com 项目中管理的合作伙伴将不会因同一动作获得归因。这样,你就可以防止同一动作产生重复付款。
归因选项让你能够控制归因如何分配给你的网络。可以把你正在配置的网络看作另一位促成客户旅程的合作伙伴。正如你可以为 impact.com 合作伙伴设置动作限额一样,你也可以为该网络设置动作限额。
{% hint style="info" %}
提醒
别忘了点击 **保存** ,在完成网络设置后。
{% endhint %}
{% endstep %}
{% endstepper %}
#### 我完成了!接下来呢?
恭喜!你已经成功设置了你的网络。你可以通过选择 **创建媒体来源** ,继续创建你还需要设置的其他网络,位置在 *媒体来源* 屏幕右上角,或者返回并编辑你已创建的任何网络。
---
# Agent Instructions
This documentation is published with GitBook. GitBook is the documentation platform designed so that both humans and AI agents can read, navigate, and reason over technical content effectively. Learn more at gitbook.com.
## Querying This Documentation
If you need additional information that is not directly available in this page, you can query the documentation by asking a question.
Perform an HTTP GET request on the following URL with the `ask` and `goal` query parameters:
```
GET https://help.impact.com/brand/zh/what-would-you-like-to-learn-about/platform-features/cross-channel-performance-insights/configure-affiliate-networks-for-deduplication.md?ask=&goal=
```
`ask` is the immediate question: it should be specific, self-contained, and written in natural language.
`goal` is what the user is ultimately trying to achieve, the reason they need the answer. Sharing it helps GitBook give you a better, more relevant answer. A goal is most helpful when it describes the outcome the user wants rather than restating the question. For example, with `ask=how do I create an API token`, a goal like `automate deployments from our CI pipeline` lets GitBook tailor the answer to that use case.
The response will contain a direct answer to the question and relevant excerpts and sources from the documentation.
Use this mechanism when the answer is not explicitly present in the current page, you need clarification or additional context, or you want to retrieve related documentation sections.