> For the complete documentation index, see [llms.txt](https://help.impact.com/llms.txt). Markdown versions of documentation pages are available by appending `.md` to page URLs; this page is available as [Markdown](https://help.impact.com/brand/zh/what-would-you-like-to-learn-about/advocate-program/manage-advocate-participant-experiences/microsite-experiences/customize-microsite-layouts-and-pages.md).
# 自定义微站布局和页面
微型网站是您推荐计划中的关键参与者触点之一。本文帮助文章将说明如何使用 *微型网站编辑器* 将您现有的微型网站自定义为一个体现品牌形象并为终端用户提供引人入胜体验的空间。
如果您还没有 [设置微型网站](/brand/zh/what-would-you-like-to-learn-about/advocate-program/manage-advocate-participant-experiences/microsite-experiences/set-up-a-microsite.md) ,那么您需要先完成这一步。
1. 从左侧导航菜单中,选择  **\[Engage] → 内容**.
2. 在 *微型网站* 卡片上,选择 **编辑内容**.
* 此操作会打开微型网站编辑器,并显示 *微型网站* 侧边抽屉。
3. 使用微型网站编辑器来更新您的品牌设置,或添加新内容,例如布局和页面。
{% hint style="warning" %}
**警告:** 微型网站编辑器不会自动保存您的更改。请频繁保存,以确保不会丢失您的工作。
{% endhint %}
{% stepper %}
{% step %}
## **步骤 1:更改您的微型网站品牌设置(可选)**
{% tabs %}
{% tab title="颜色和字体" %}
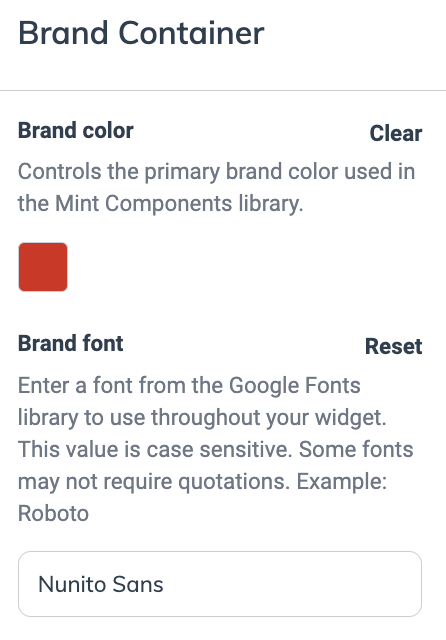
您的基础布局包含一个品牌容器组件,用于控制微型网站的字体和品牌颜色。品牌颜色会应用于微型网站的各个部分,包括高亮颜色和按钮颜色。
1. 在 *微型网站* 侧边抽屉中,选择 **基础布局**.
2. 在左侧,位于 *当前布局*下方,选择 **图层**.
3. 选择 **品牌容器**.
4. 在右侧,位于 *品牌容器* 菜单中,编辑 **品牌颜色** 和 **品牌字体**.
5. 选择 **保存** 在右上角。
{% endtab %}
{% tab title="网站页眉" %}
您可以添加一个可点击的页眉图片,将参与者重定向到您指定的页面。请在基础布局中进行设置。
1. 在 *微型网站* 侧边抽屉中,选择 **基础布局**.
2. 在左侧,位于 *当前布局* 或 *当前页面*下方,选择 **图层**.
3. 在右侧,位于 *微型网站框架页眉内容* 菜单中,提供图片并按需调整其高度和宽度。
4. 设置重定向路径。这是在参与者点击图片后将被重定向到的位置。
5. 选择 **保存**.
{% endtab %}
{% endtabs %}
{% endstep %}
{% step %}
## **步骤 2:创建布局或页面**
{% tabs %}
{% tab title="添加页面" %}
1. 在 *微型网站* 侧边抽屉中,选择 **微型网站**.
* 此操作会打开微型网站的结构视图,其中显示所有布局和页面。
2. 选择 **添加页面** 按钮。
3. 可选地,使用 **继承布局** 下拉列表来选择您希望作为父布局的布局。
{% hint style="info" %}
**示例:** 如果您想在站点中添加一个登陆页,并且希望任何人都能看到,而不管他们是否为已登录参与者,您可以在基础布局下嵌套一个新页面。
{% endhint %}
4. 输入 **页面标题** 或布局名称。
5. 可选地,调整您页面的 **页面键** 。页面键会根据页面标题自动生成,但如果需要,您可以更改它。
6. 输入 **URL** 用于您的页面。
* 在要使用的名称前添加一个前斜杠,并在多词 URL 中使用连字符,例如 `/company-info`.
7. 在 **允许的用户** 下拉列表中,选择可以访问该页面的用户组。
* **公开:** 任何人都可查看。
* **已验证:** 仅限已登录参与者。
* **未验证:** 已登录但尚未验证电子邮件地址的参与者。
8. 在 **不允许用户的重定向** 下拉列表中,选择您希望将不允许的参与者发送到的页面。
9. 选择 **添加**.
10. 在页面右上角,选择 **保存**.
{% endtab %}
{% tab title="添加布局" %}
1. 在 *微型网站* 侧边抽屉中,选择 **微型网站**.
* 此操作会打开微型网站的结构视图,其中显示所有布局和页面。
2. 选择 **添加布局**.
3. 可选地,使用 **继承布局** 下拉列表来选择您希望作为父布局的布局。这主要有助于站点组织。
4. 输入 **布局名称** 用于您的布局。
5. 可选地,调整您页面的 **布局键** 用于您的布局。布局键会根据页面标题自动生成,但如果需要,您可以更改它。
6. 选择 **添加**.
7. 在页面右上角,选择 **保存**.
{% endtab %}
{% endtabs %}
{% endstep %}
{% step %}
## **步骤 3:应用模板**
如果您不想从头开始,可以将模板应用到新的布局或页面。
1. 在 *微型网站* 侧边抽屉中,使用结构视图选择您想要使用模板的布局或页面。
2. 在左侧,位于 *当前布局* 或 *当前页面*下方,选择 **模板**.
3. 浏览可用模板,然后选择 **应用模板** 在您想使用的模板卡片上。
4. 在页面右上角,选择 **保存**.
{% endstep %}
{% step %}
## **步骤 4:编辑微型网站的侧边栏**
如果您希望已登录参与者能够从微型网站的侧边栏导航菜单进入某个页面,建议这样做。以下步骤将向您展示如何操作,但如果您想向其他布局添加侧边栏项,也可以进行调整。
1. 在 *微型网站* 侧边抽屉中,选择 **已登录布局** 从结构视图中。
* 选择  **\[退出图标]** 关闭侧边抽屉并访问编辑画布。
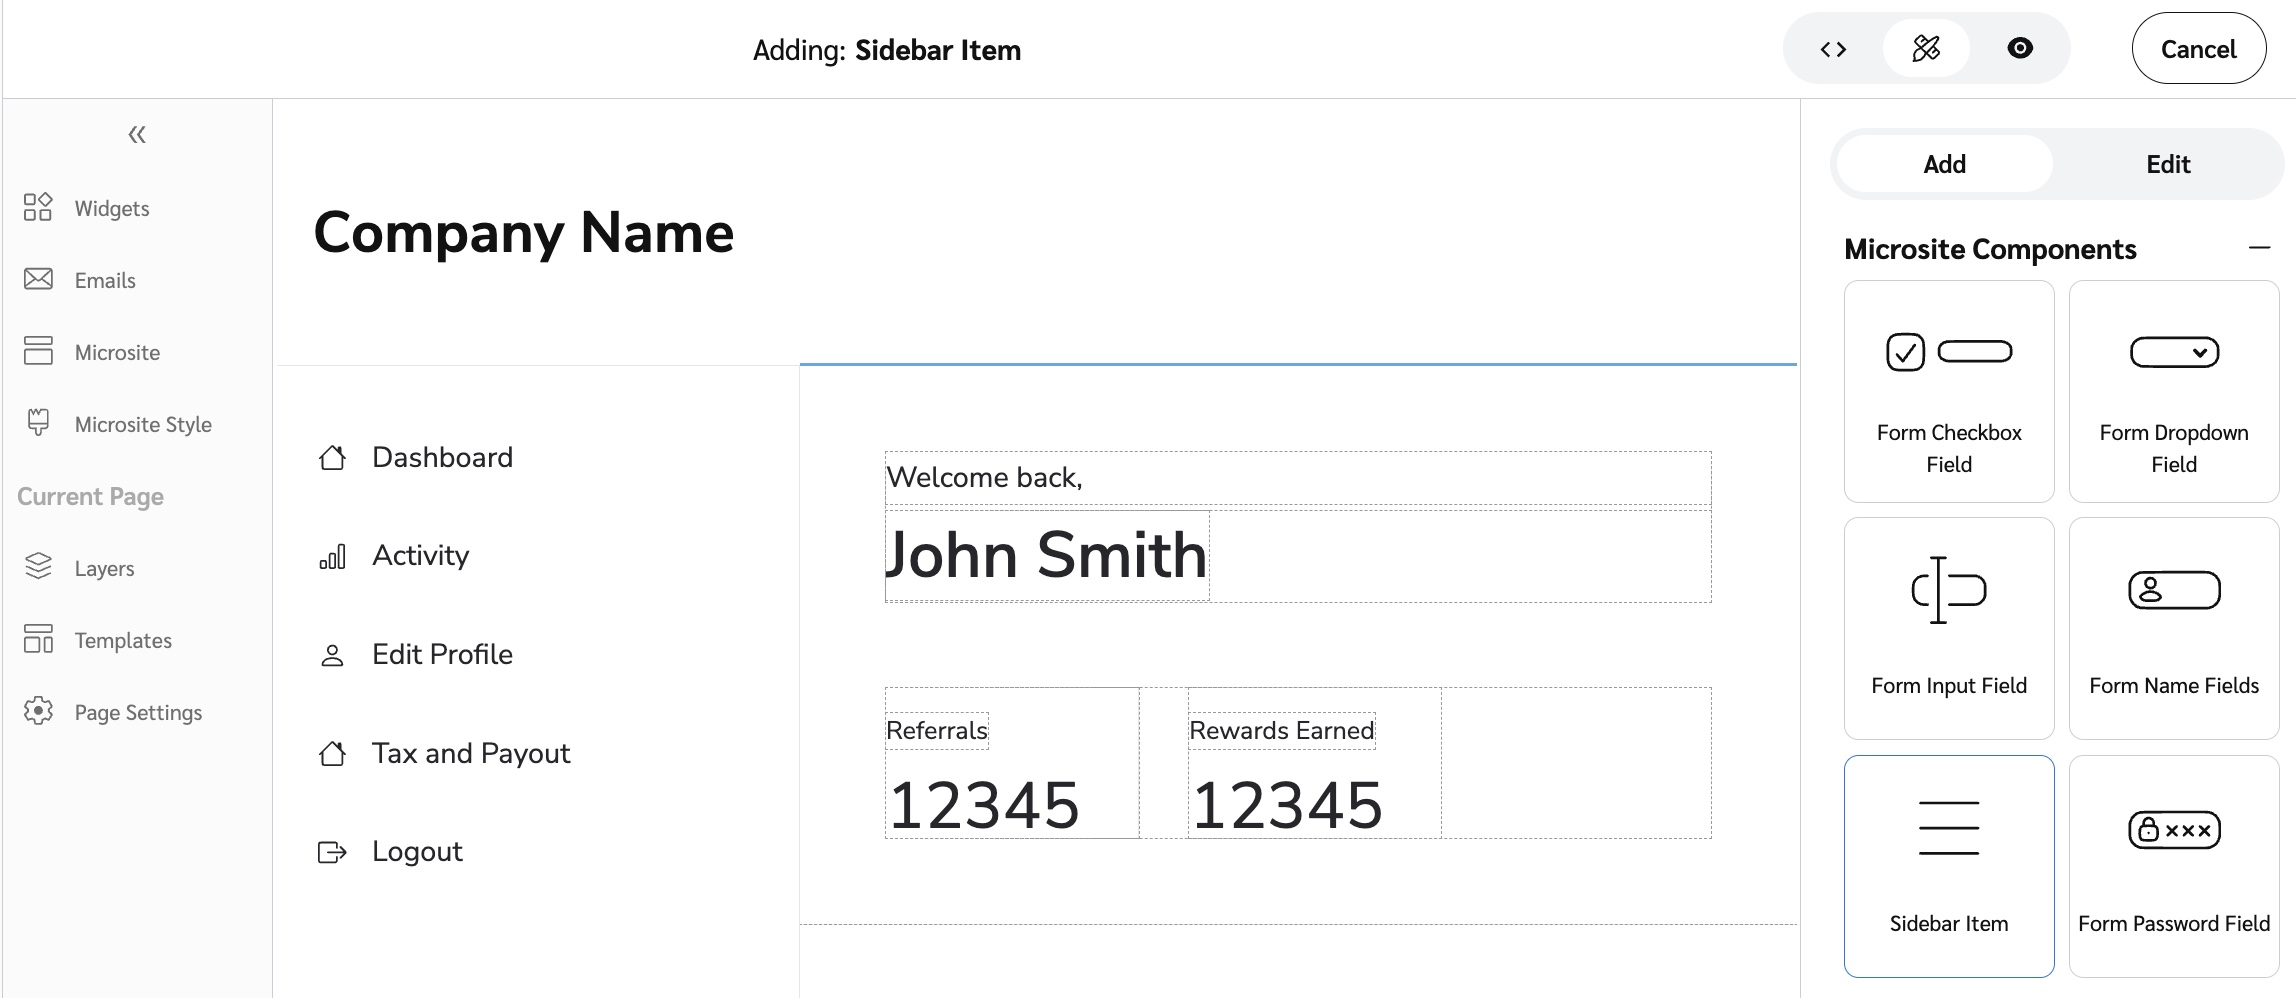
2. 在右侧,位于 *添加* 菜单中,展开 *微型网站组件* 类别,然后选择 **侧边栏项目**.
3. 在编辑画布中,将 *侧边栏项目* 组件拖到有效位置。可用位置由 **添加到侧边栏内容** 消息标识。
* 在较小屏幕上,选择  **\[汉堡菜单]** 以访问 **添加到侧边栏内容** 按钮。
4. 在右侧,位于 *编辑* 菜单,选择一个 **图标** 和 **标签** 来代表该页面。
5. 在 **导航路径** 下拉列表中,选择应将用户引导到的页面 URL 路径。
6. 在页面右上角,选择 **保存**.
{% endstep %}
{% step %}
## **步骤 5:预览并保存**
{% tabs %}
{% tab title="预览您的微型网站" %}
您可以预览微型网站在参与者眼中的显示效果。
1. 在顶部菜单栏中,在以下视图之间切换  **\[桌面端]**,  **\[平板端]** 或  **\[移动端]** 以查看微型网站在各设备上的显示效果。
2. 要进入预览,请选择  **\[查看]** 位于顶部菜单栏中。
3. 要返回编辑界面,请选择  **\[编辑]** 位于顶部菜单栏中。
{% endtab %}
{% tab title="保存您的微型网站" %}
微型网站编辑器不会自动保存您的更改。请频繁保存,以确保不会丢失您的工作。
1. 完成所有相关更改后,选择 **保存** 位于右上角。
2. 保存后,更改将立即显示在您的微型网站在线版本中。
{% endtab %}
{% endtabs %}
{% endstep %}
{% endstepper %}
请阅读我们的文章 [组件和微型网站组件解析](/brand/zh/what-would-you-like-to-learn-about/advocate-program/manage-advocate-participant-experiences/widget-and-microsite-components-explained.md) 以了解更多关于微型网站和小组件的组件方面内容。
---
# Agent Instructions
This documentation is published with GitBook. GitBook is the documentation platform designed so that both humans and AI agents can read, navigate, and reason over technical content effectively. Learn more at gitbook.com.
## Querying This Documentation
If you need additional information that is not directly available in this page, you can query the documentation by asking a question.
Perform an HTTP GET request on the following URL with the `ask` and `goal` query parameters:
```
GET https://help.impact.com/brand/zh/what-would-you-like-to-learn-about/advocate-program/manage-advocate-participant-experiences/microsite-experiences/customize-microsite-layouts-and-pages.md?ask=&goal=
```
`ask` is the immediate question: it should be specific, self-contained, and written in natural language.
`goal` is what the user is ultimately trying to achieve, the reason they need the answer. Sharing it helps GitBook give you a better, more relevant answer. A goal is most helpful when it describes the outcome the user wants rather than restating the question. For example, with `ask=how do I create an API token`, a goal like `automate deployments from our CI pipeline` lets GitBook tailor the answer to that use case.
The response will contain a direct answer to the question and relevant excerpts and sources from the documentation.
Use this mechanism when the answer is not explicitly present in the current page, you need clarification or additional context, or you want to retrieve related documentation sections.